To connect either free Gmail or Google Workspace (previously known as GSuite) accounts, there are 3 steps to connecting with Mails.ai.
Enable IMAP
Enable 2-Step Verification to generate an App Password
Connect your Gmail / Google Workspace with Mails.ai
Go to 👉 Gmail IMAP Settings
In the "IMAP access" section, select Enable IMAP.
Click Save Changes.
Go to 👉 Google Account Security Settings
Click "2-Step Verification" > "Get started".
Enter a mobile number to receive a verification code via text message.
Enter the verification code you received.
Click "Turn on" to enable 2-Step Verification.
Go to 👉 Google Account App Passwords settings
For "App name" type any name for it.
Click "Create" and note the 16-character App Password.
💁🏻♀️ Copy the App Password and keep it safe. After leaving this page, you won't be able to see it again. Now you can use this generated 16-character App Password to connect your account with Mails.ai.
Troubleshooting Tips:
If you forget your App Password, you can revoke it and generate a new one by following the same steps as above.
If you're having trouble signing in to an app or device with your App Password, double-check that you've entered it correctly.
app.mails.ai >> Settings >> Mailbox Settings >> Gmail
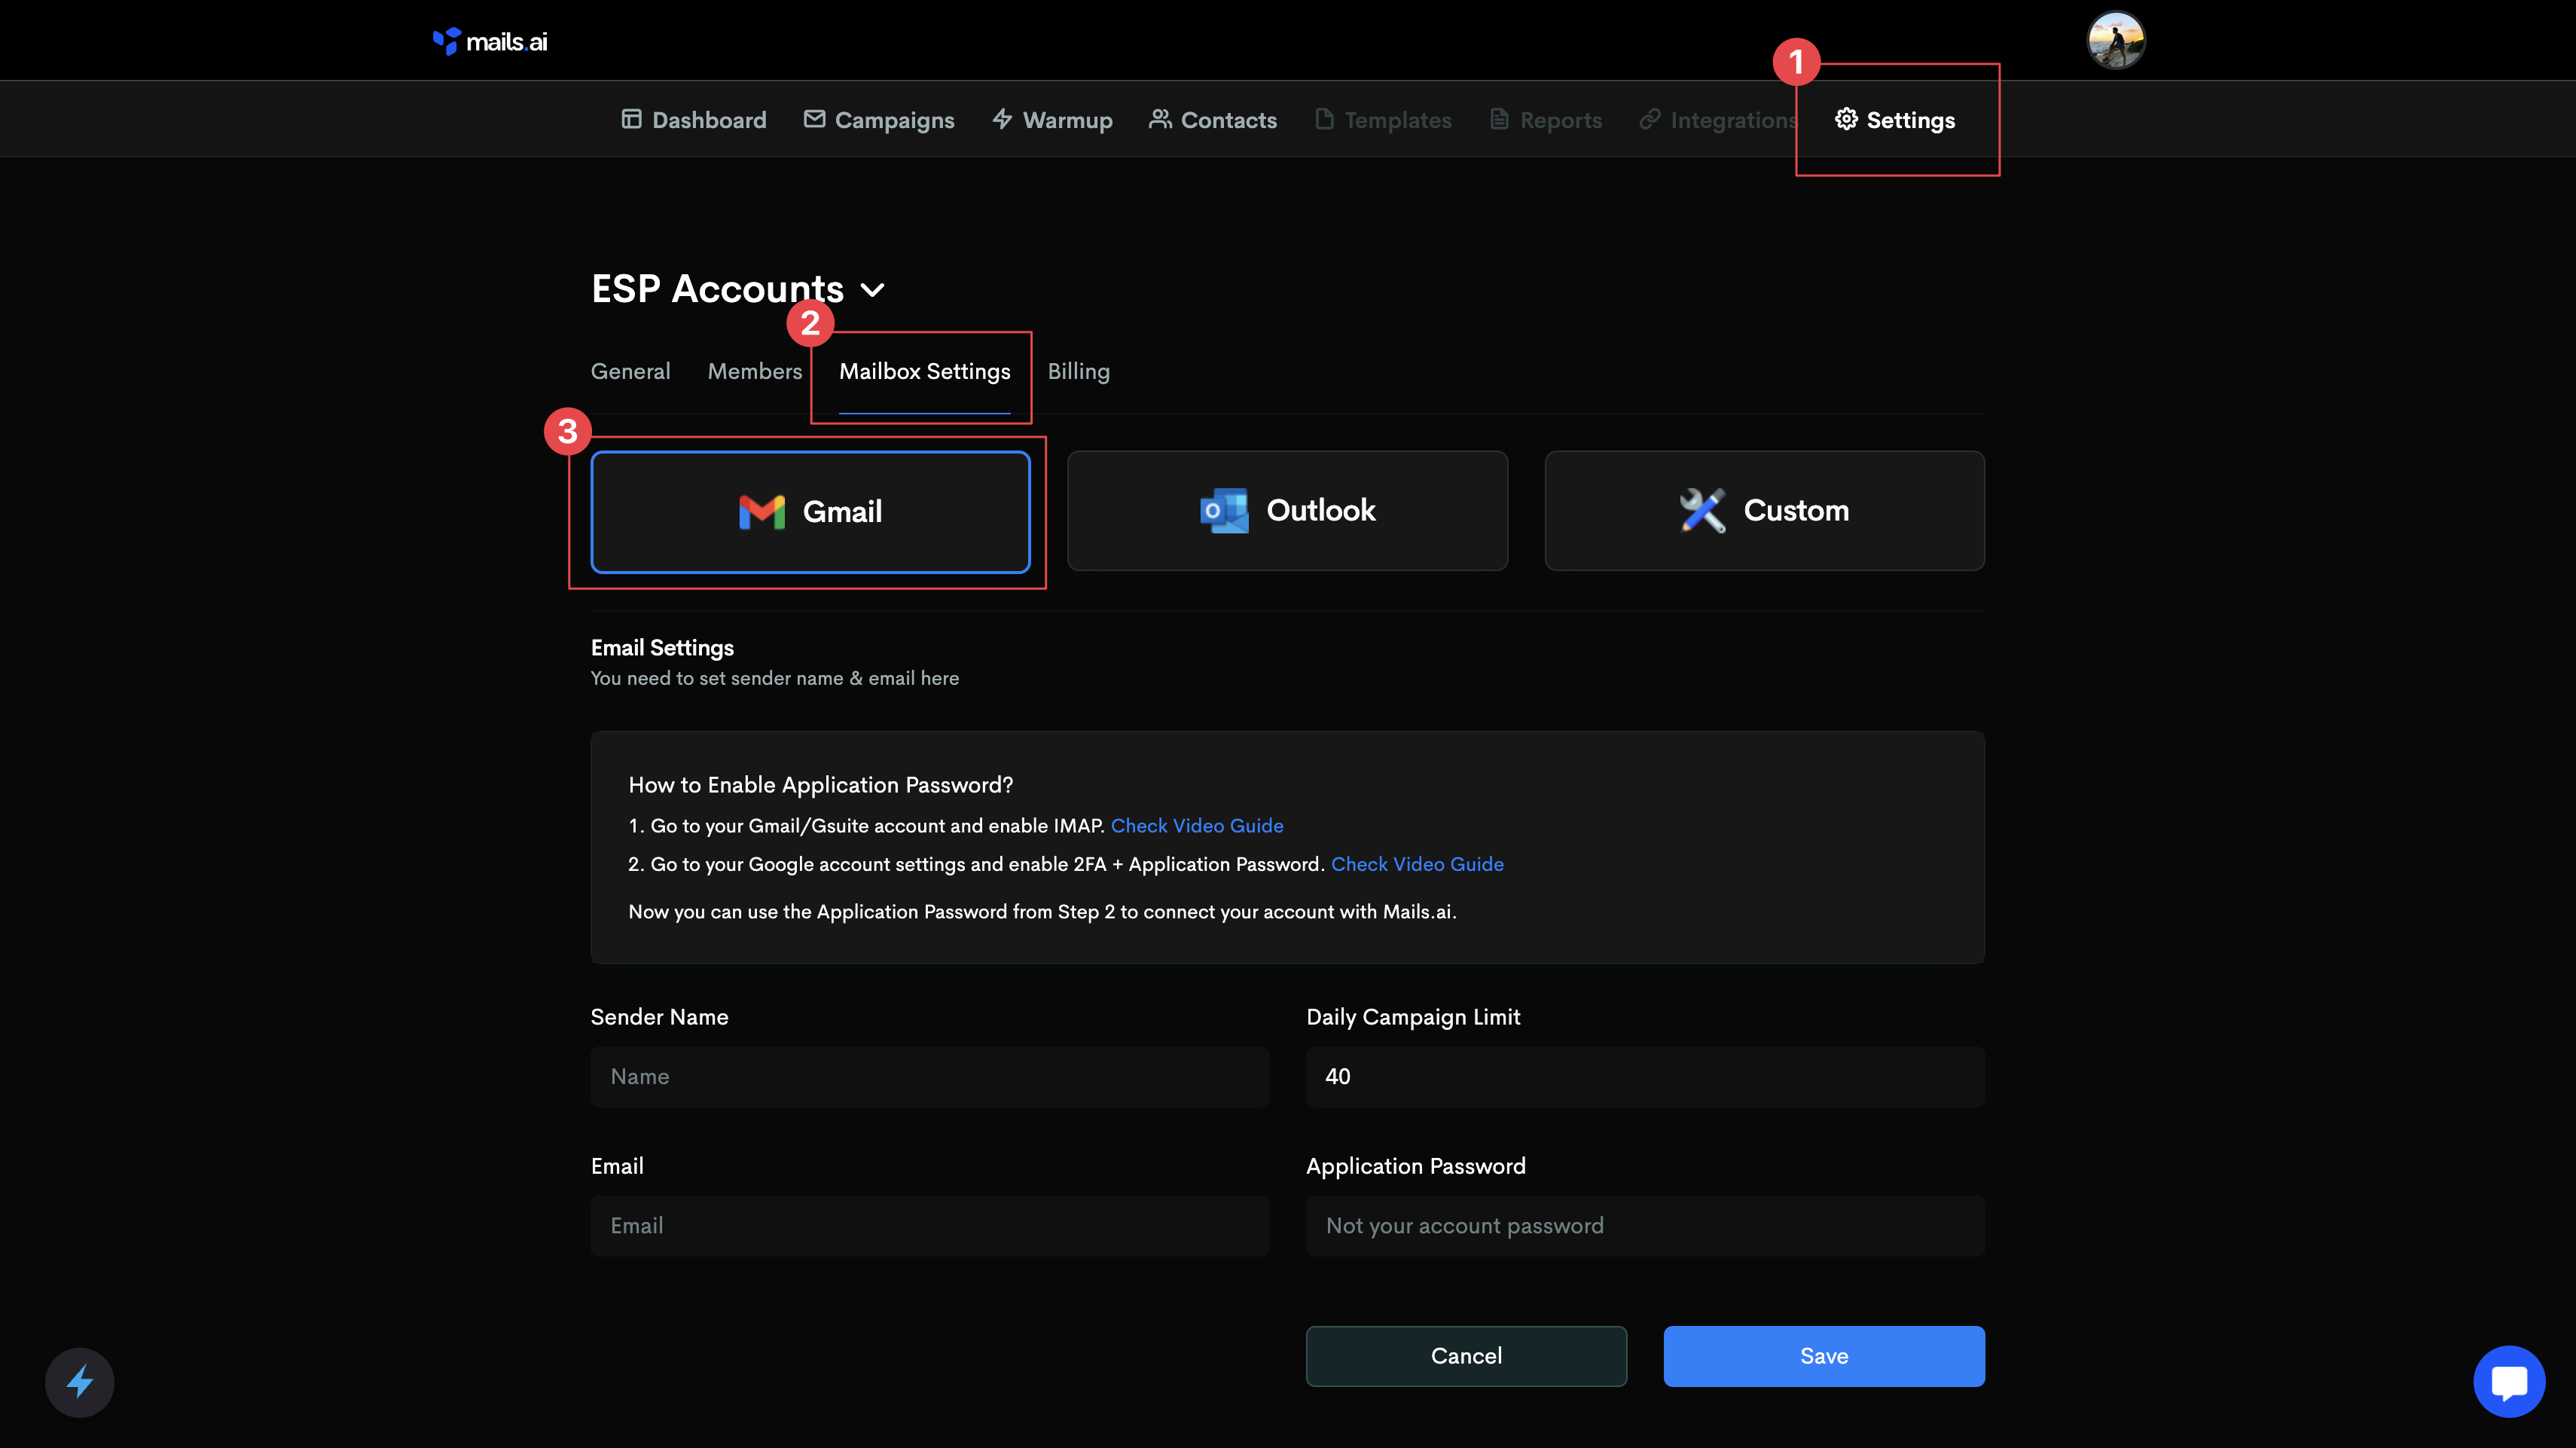
Sender Name: Input the First and Last Name for the mailbox user you're connecting.
Daily Send Limit: Set the Daily Send limit for this mailbox you're connecting. We recommend anywhere between 20-40 daily send limits per day.
Email: Input the email address that you're connecting to Mails.ai
Application Password: Input the App Password for that mailbox.
Then click 'Save' and that's it! your mailbox has been connected to Mails AI.

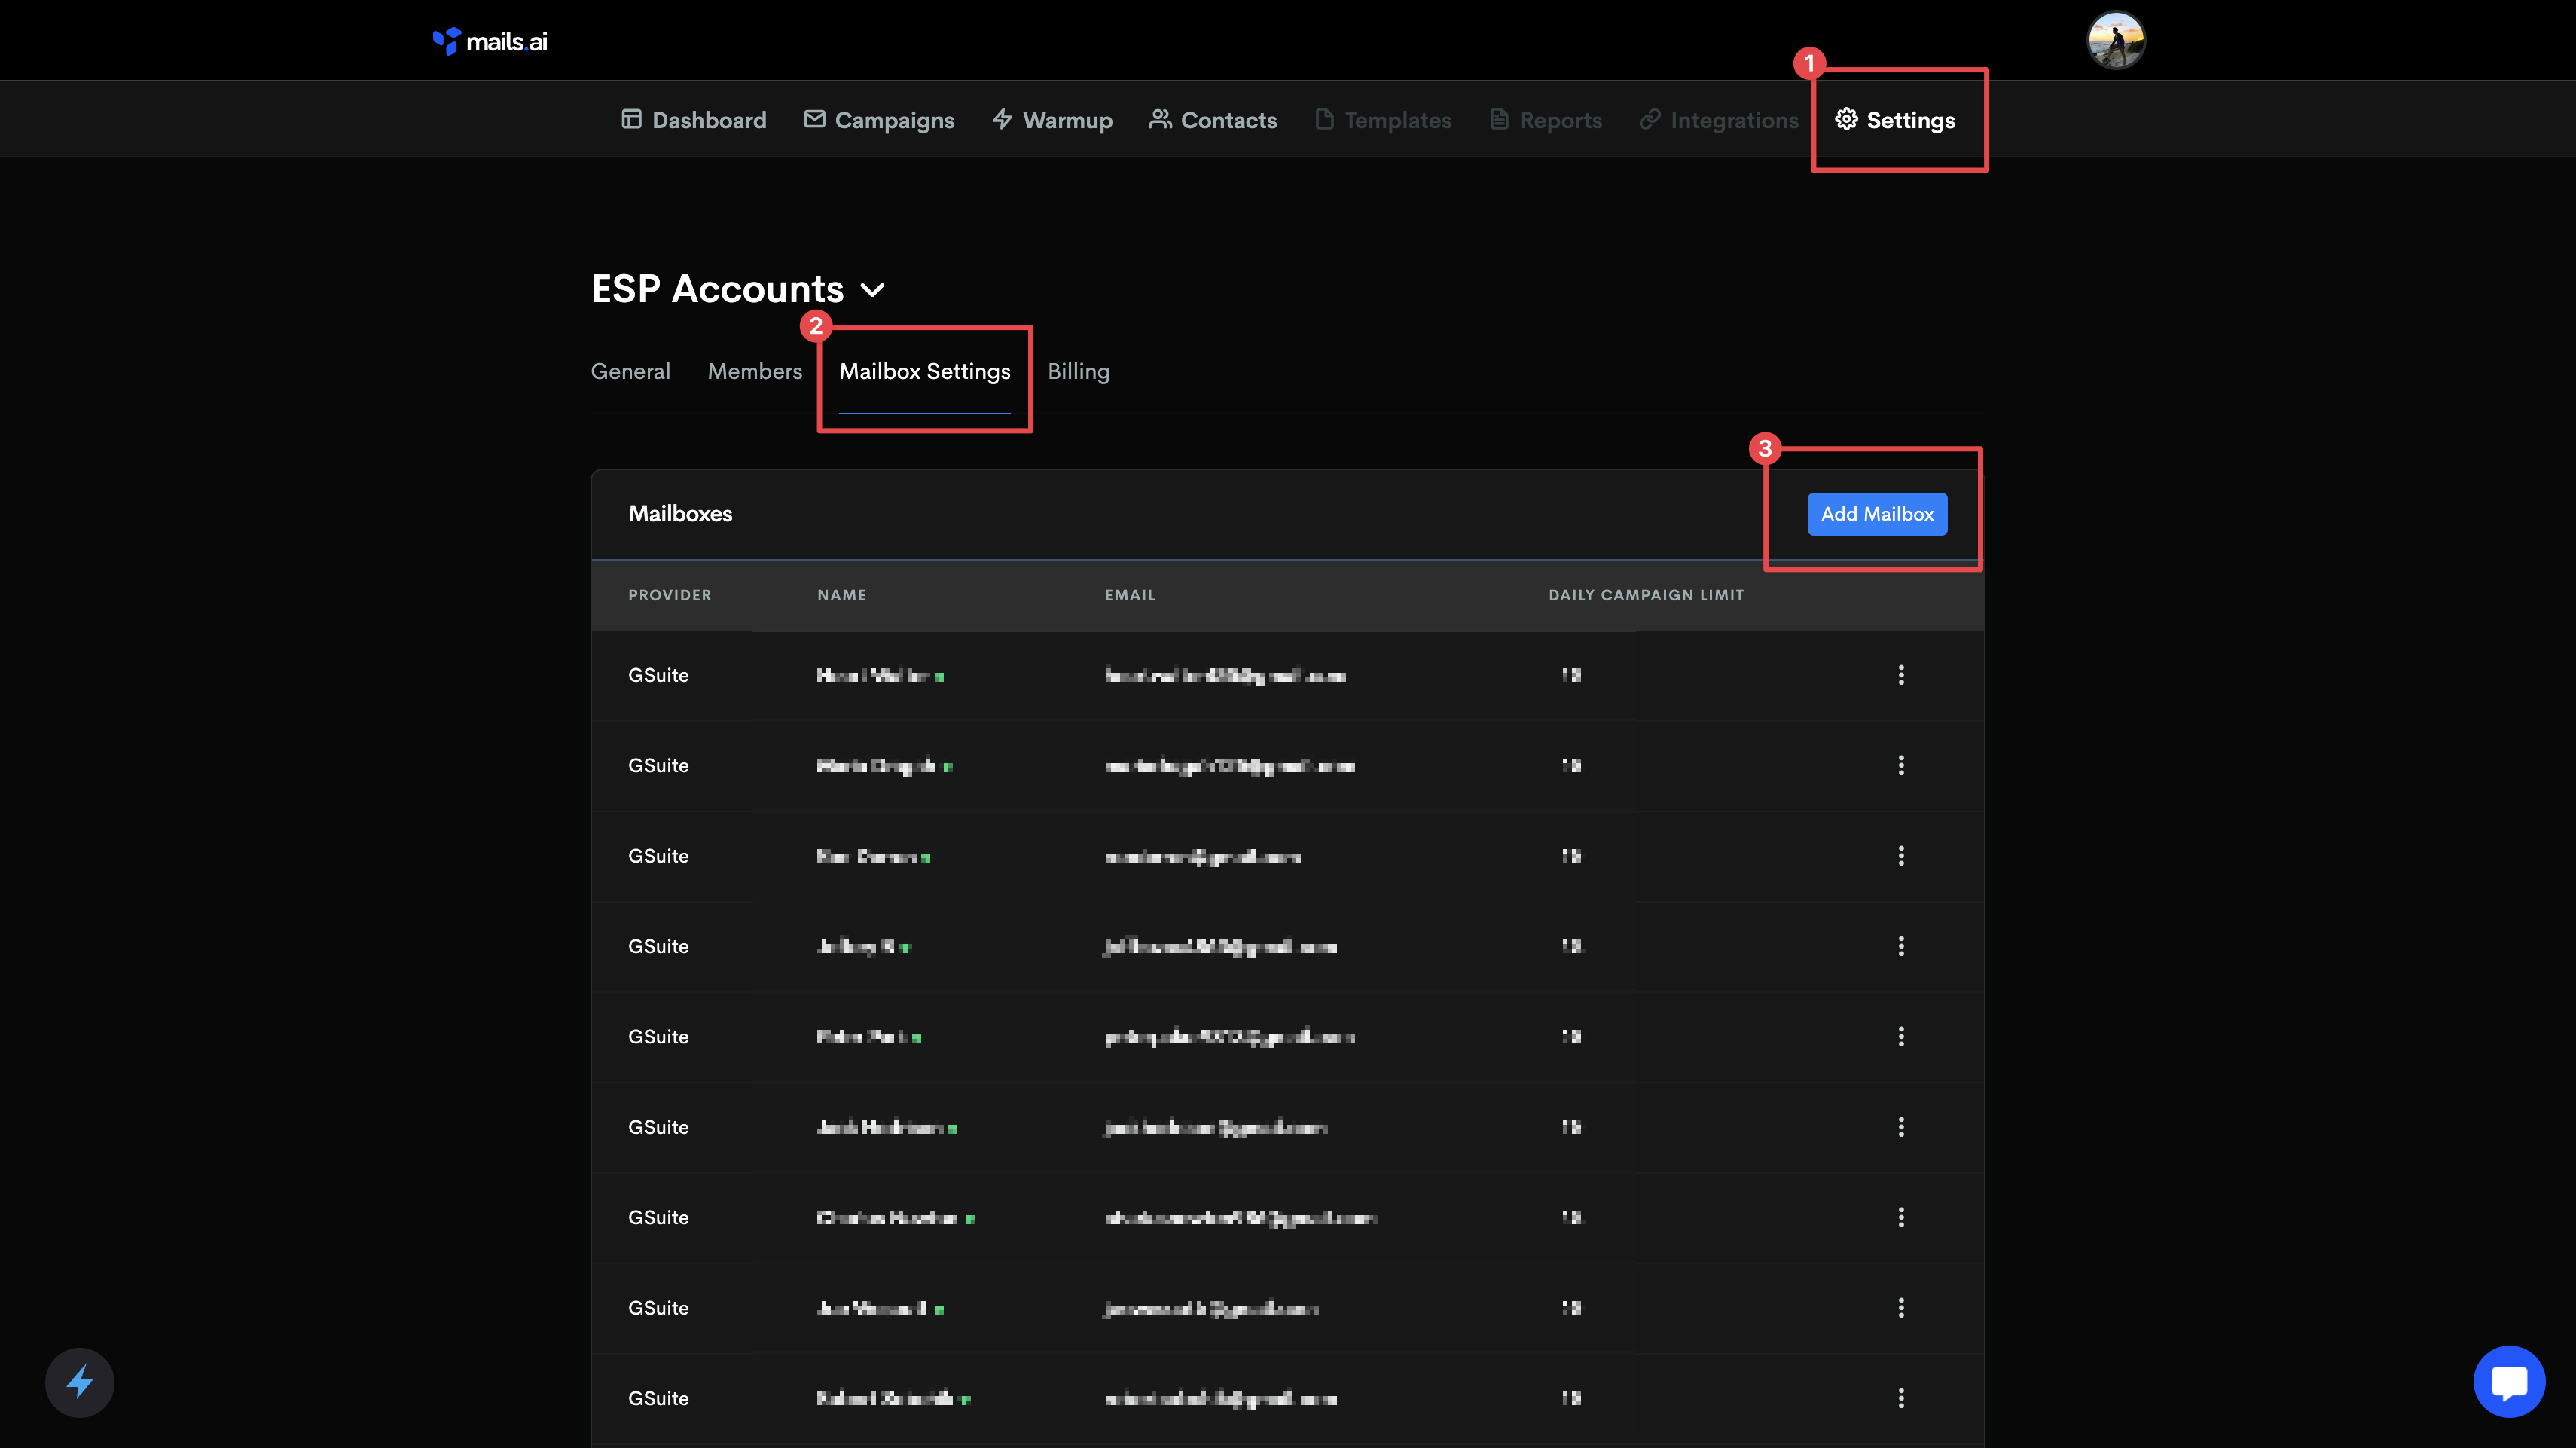
🎉 Congratulations! Your Gmail account has been connected to Mails.ai!
If you want to add additional mailbox, simply click on Add Mailbox and repeat to connect as many Mailbox as needed.
At Mails.ai, we have opted not to use OAuth, Google's official protocol for service access. Instead, we utilize Google's "App Password" for connecting Gmail and Google Workspace accounts with Mails.ai. Our focus is on cold outreach and warmup processes, which may not entirely align with Google's terms of service. We approach this area cautiously and responsibly.
Importantly, several companies that previously used Google OAuth for similar activities have not only stopped their warmup operations but have actually been shut down. This is a direct result of Google's stringent enforcement of API usage rules. Aware of these industry changes and the clear risks they present to systems like ours, we are keenly monitoring these trends. Our goal is to adapt promptly and effectively to Google's policy changes, to both mitigate risks and maintain our service delivery to our users.
Activating Warmup
How to setup warmup and enable it
Authenticating Domains - SPF, DKIM, and DMARC Setup
Guidelines for setting up SPF, DKIM, and DMARC to ensure email deliverability.
Which Email Service Provider (ESP) Should I Connect?
The benefits of using Gmail or Google Workspace with Mails.ai