Implementing a custom tracking domain can play a significant role in determining your email's deliverability success. But what exactly is it, and why is it so vital?

Mails.ai uses a unique method to track important email metrics such as open rates and link clicks. It employs a special code embedded within your email content. Usually, this code is in a URL format.
This generic URL is shared across all Mails.ai users. However, to stand out and protect your sender reputation, Mails.ai allows you to set up a custom tracking domain.
Setting up a custom tracking domain implies that the inserted special tracking code will employ your chosen domain instead of the shared one. This gives you two major benefits:
Uniqueness: Having a custom domain enhances your brand's identity and lends credibility to your emails in recipient's inboxes.
Isolated Reputation: It separates your sender reputation from other users' on Mails.ai, ensuring it is determined solely by your activity, not others.
Using a custom tracking domain is like bringing your own water bottle to a gym. It ensures your emails stay unique and uncontaminated, just as your water bottle keeps your drink fresh, untouched by shared dispensers.
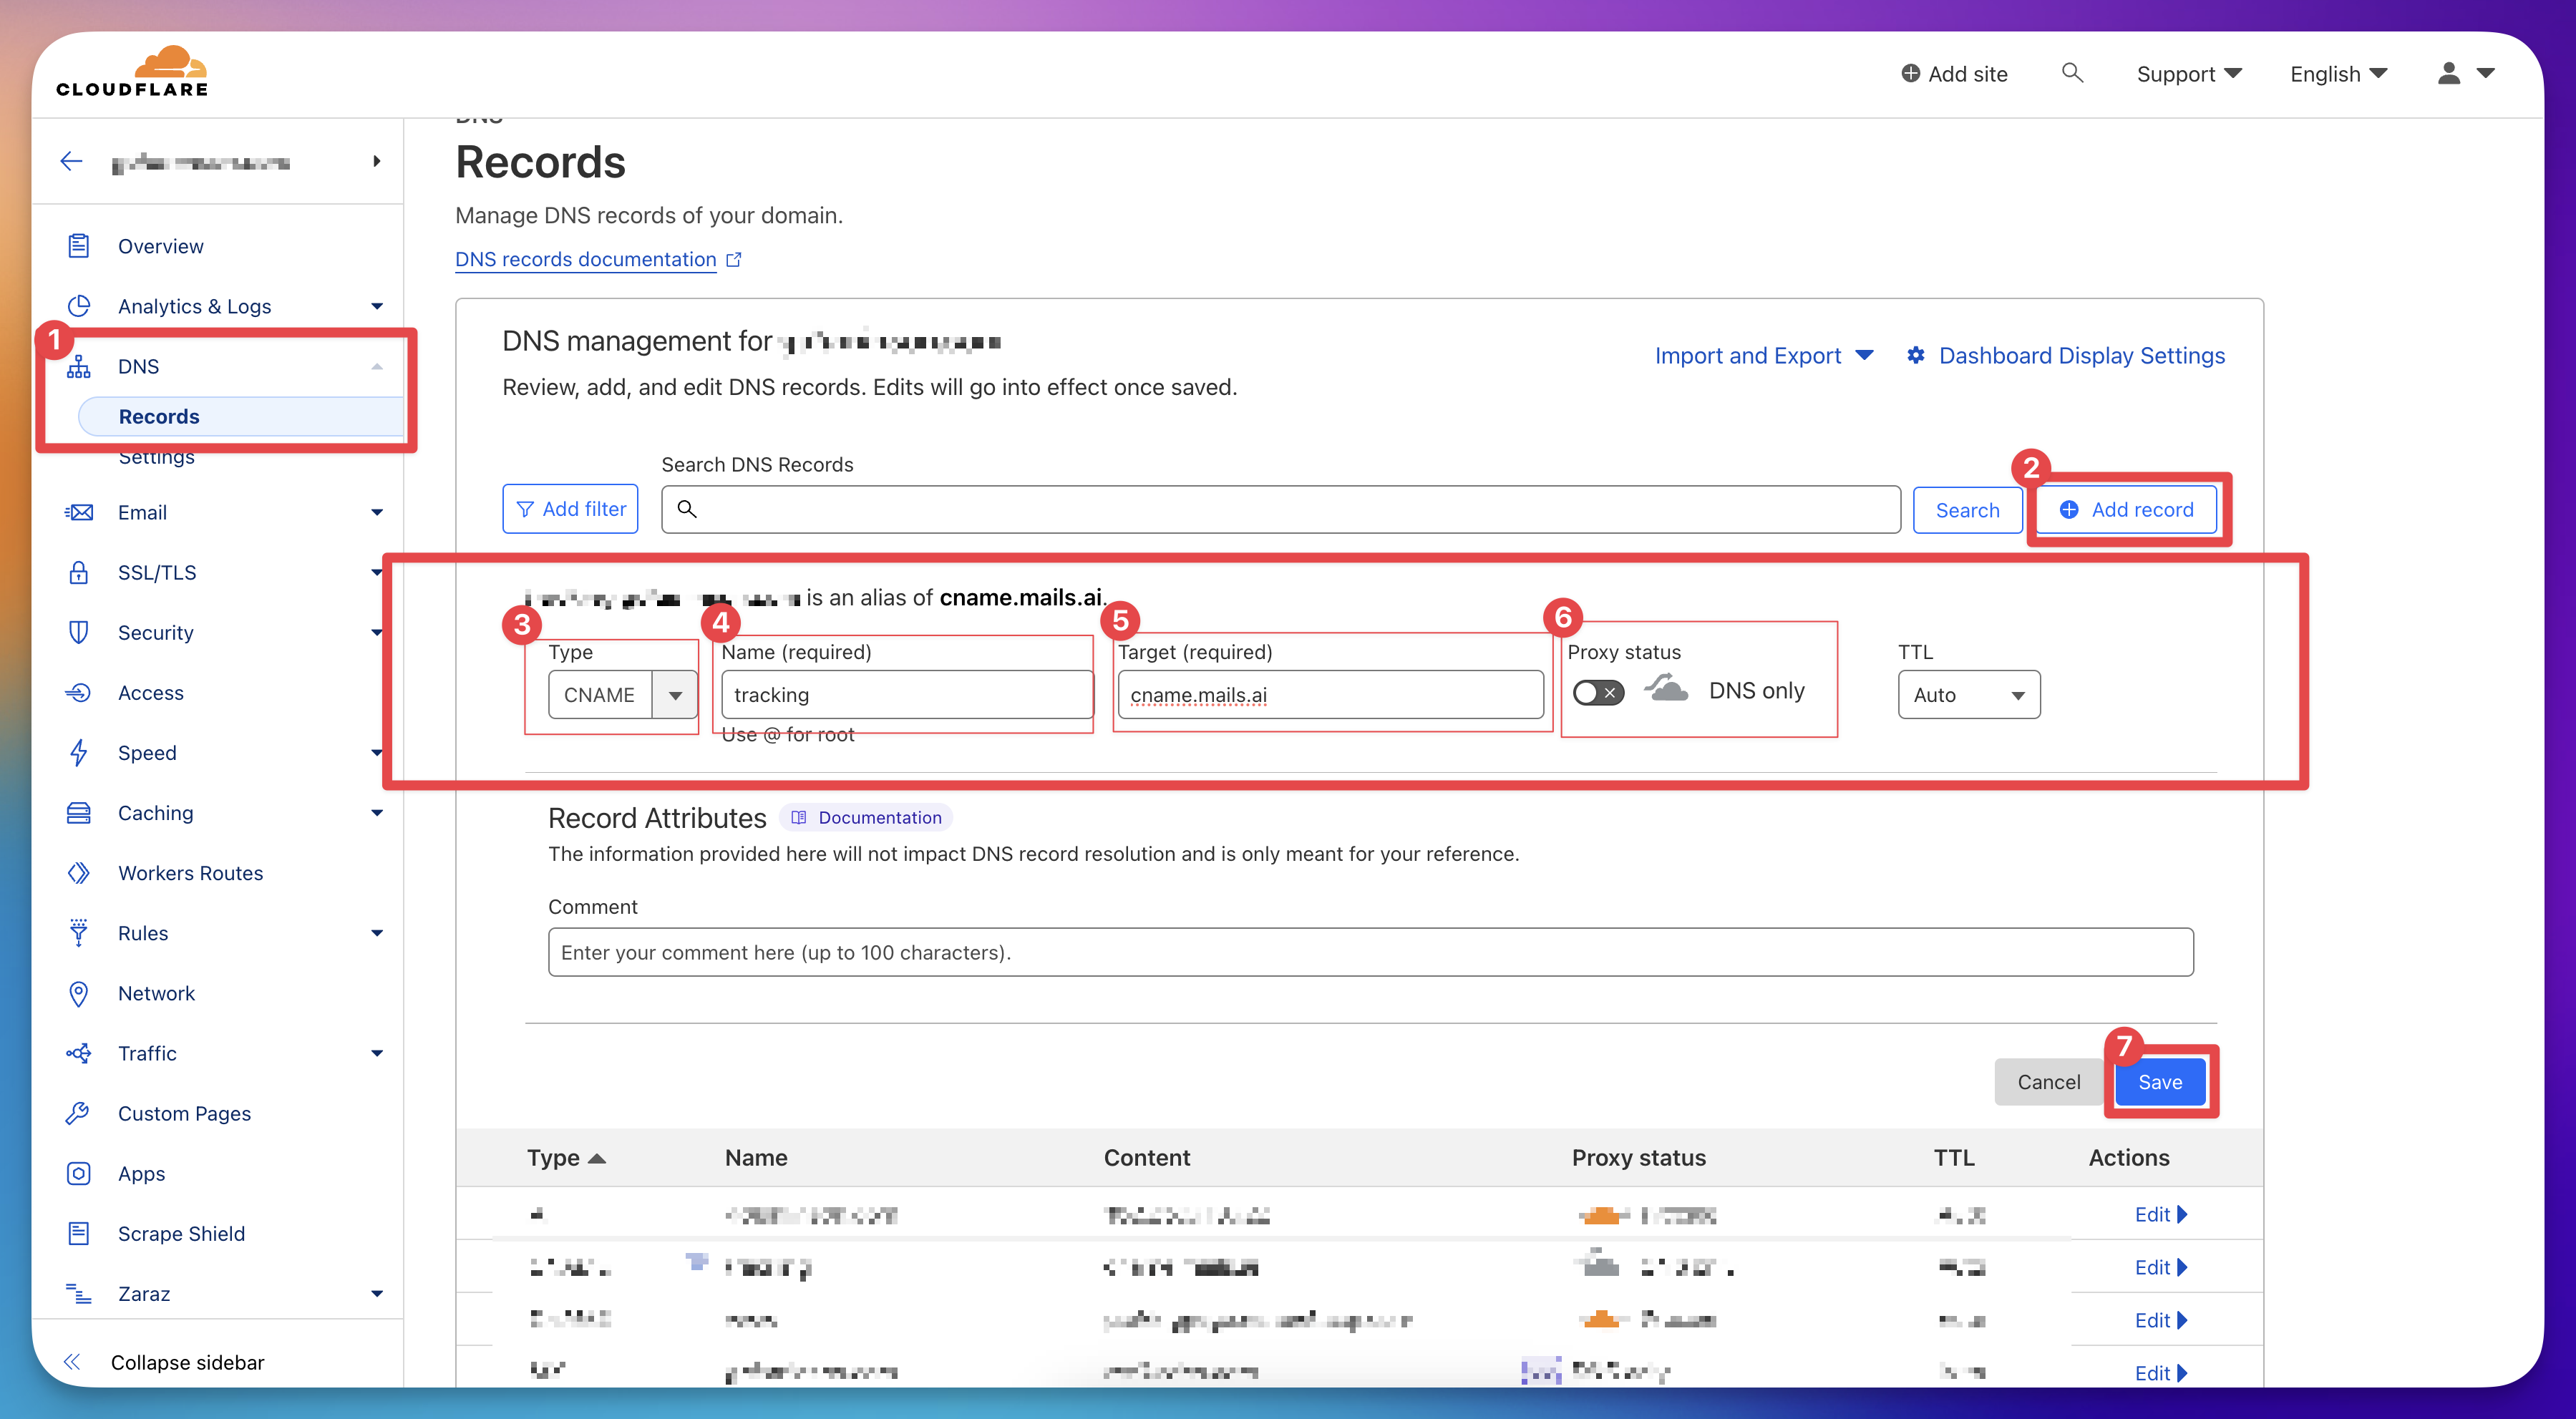
Switch over to your domain DNS settings (e.g. in Cloudflare, Namecheap, etc.) to create a new CNAME DNS record.
Configure 'tracking' as the name of the CNAME
Configure 'cname.mails.ai' as the value of the CNAME.
Log In:
Go to Cloudflare.
Sign in to your account.
Select Domain:
Choose the domain you wish to modify.
DNS Settings:
Click on the "DNS" tab.
Add CNAME:
Click “Add Record” and set the following:
Type: CNAME
Name: tracking
Target: cname.mails.ai
Proxy status: DNS Only (this means it's disabled)
Save and Wait:
Confirm and save the changes.
Allow time for DNS propagation – usually within an hour, but can take up to 48 hours.

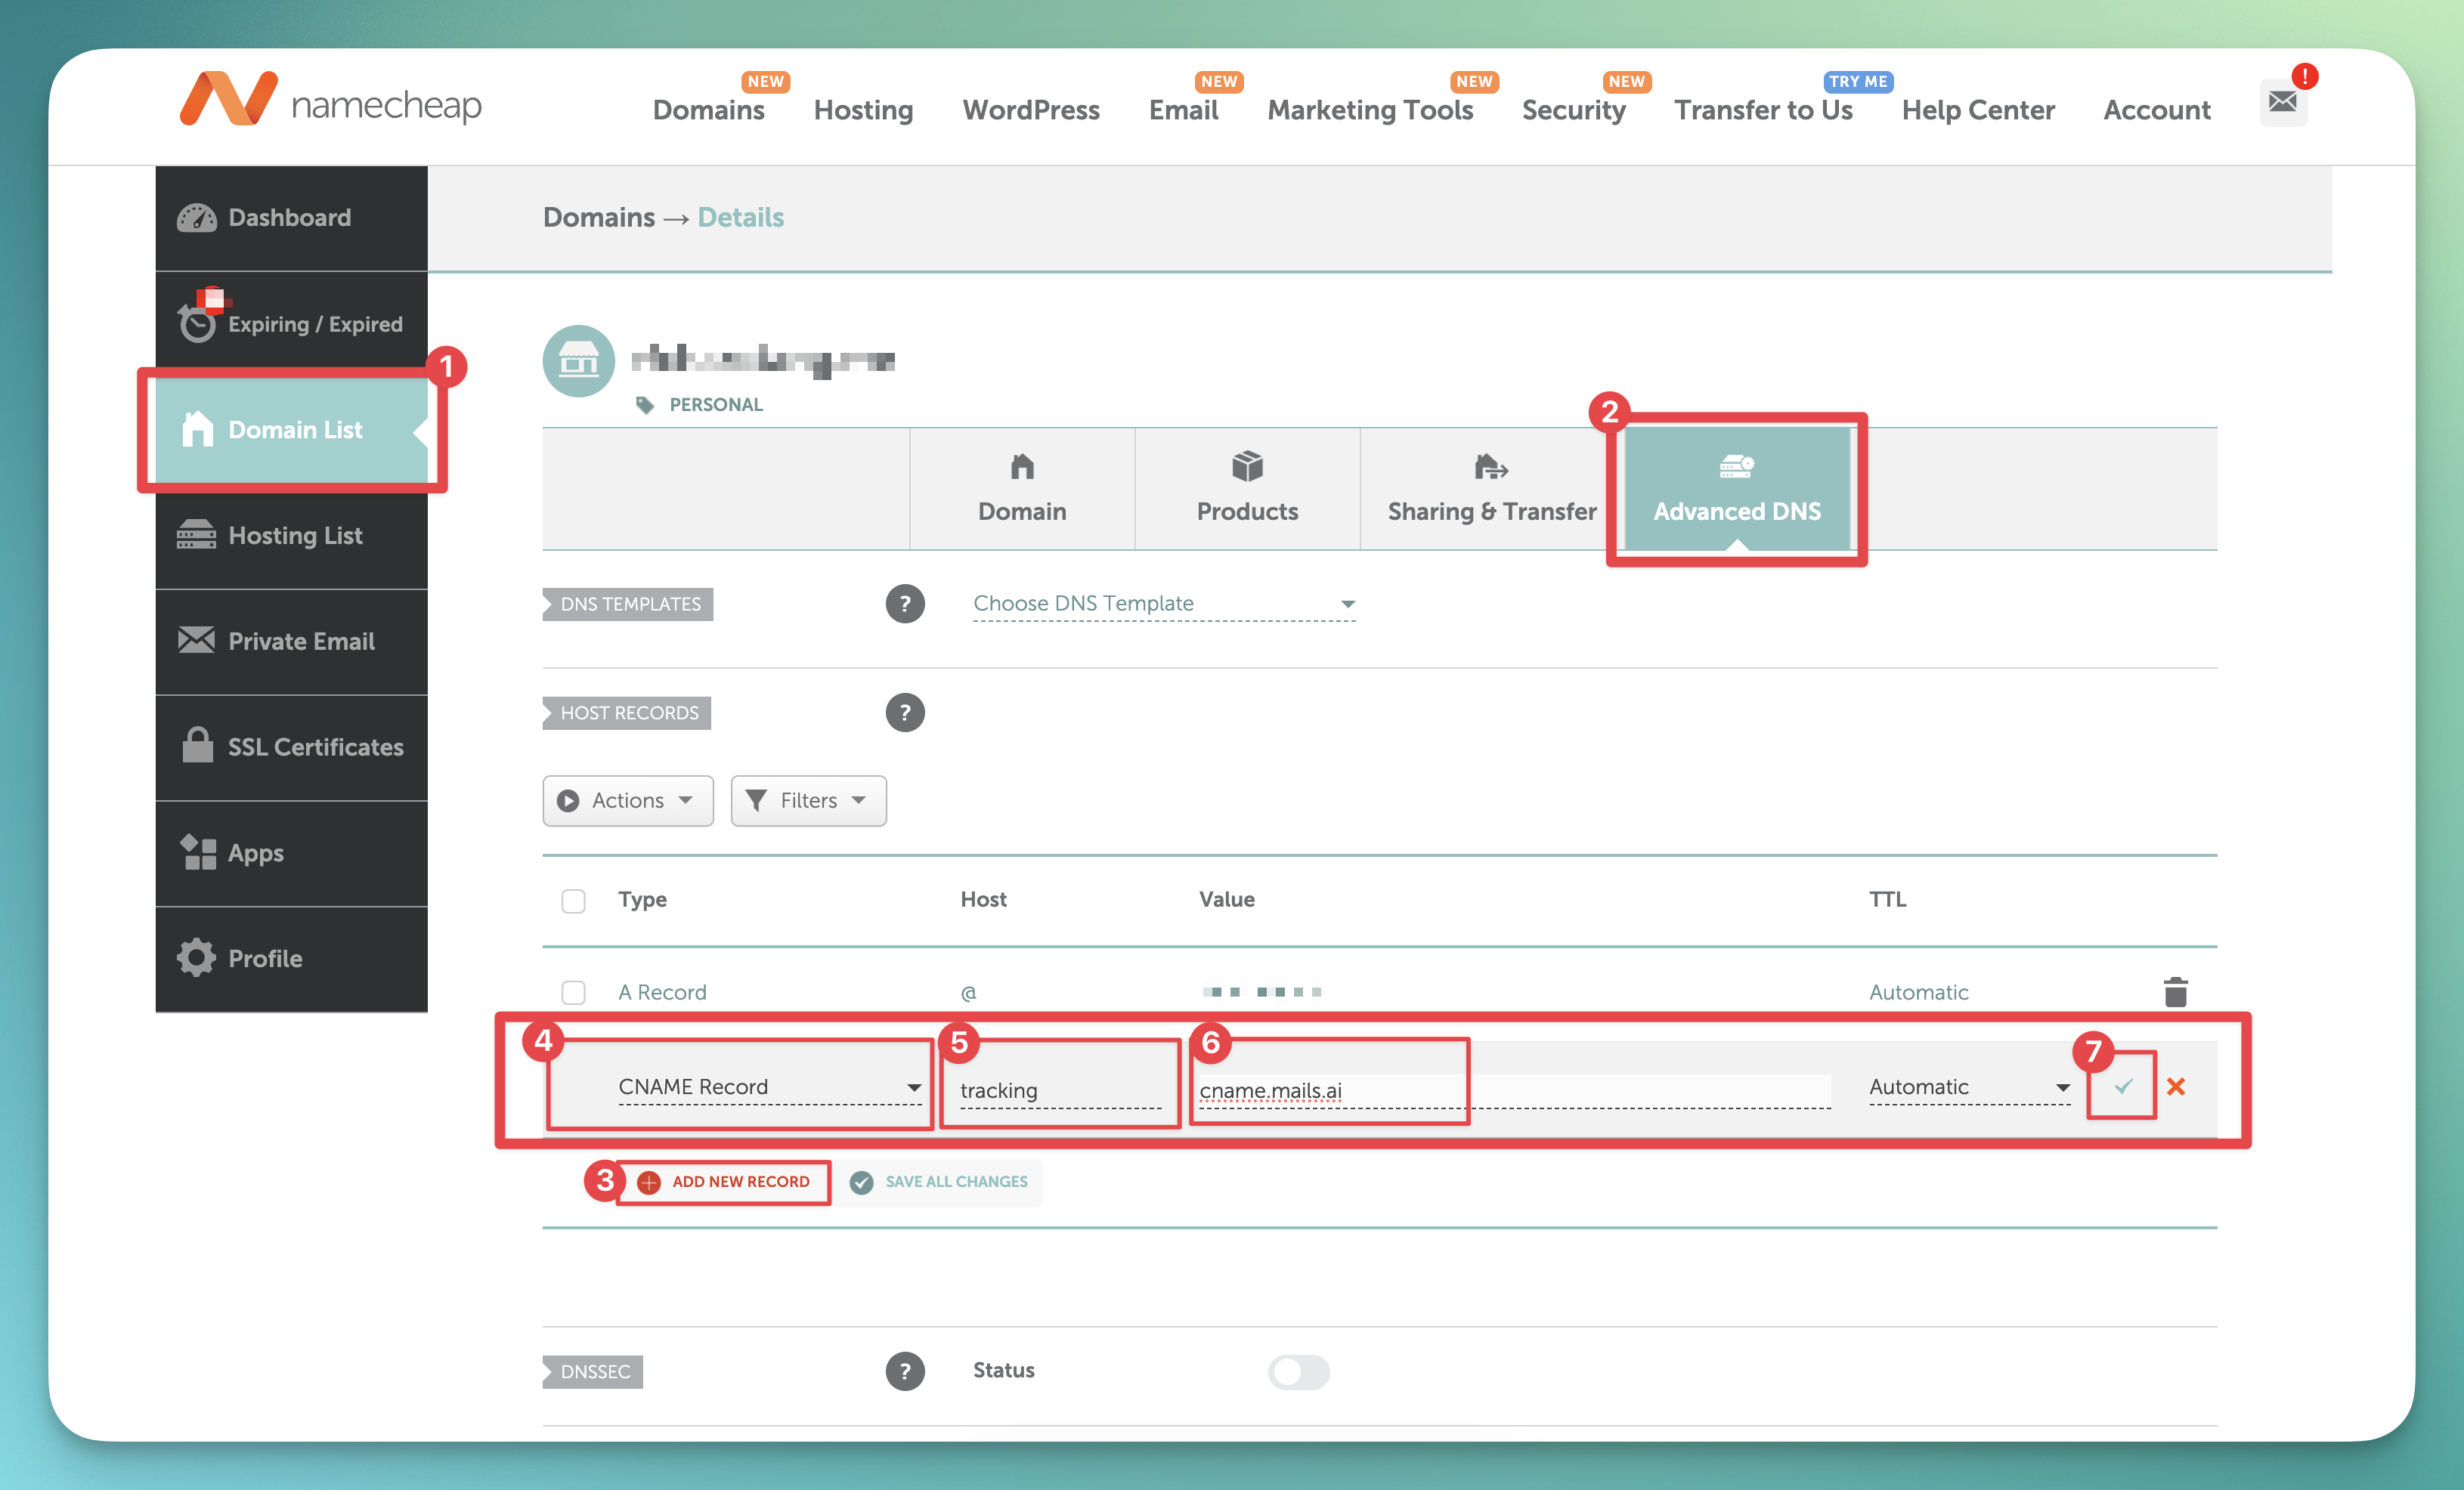
Log In:
Go to Namecheap.
Sign in to your account.
Domains:
Click "Domain List" on the left sidebar.
Click "Manage" next to your desired domain.
Advanced DNS:
Select the “Advanced DNS” tab.
Add CNAME:
In the "Host Records" section, click “Add New Record” and set the following:
Type: "CNAME Record".
Host: tracking
Value: cname.mails.ai
Save and Wait:
Click the checkmark or “Save Changes”.
Allow time for DNS propagation – usually within an hour, but can take up to 48 hours.
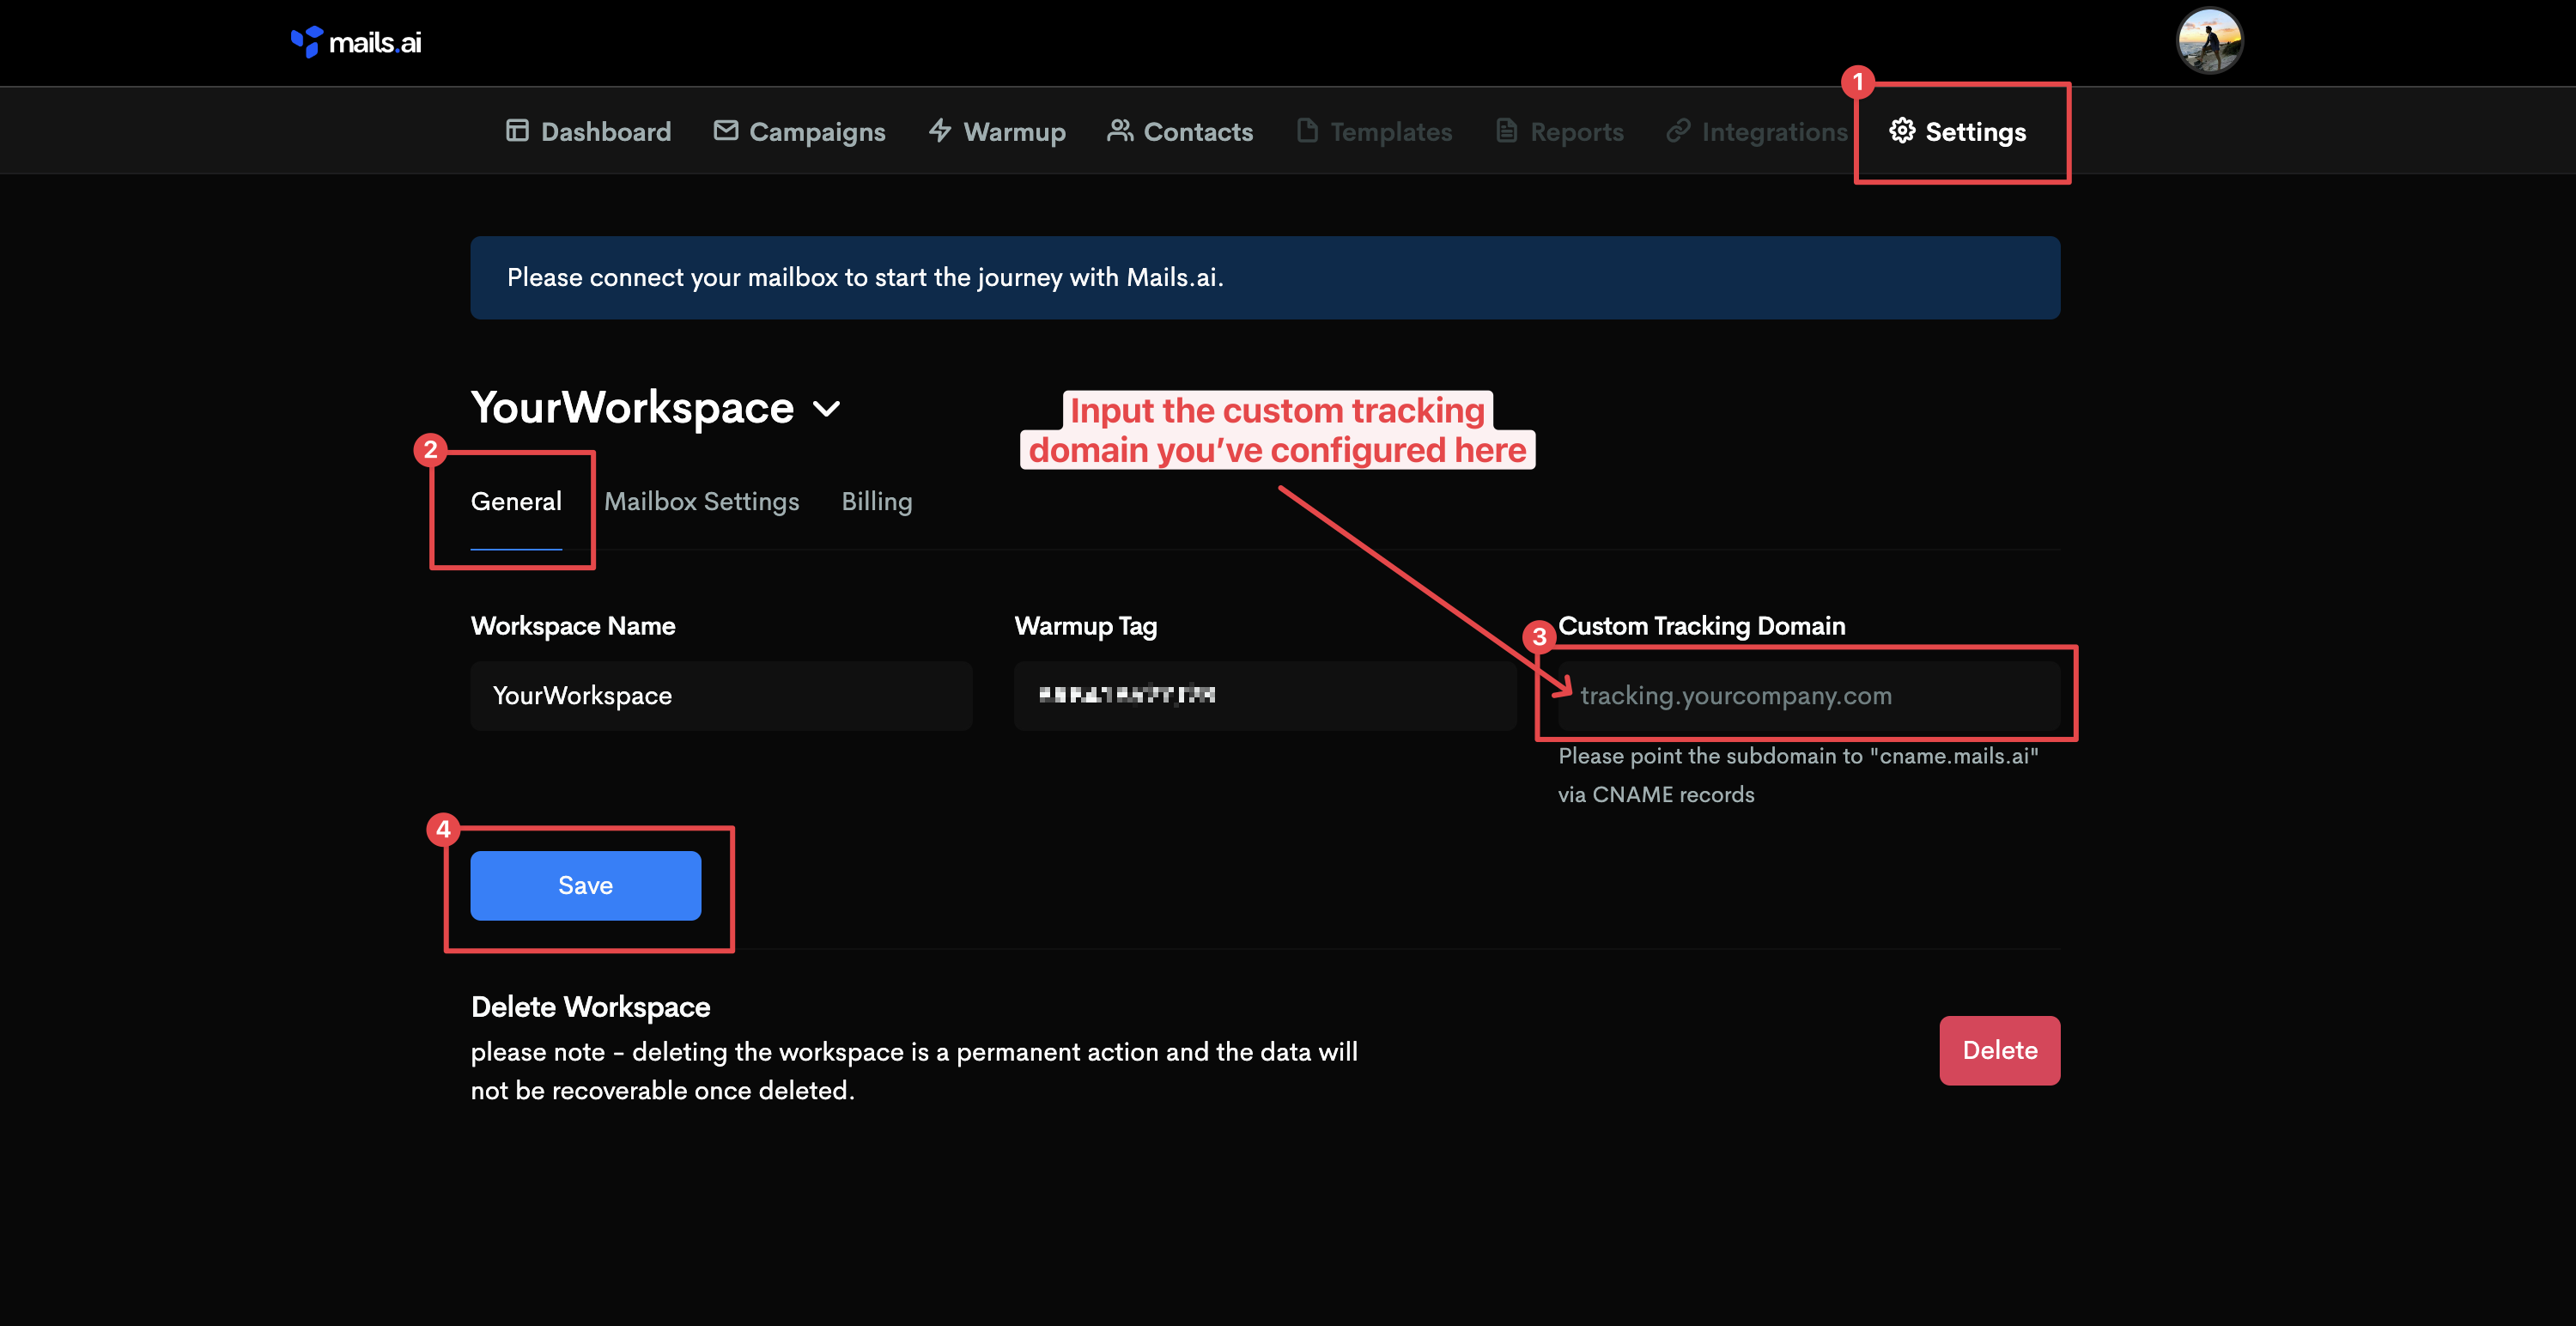
Returning to the Mails.ai settings page, add the newly created CNAME.
For example, if that domain is 'yoursendingdomain.com', then add it as 'tracking.yoursendingdomain.com' in Mails.ai in the Custom Tracking Domain field.
Done! 🎉🎉 If everything is set up correctly, the details will be saved.
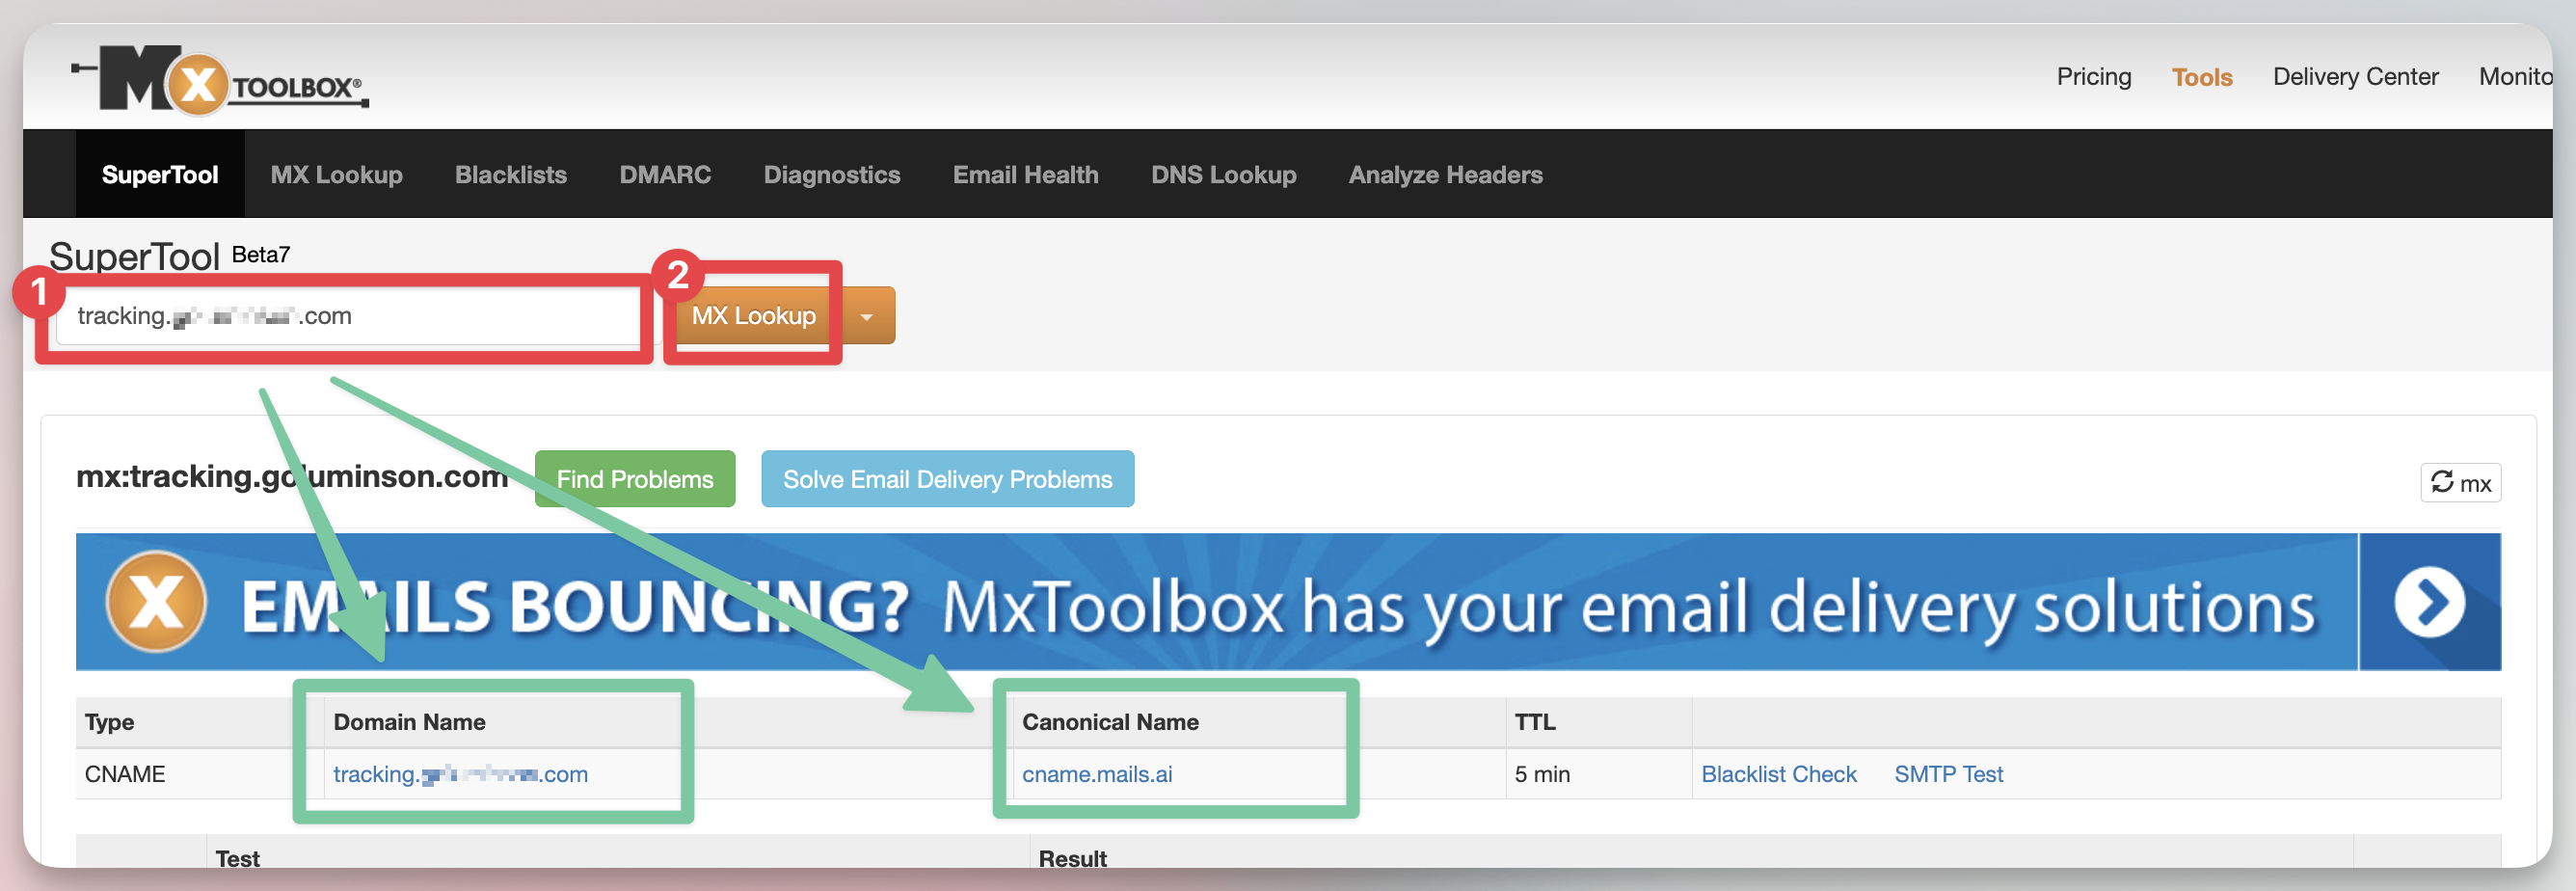
If you're experiencing issues with your domain's email tracking functionality, follow the steps below to verify its setup:
Visit Mxtoolbox.com.
Enter your custom tracking domain: 'tracking.yoursendingdomain.com'
Select 'MX Lookup'.
Confirm that the CNAME record points to 'cname.mails.ai'.
If this is not the case, we encourage you to check your setup or contact your domain provider to help with record propagation.
Activating Warmup
How to setup warmup and enable it