To connect either Zoho email accounts, there are 2 requirements before connecting to Mails.ai.
Enable IMAP
Create an App password
To enable IMAP in Zoho Mail, you need to follow these steps:
Step 1: Log Into Your Account
Go to Zoho Admin Console. Enter your Zoho email and password to log in.
Step 2: Navigate to Zoho Users
Once you’re logged in, click on the ‘Users’ page. From there:
Select the a user you want to enable IMAP for.
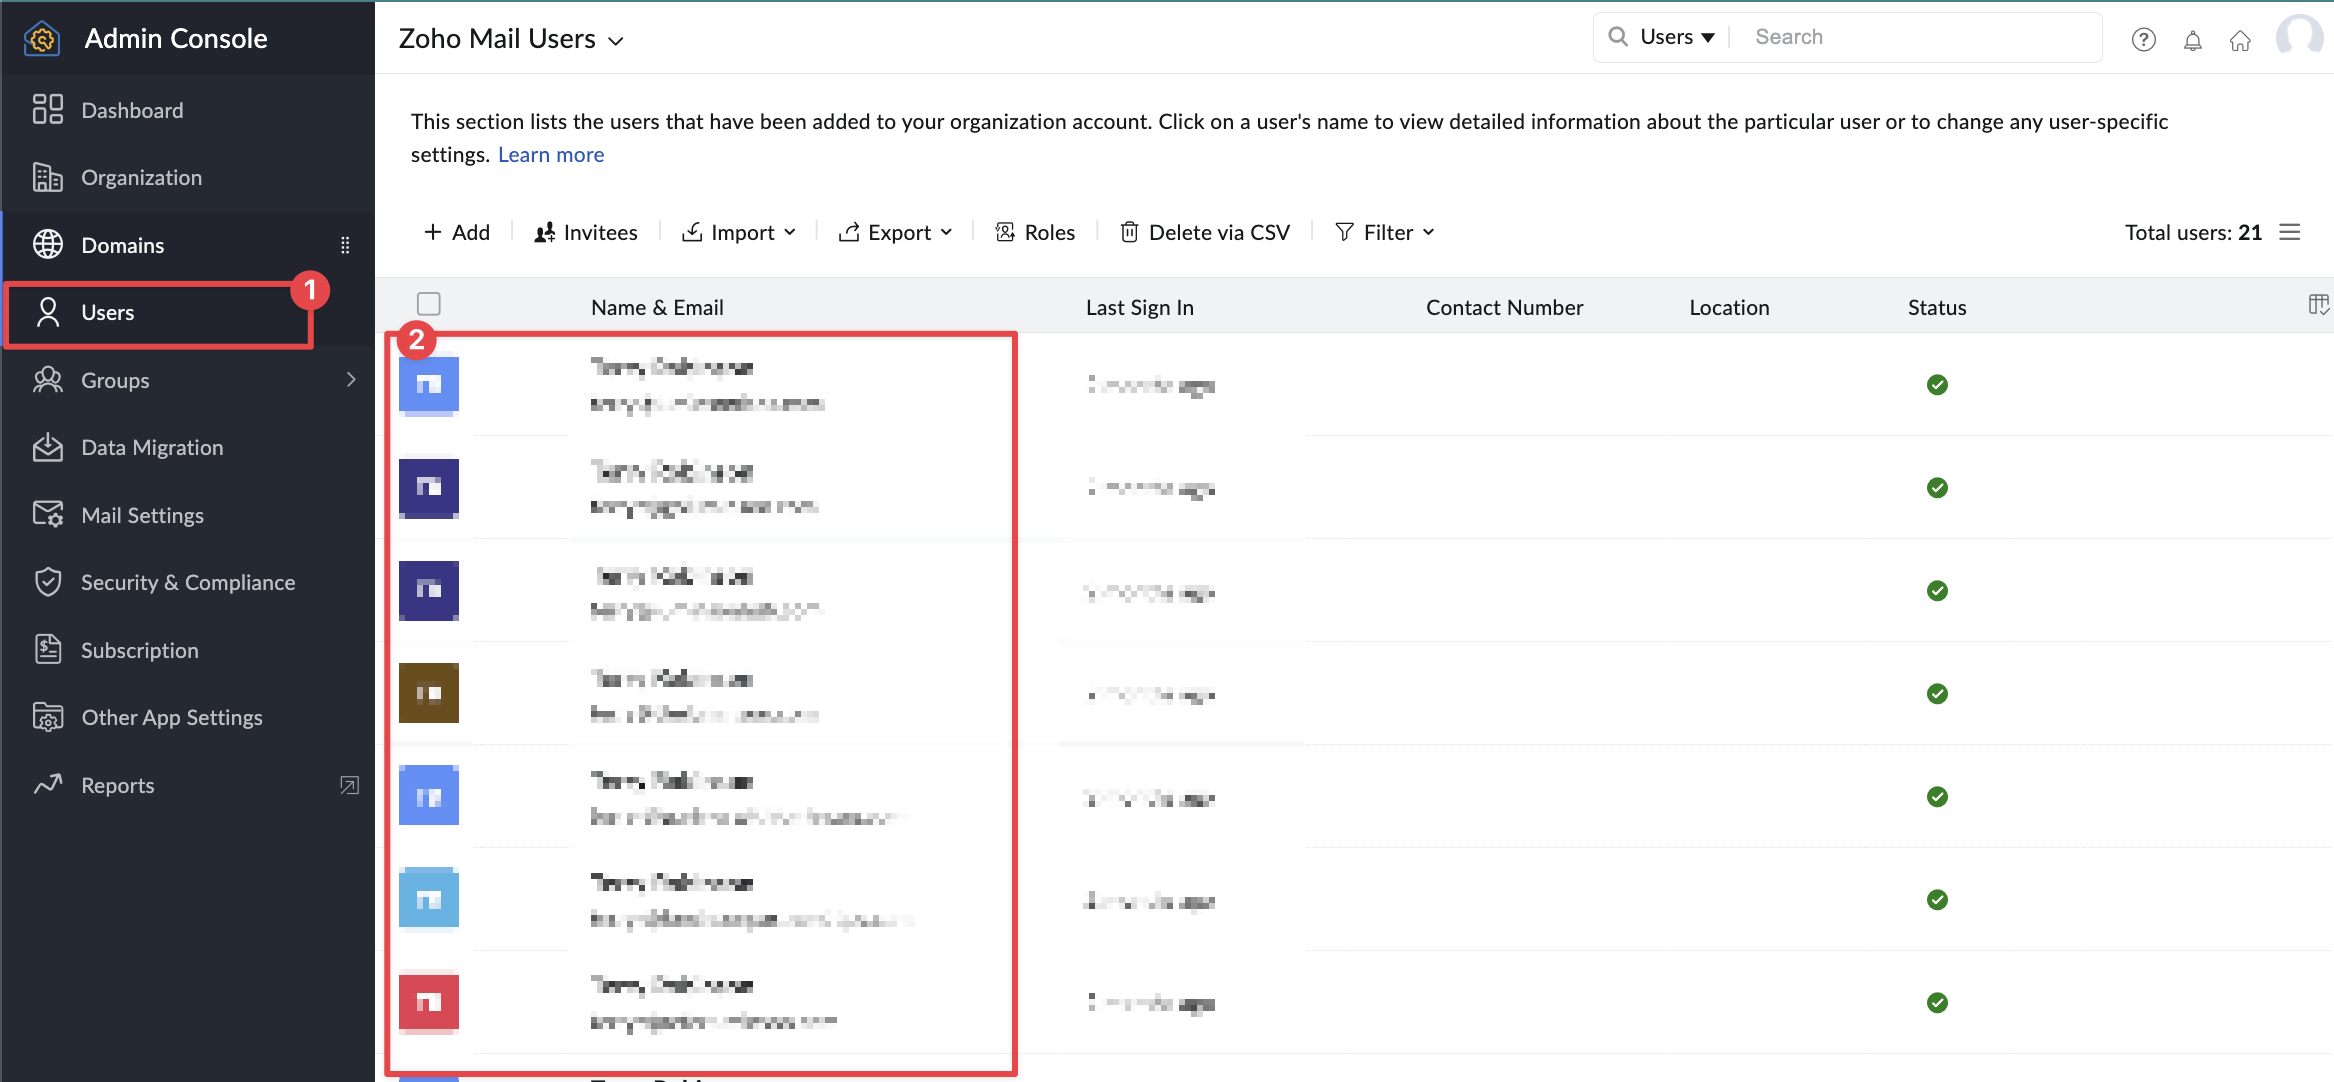
Step 3: Enable IMAP
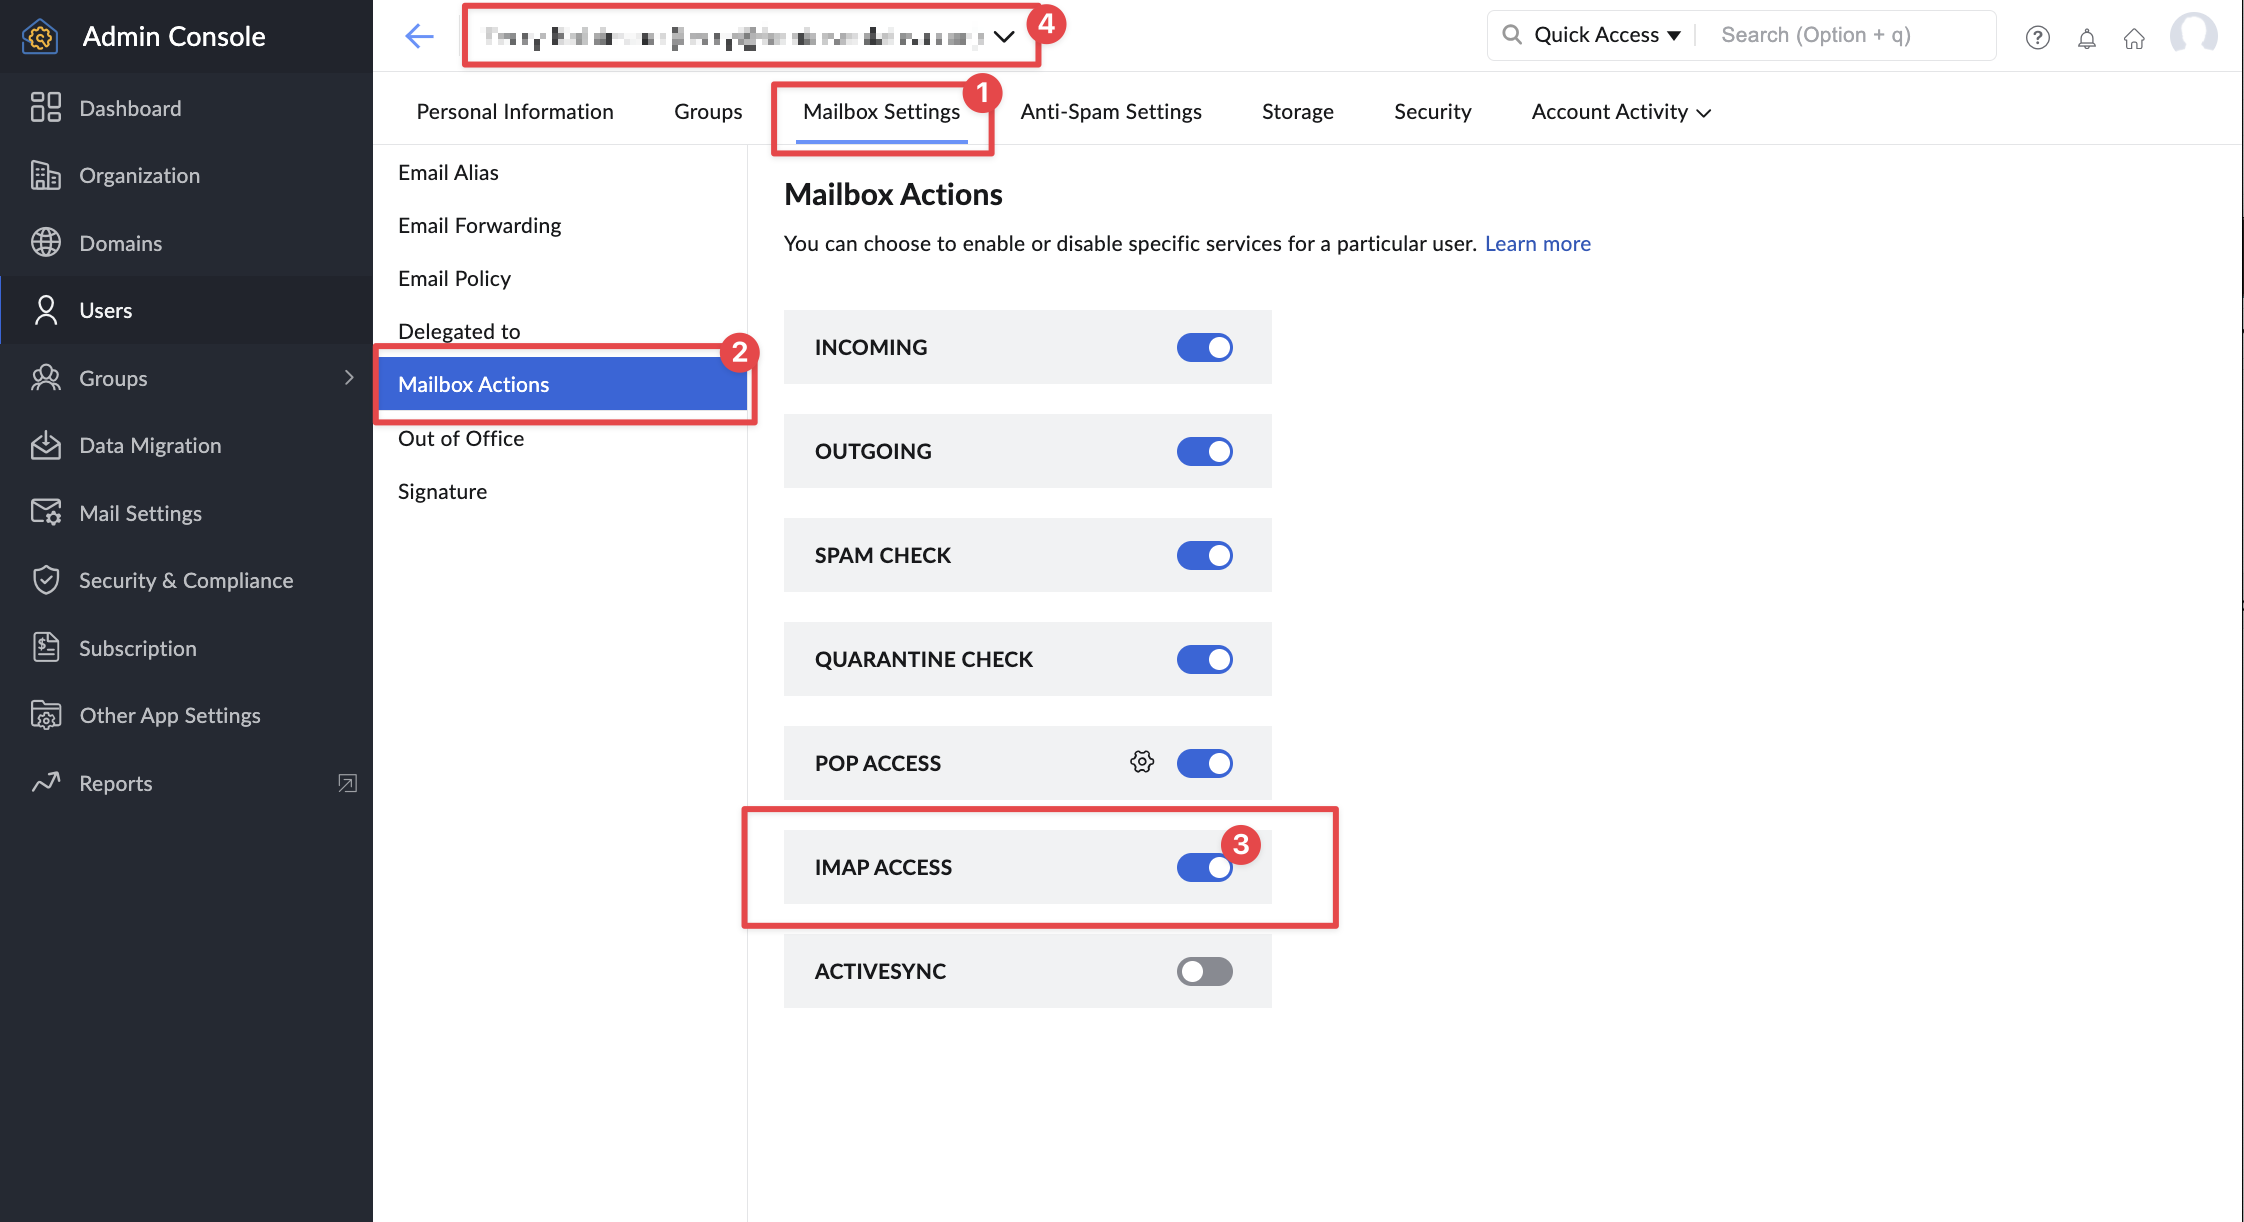
In the account you've selected, navigate to:
Mailbox Settings >> Mailbox Actions
Enable IMAP for that account by enabling 'IMAP ACCESS'
To enable IMAP for other accounts, simply repeat the process by clicking on the current email address above the navbar and pick the next account you’d like to activate IMAP for.
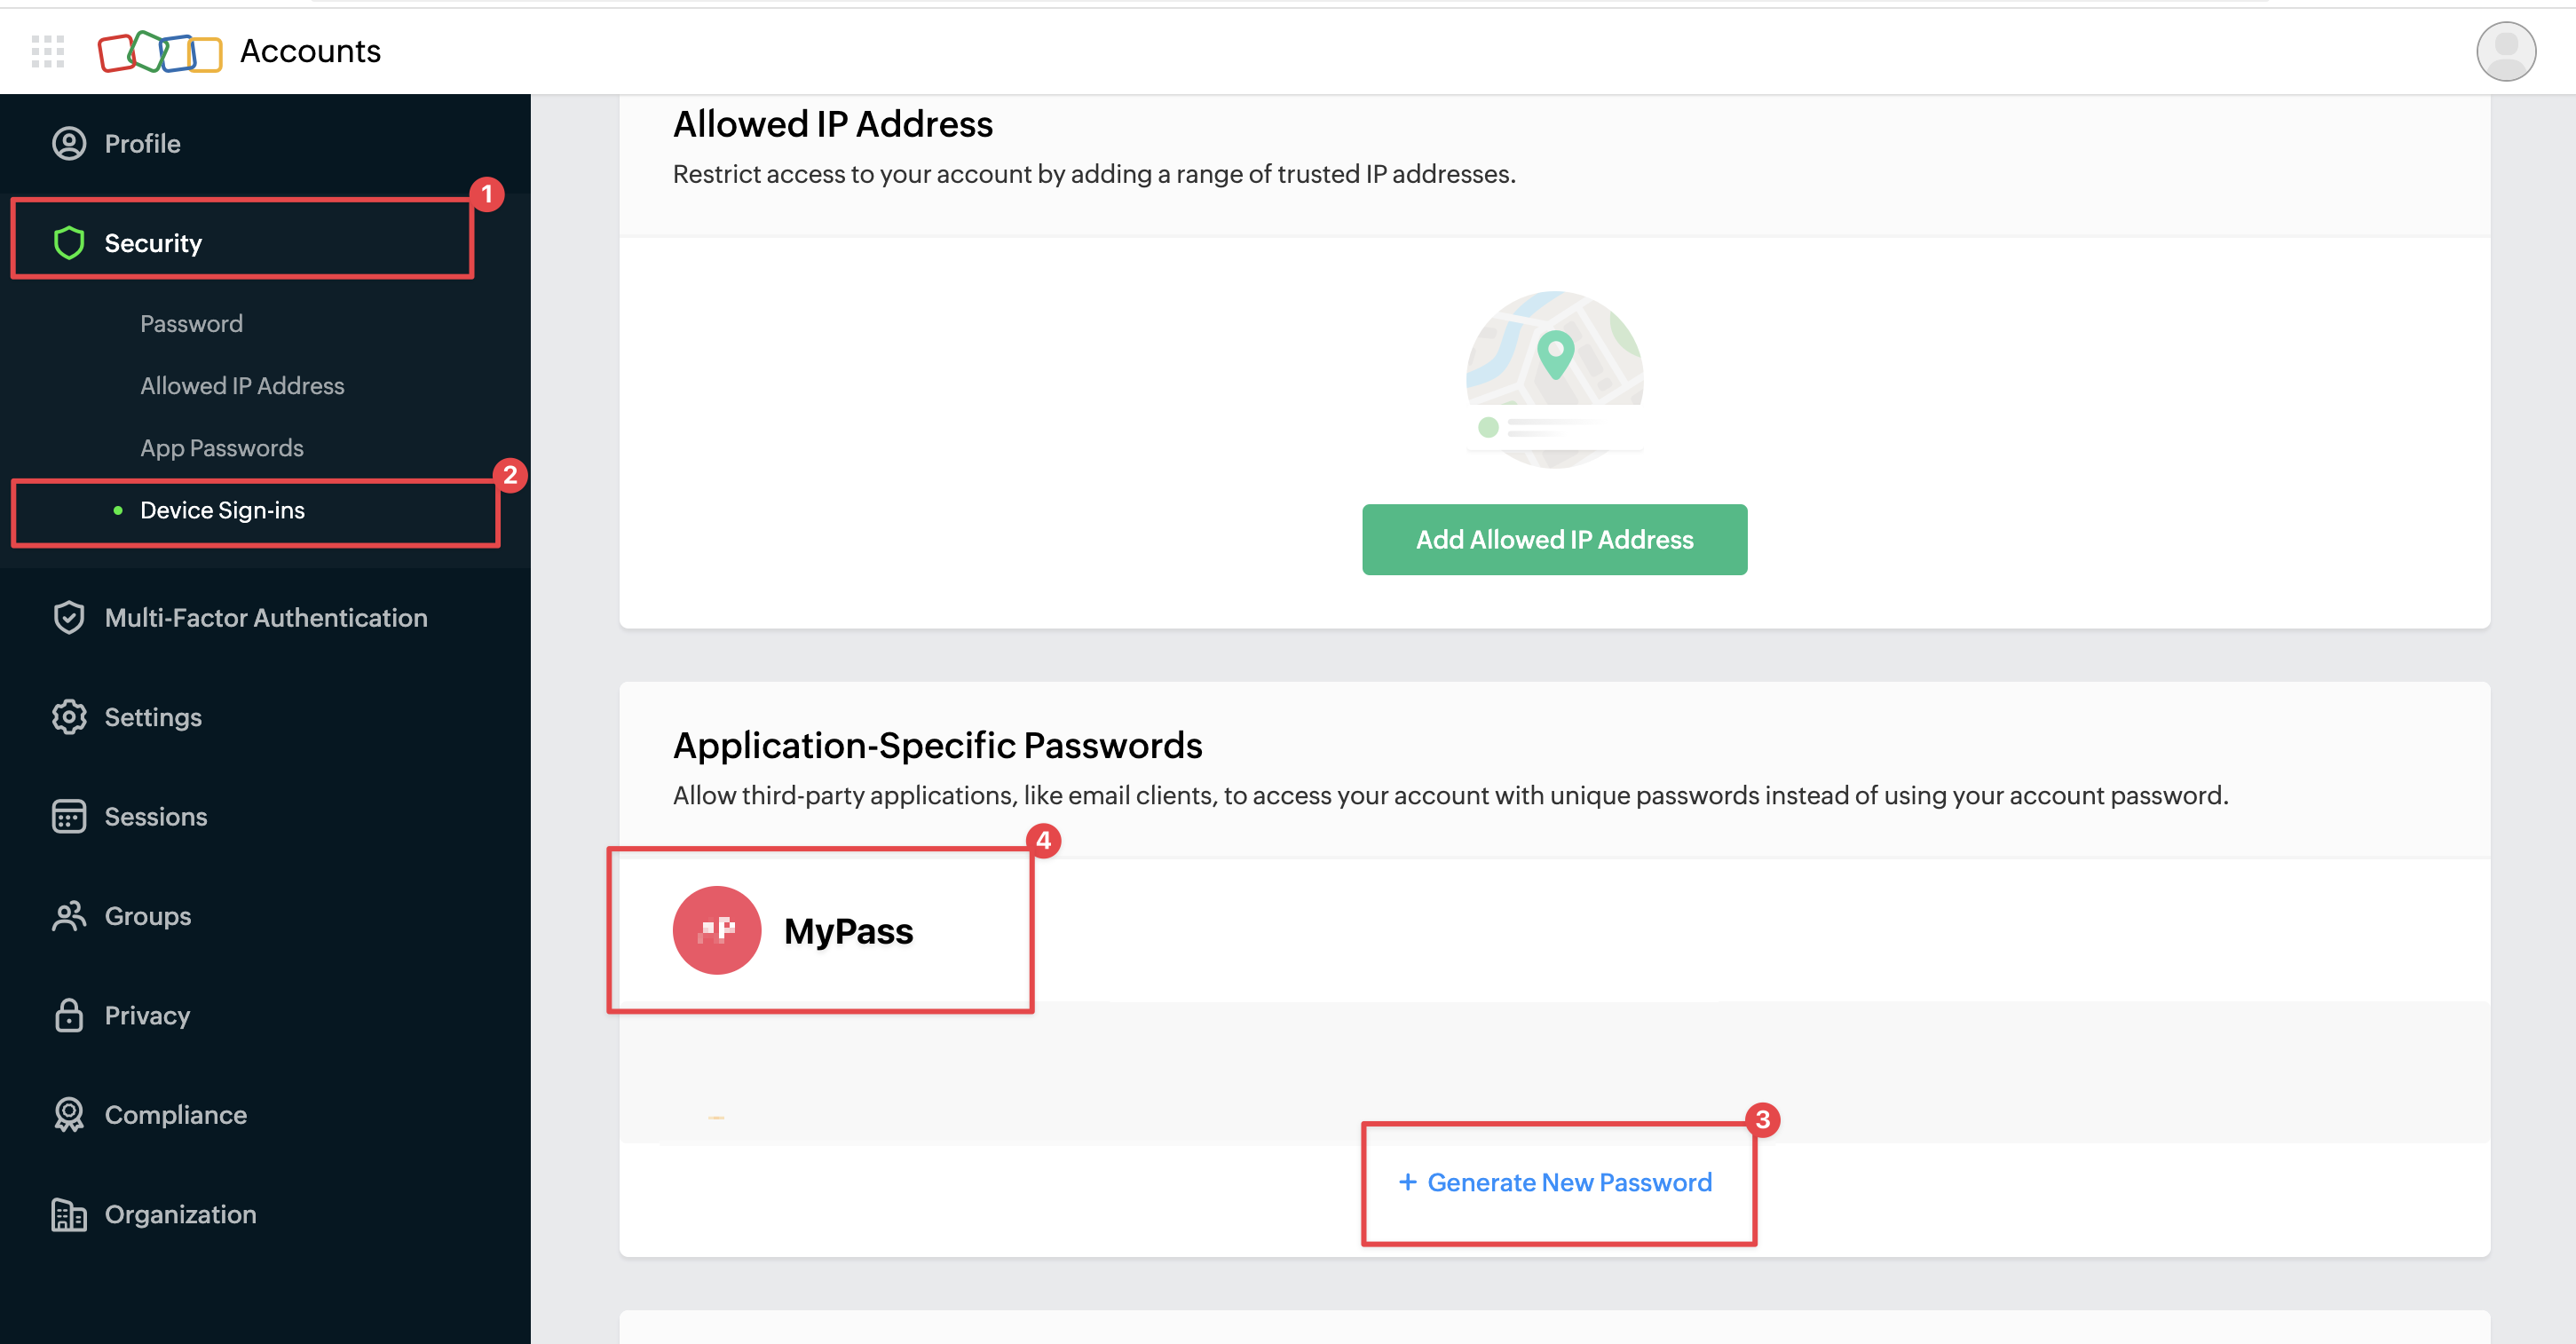
Log in to your Zoho account at https://accounts.zoho.com/.
In the "Security" section, click on "App Passwords."
Click on "Generate New Password."
In the pop-up window, enter a descriptive name for the App Password (e.g., "MailsAI" or "apps") and click "Generate."
Your new App Password will be displayed. Copy it and store it securely, as it will not be shown again.
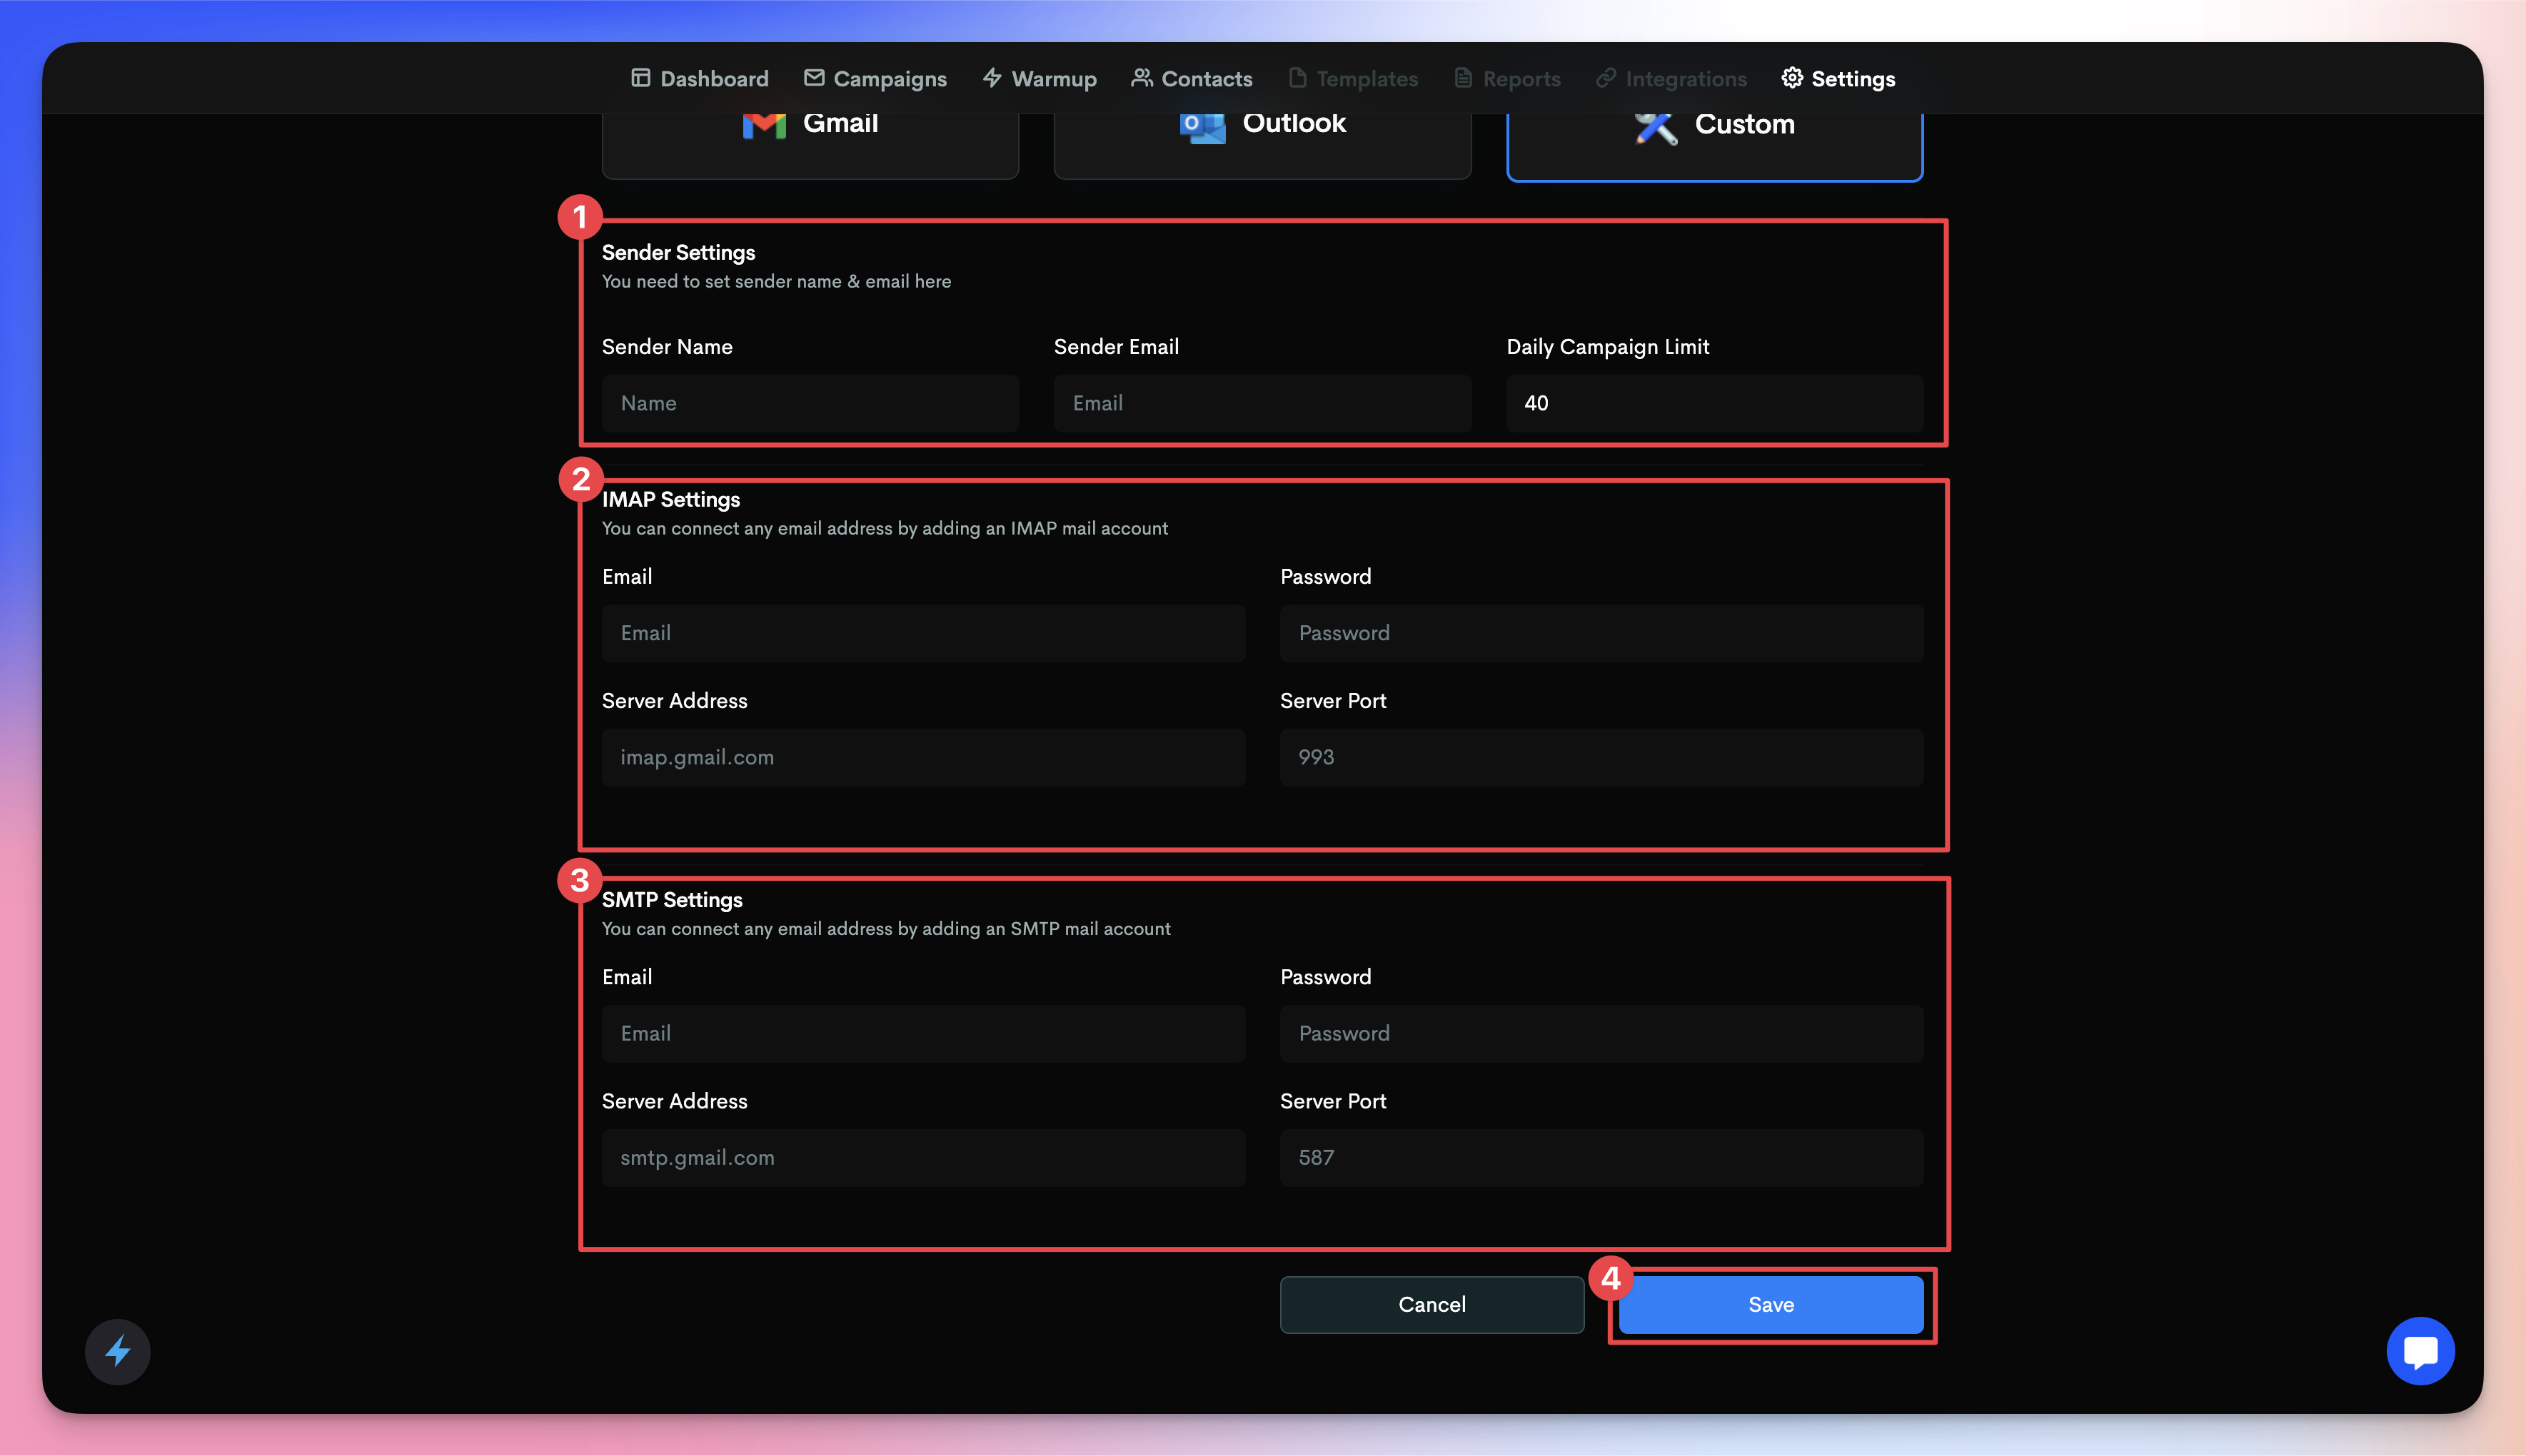
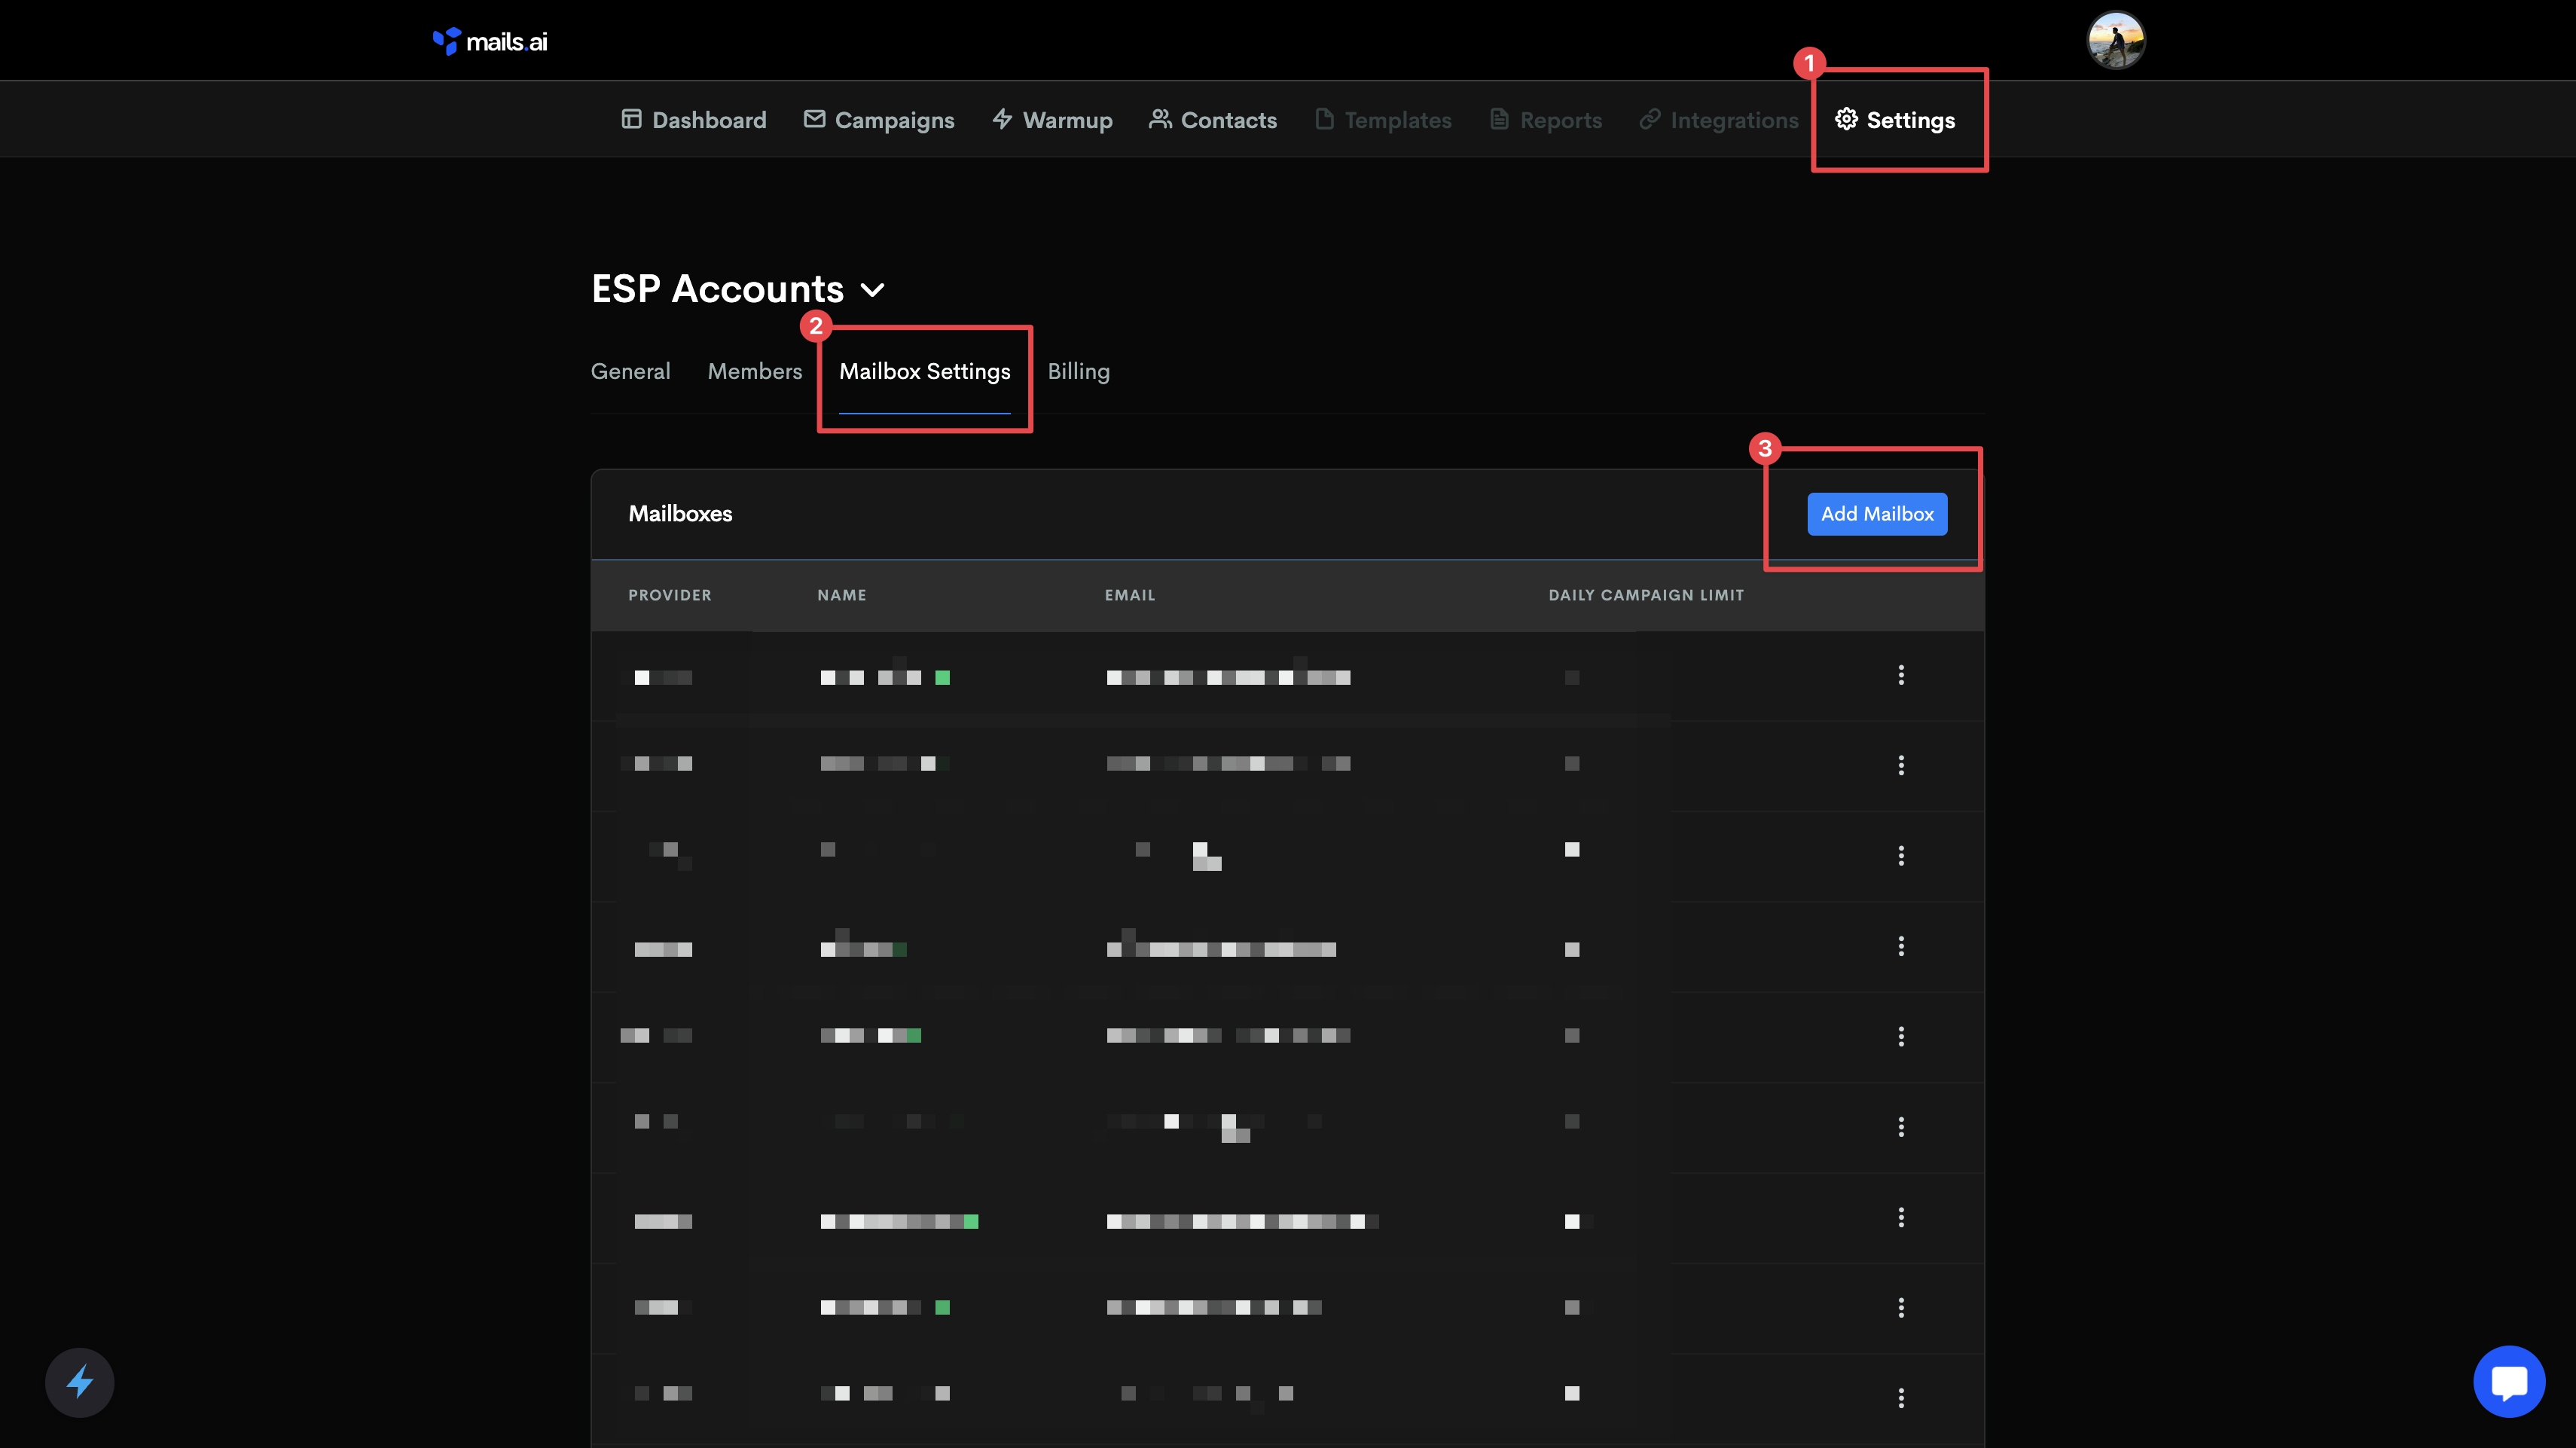
app.mails.ai >> Settings >> Mailbox Settings >> Custom
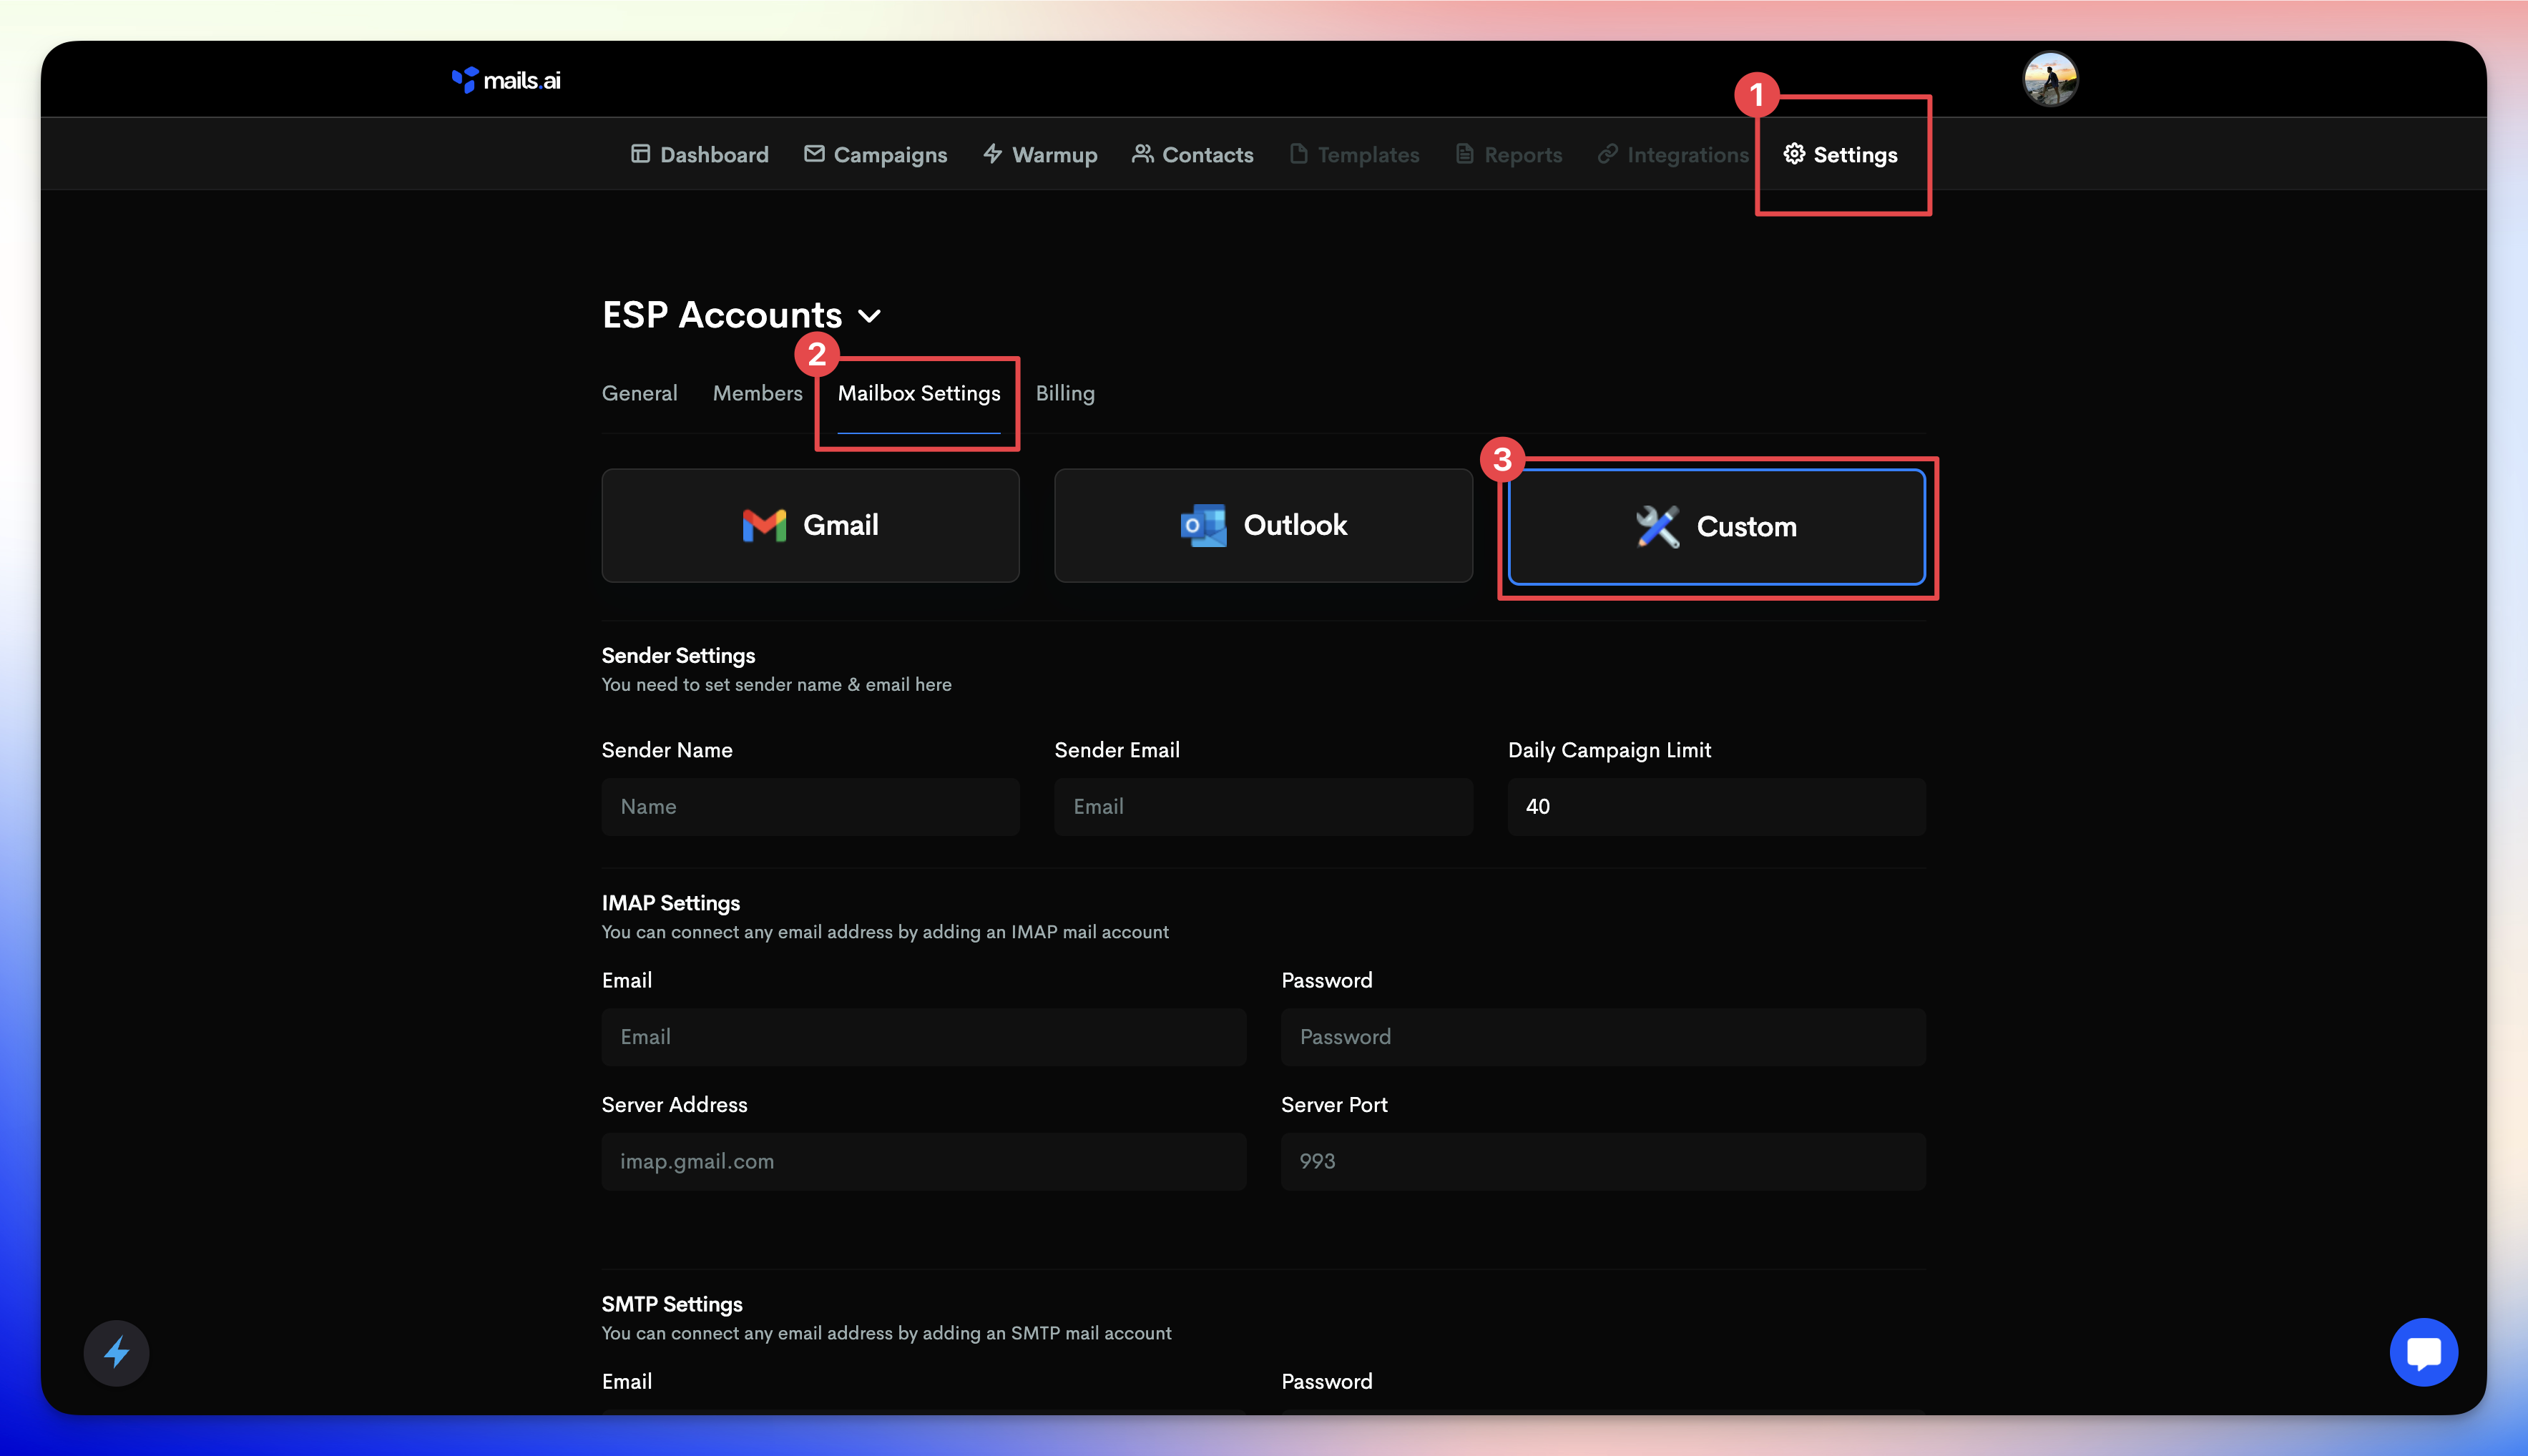
Sender Settings
Sender Name: Input the First and Last Name for the mailbox user you're connecting.
Daily Send Limit: Set the Daily Send limit for this mailbox you're connecting. We recommend anywhere between 20-40 daily send limits per day.
Email: Input the email address that you're connecting
IMAP Settings
Email: Input the email address that you're connecting
Password: Input the Password for that mailbox.
Server Address: input "imappro.zoho.com"
Server Port: input "993"
SMTP Settings
Email: Input the email address that you're connecting
Password: Input the Password for that mailbox.
Server Address: input "smtppro.zoho.com"
Server Port: input "465".
Then click 'Save' and that's it! your mailbox has been connected to Mails.ai.
🎉 Congratulations! Your Zoho mailbox has been connected to Mails.ai.
If you want to add additional mailbox, simply click on 'Add Mailbox' and repeat to connect as many Mailbox as you'd like.
If you encounter an error while connecting your Zoho account to Mails.ai, make sure that you have entered the correct information for SMTP server, port number, SMTP username, and password.
If you're still having trouble connecting your Zoho account, double-check all settings and make sure that you're signed in to the correct account.
Activating Warmup
How to setup warmup and enable it