Quickly manage cold email responses from all of your created email accounts with email forwarding. you can do this in gmail by following google's guide here or by following our step-by-step guide below.
Choose between Domain-Wide forwarding for full-domain control or individual Gmail forwarding for customized control over each account.
Sign in to Google Workspace Admin Console.
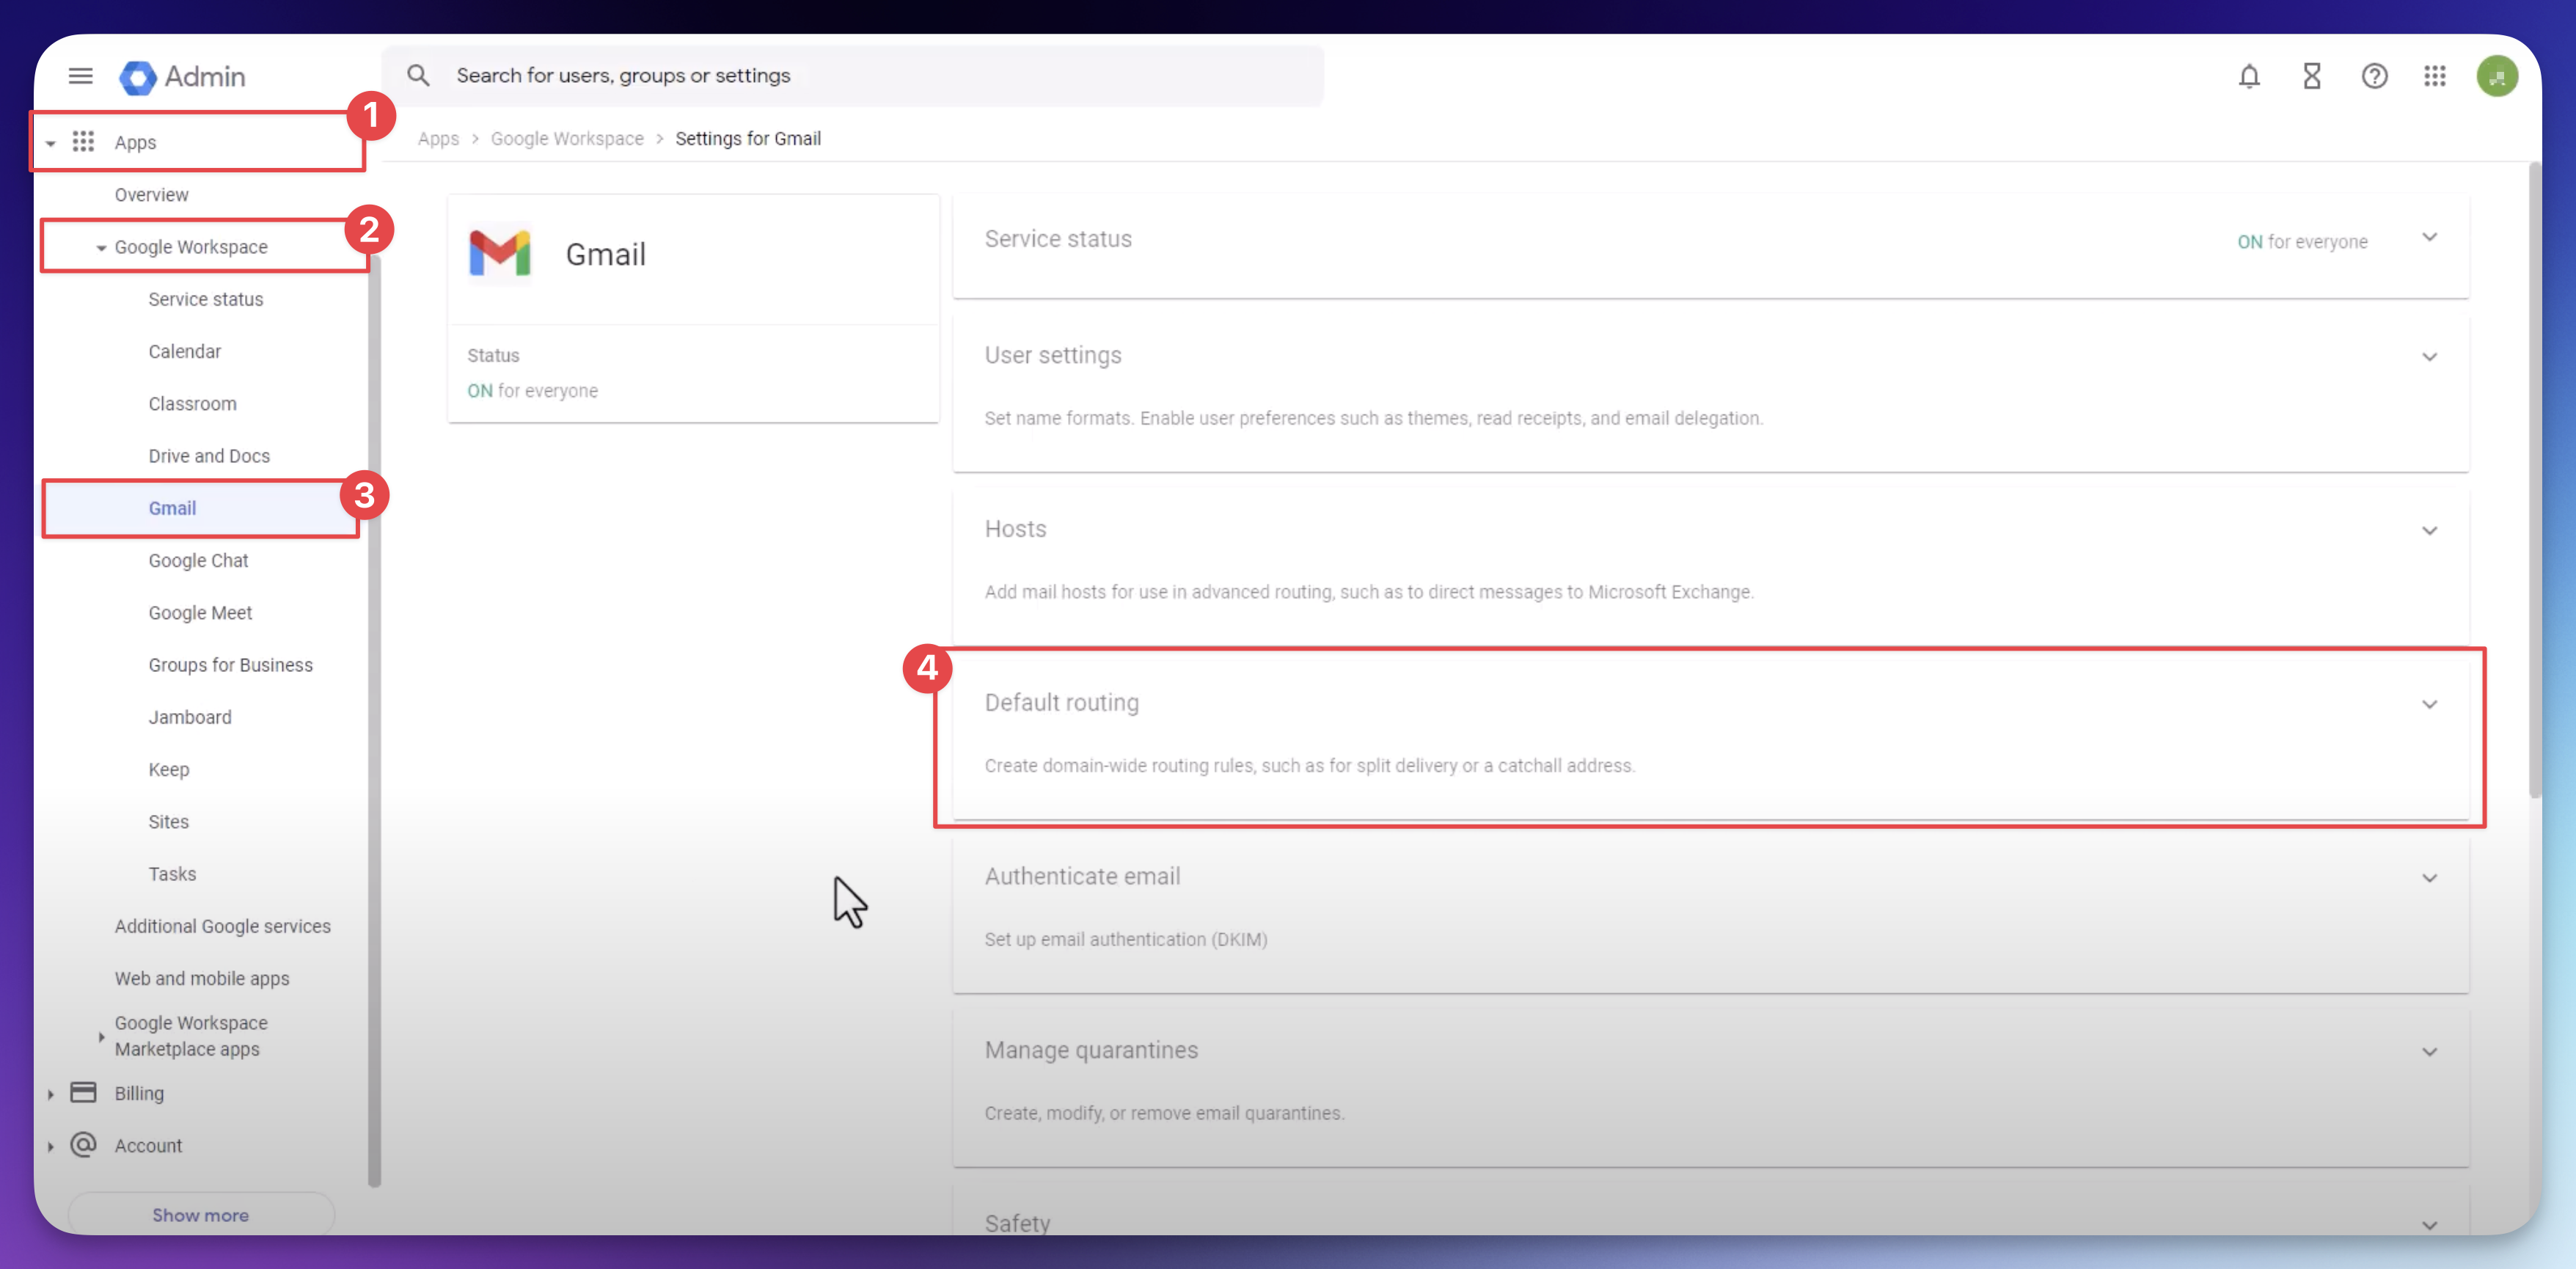
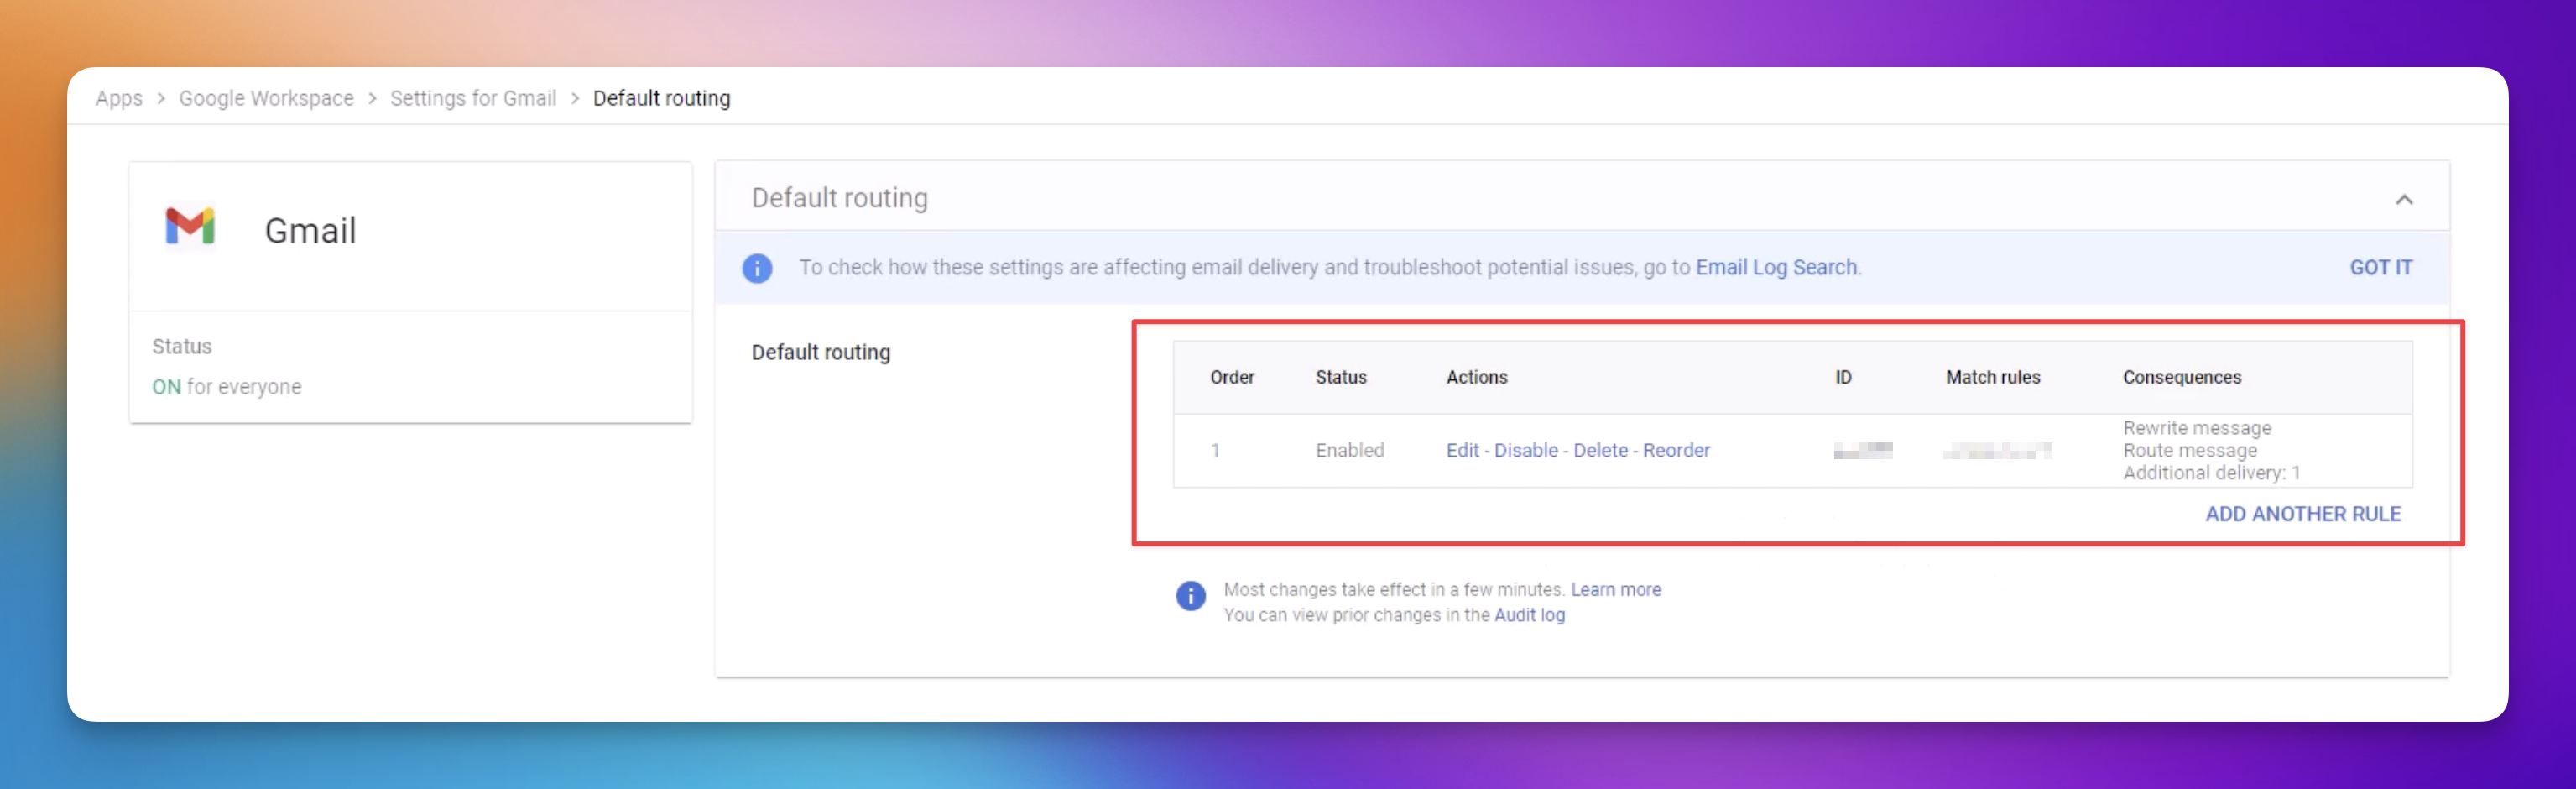
Select 'Apps' -> 'Google Workspace' -> 'Gmail' -> 'Default Routing'.
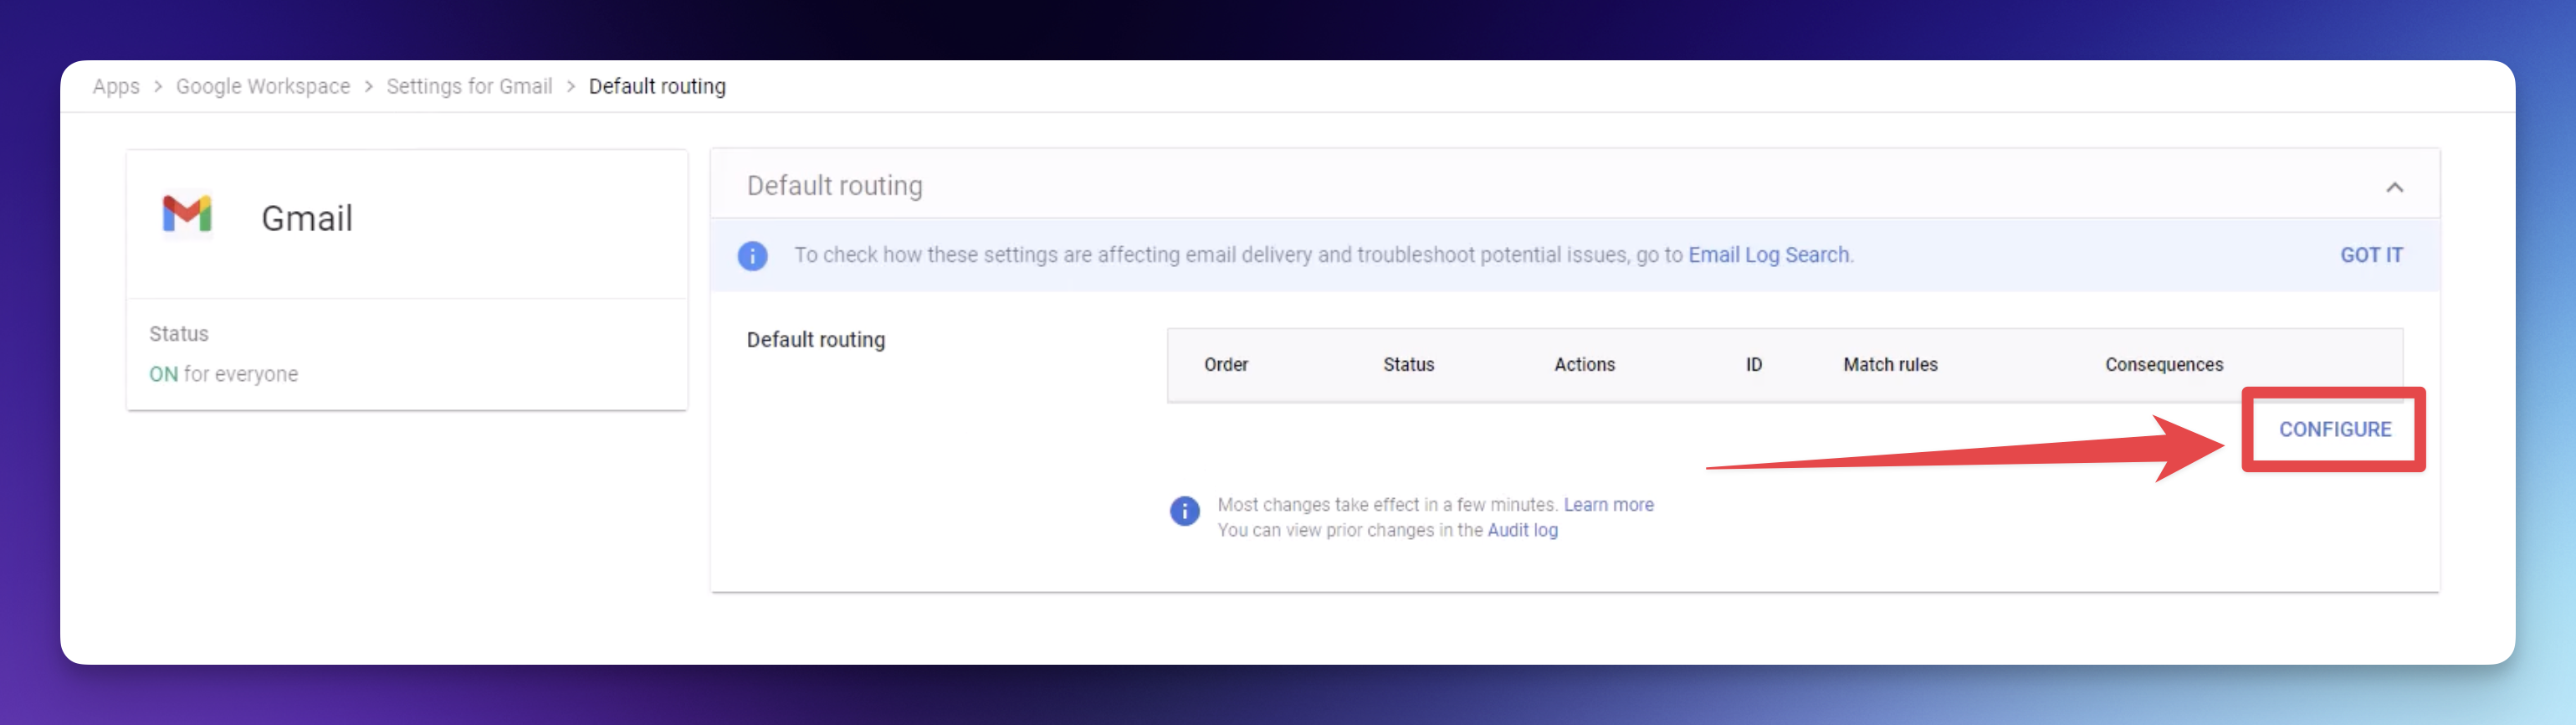
Click 'Configure' or 'Add Another Rule'.
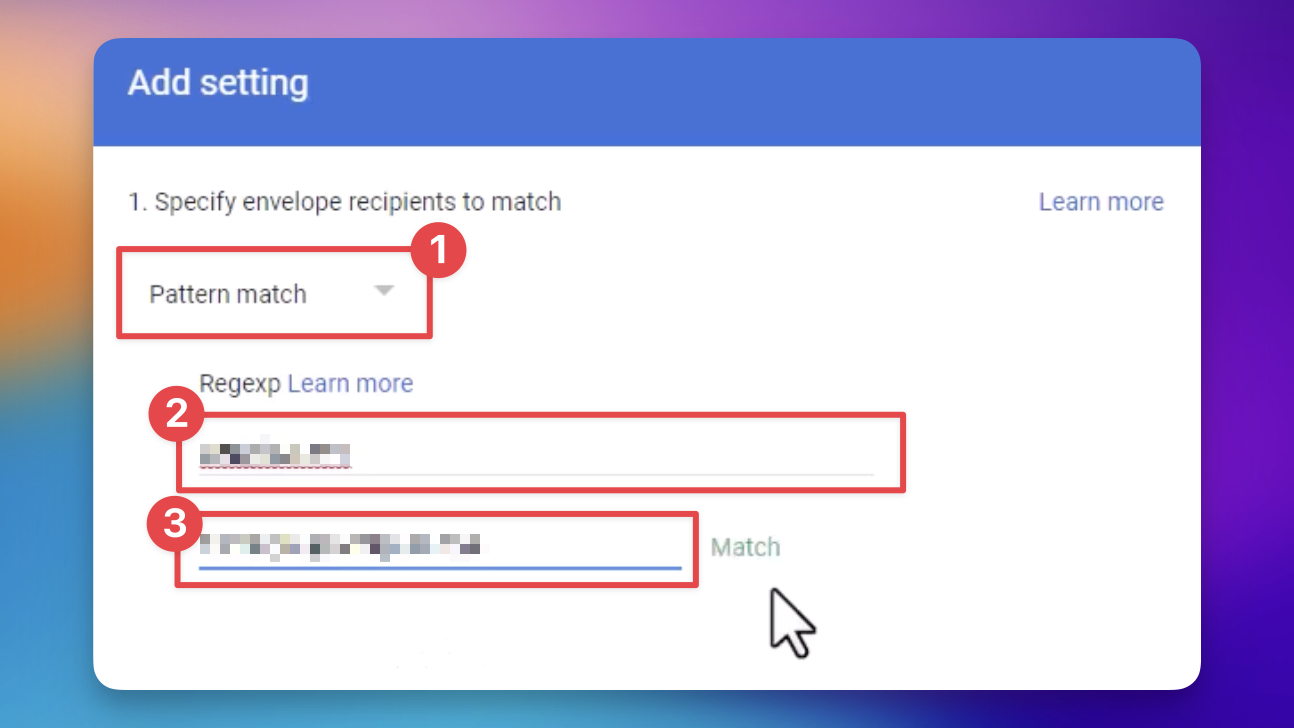
In the "Add setting" window, fill in the following
Under the 'Specify envelope recipients to match' section, select 'Pattern match', enter your domain, and test the expression.
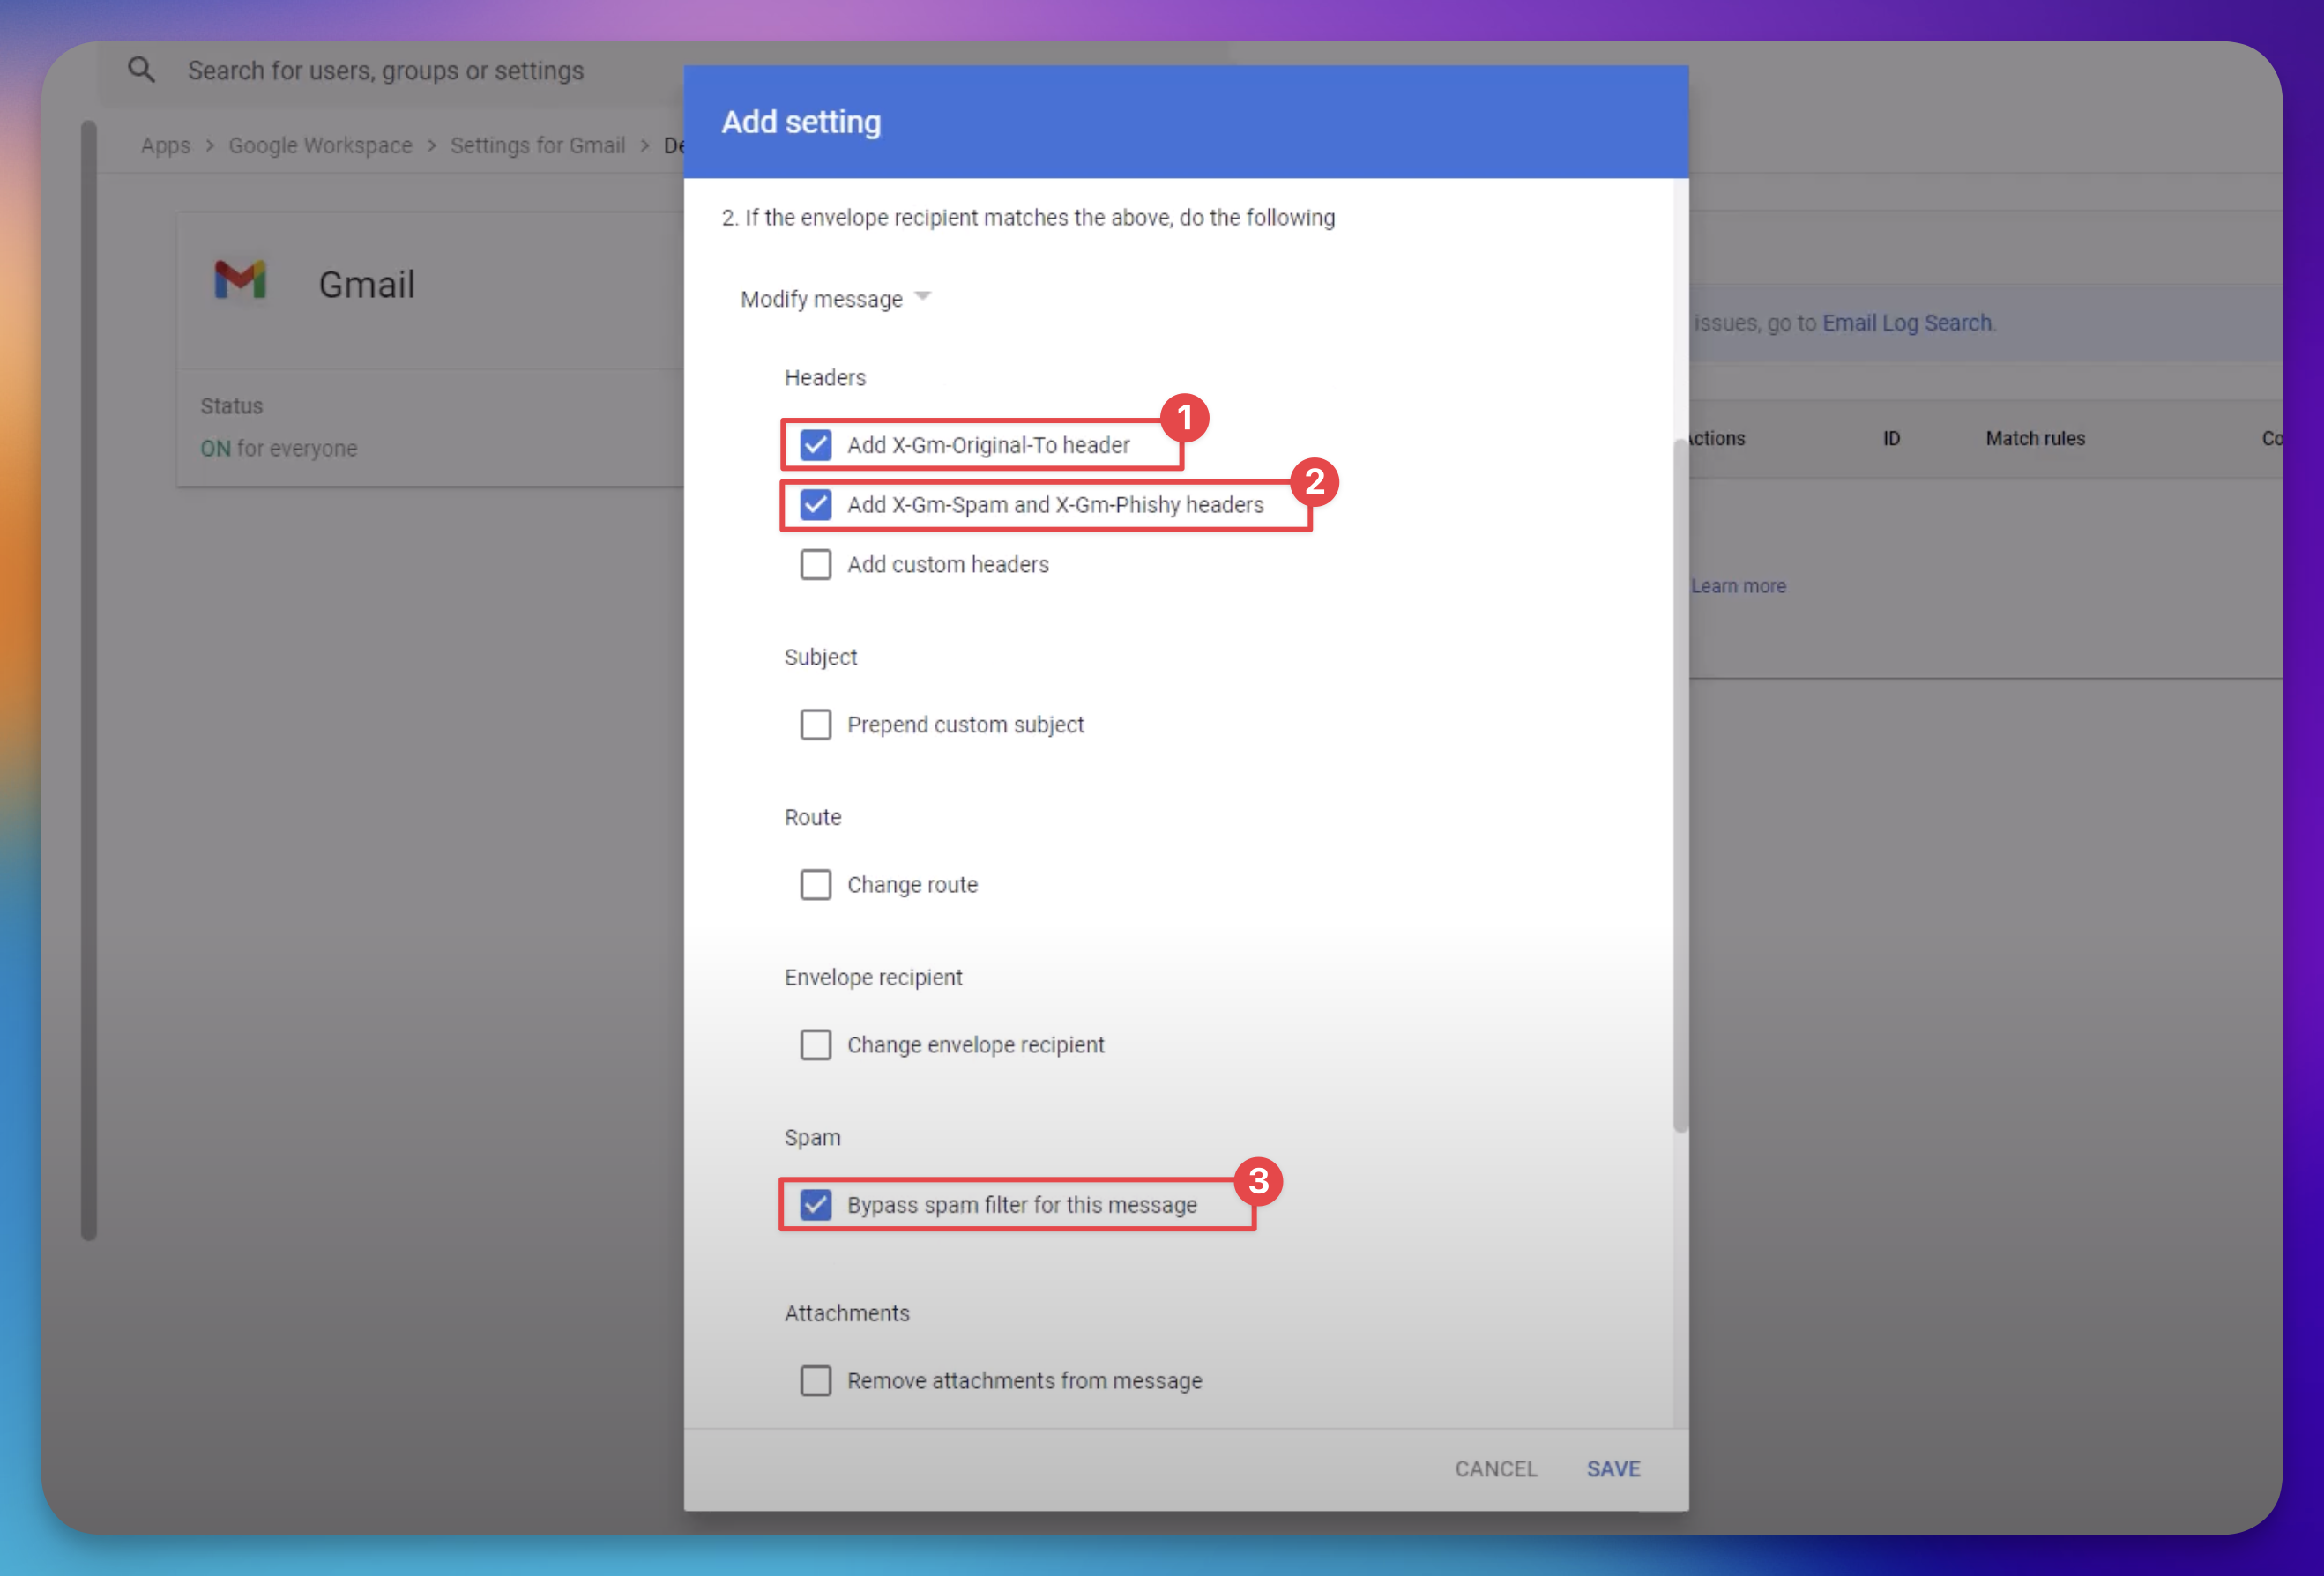
Under the 'If the envelope recipient matches the above' section, select the following
Headers
Check ☑️ 'Add X-Gm-Original-To header'
Check ☑️ 'Add X-Gm-Spam and X-Gm-Phishy headers'
Spam
Check ☑️ 'Bypass spam filter for this message'
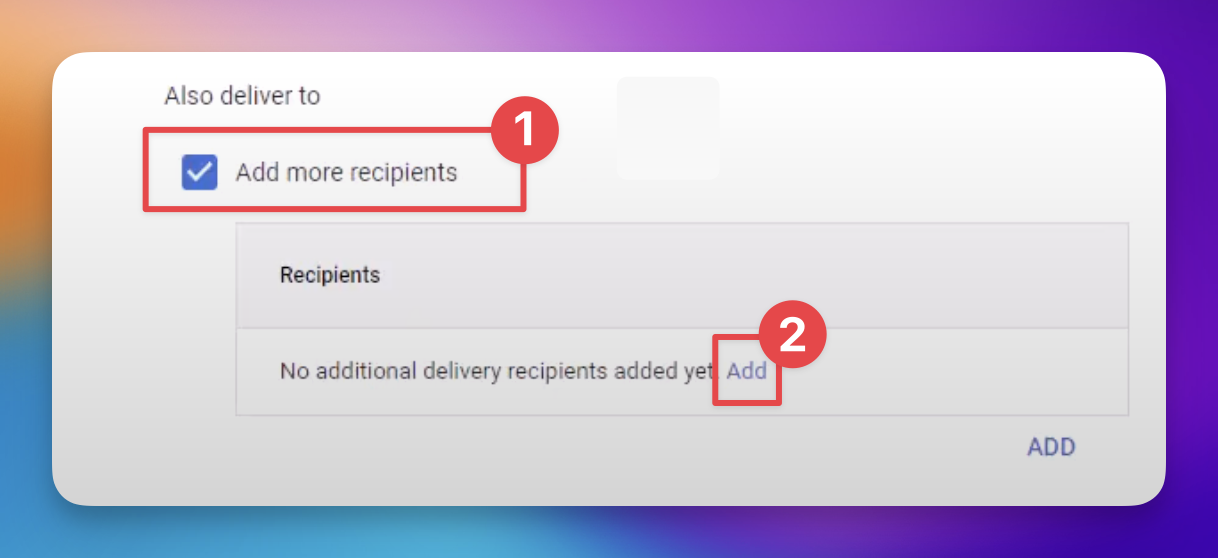
Also deliver to
Check ☑️ 'Add more recipients'
Under "Recipients" click "Add"
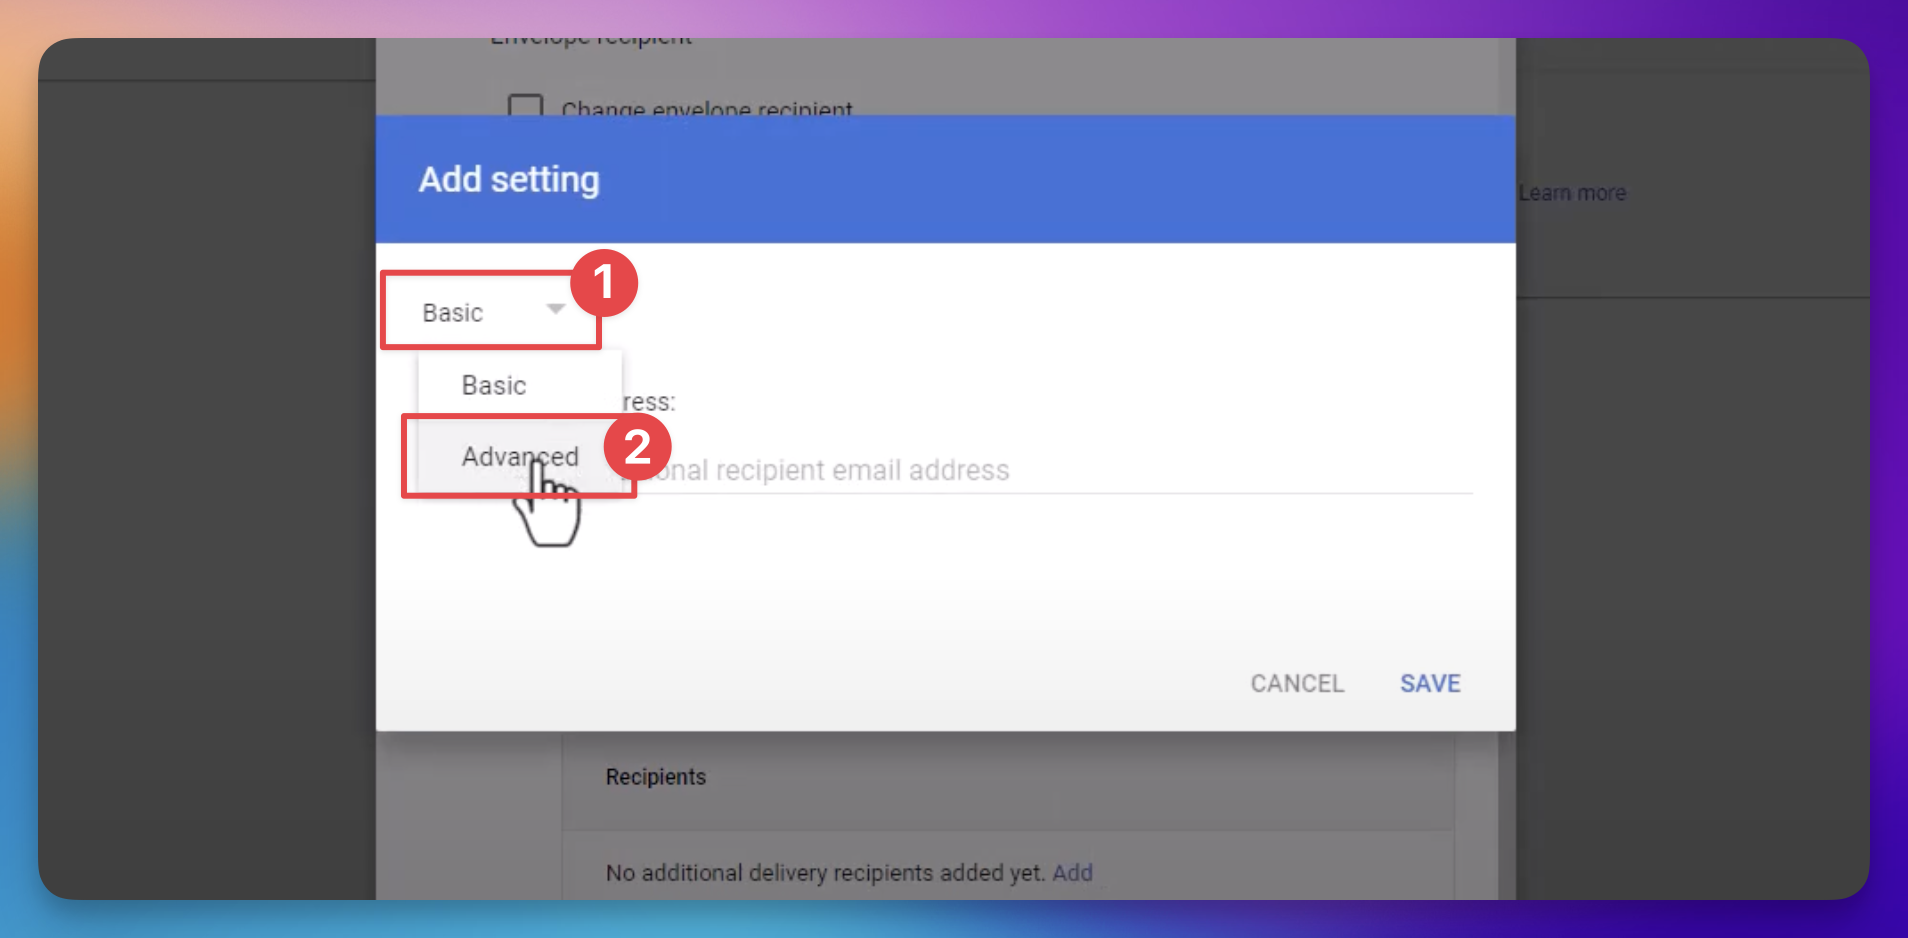
A new window will appear, select 'Advanced' from the dropdown
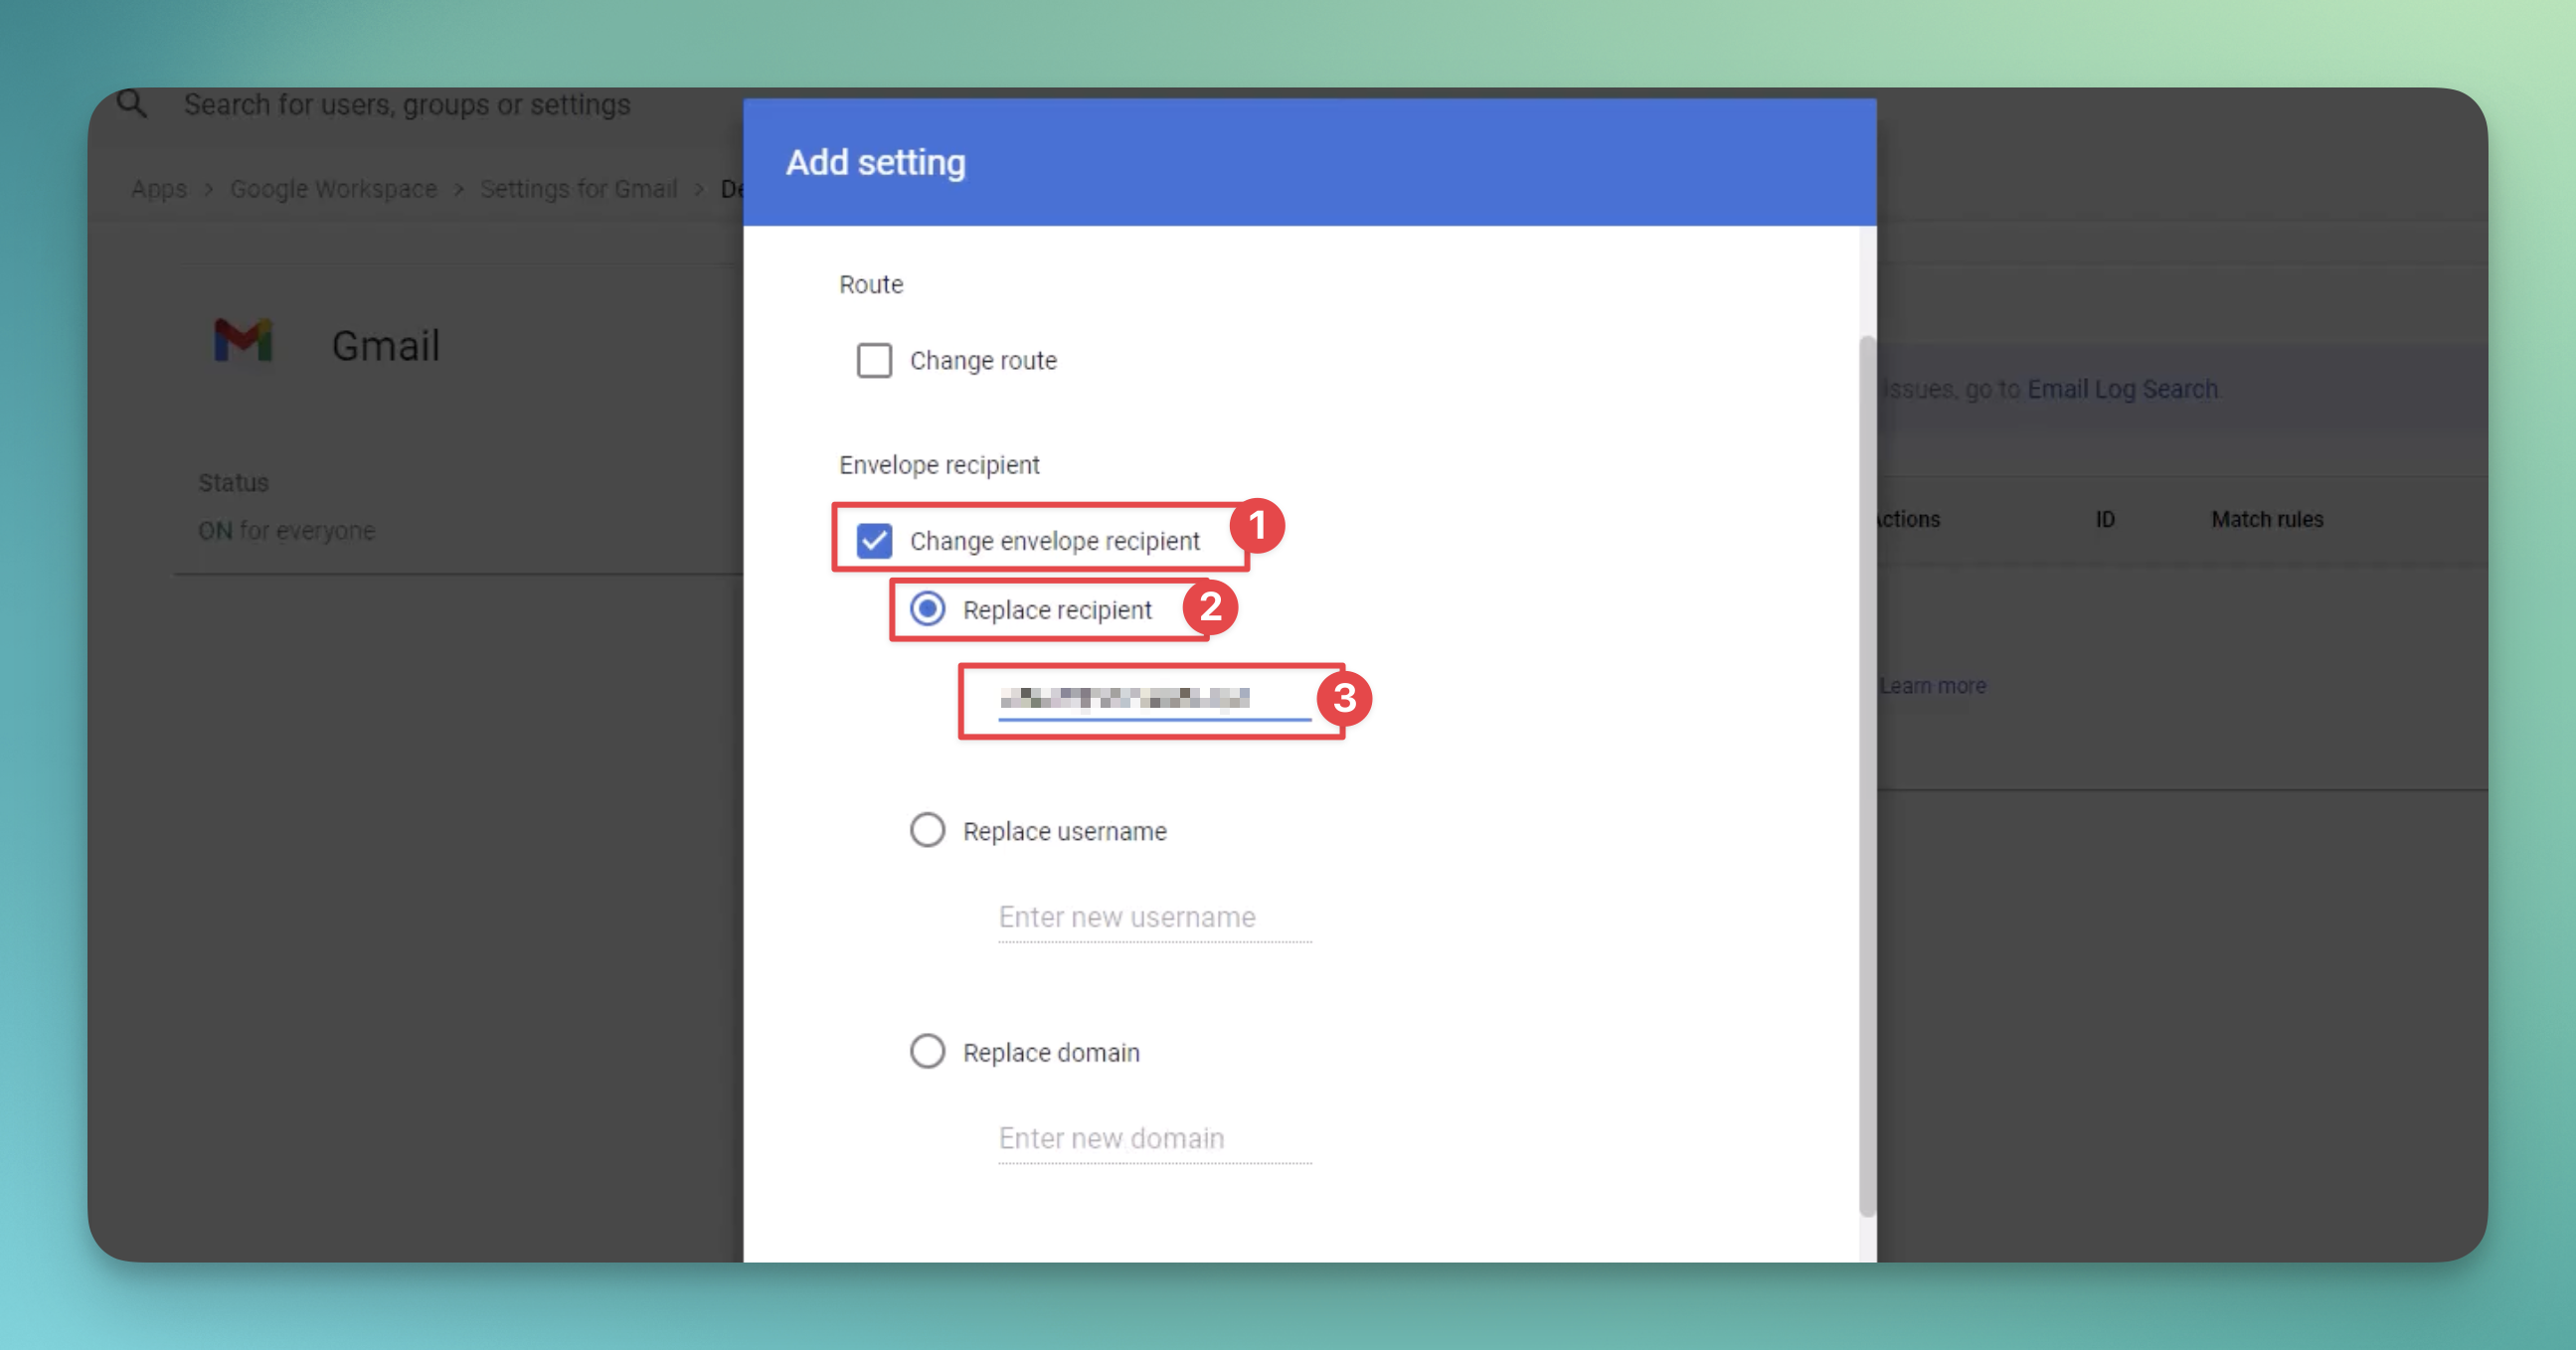
Under "Envelope recipient,"
Check ☑️ 'Change envelope recipient'
Check ☑️ 'Replace recipient'
Enter the recipient email you want to forward to
Under 'Spam and delivery options'
Uncheck ☐ 'Do not deliver spam to this recipient'
Check ☑️ 'Suppress bounces from this recipient'
Under 'Headers'
Check ☑️ 'Add X-Gm-Original-To header'
Click 'Save'

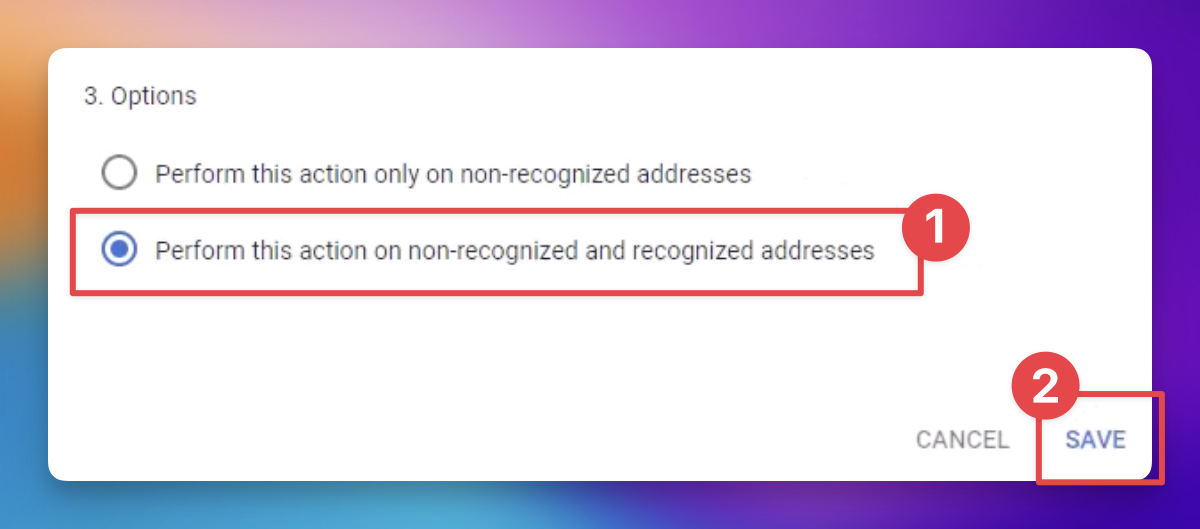
Under the 'Options' section,
select 'Perform this action on non-recognized and recognized addresses' and click 'Save'
After saving the changes, wait an hour for changes to propogate, and then test with a sent email.


Log in to the Gmail account you want emails forwarded from.
Click 'Settings' (gear icon) -> 'See all settings'.

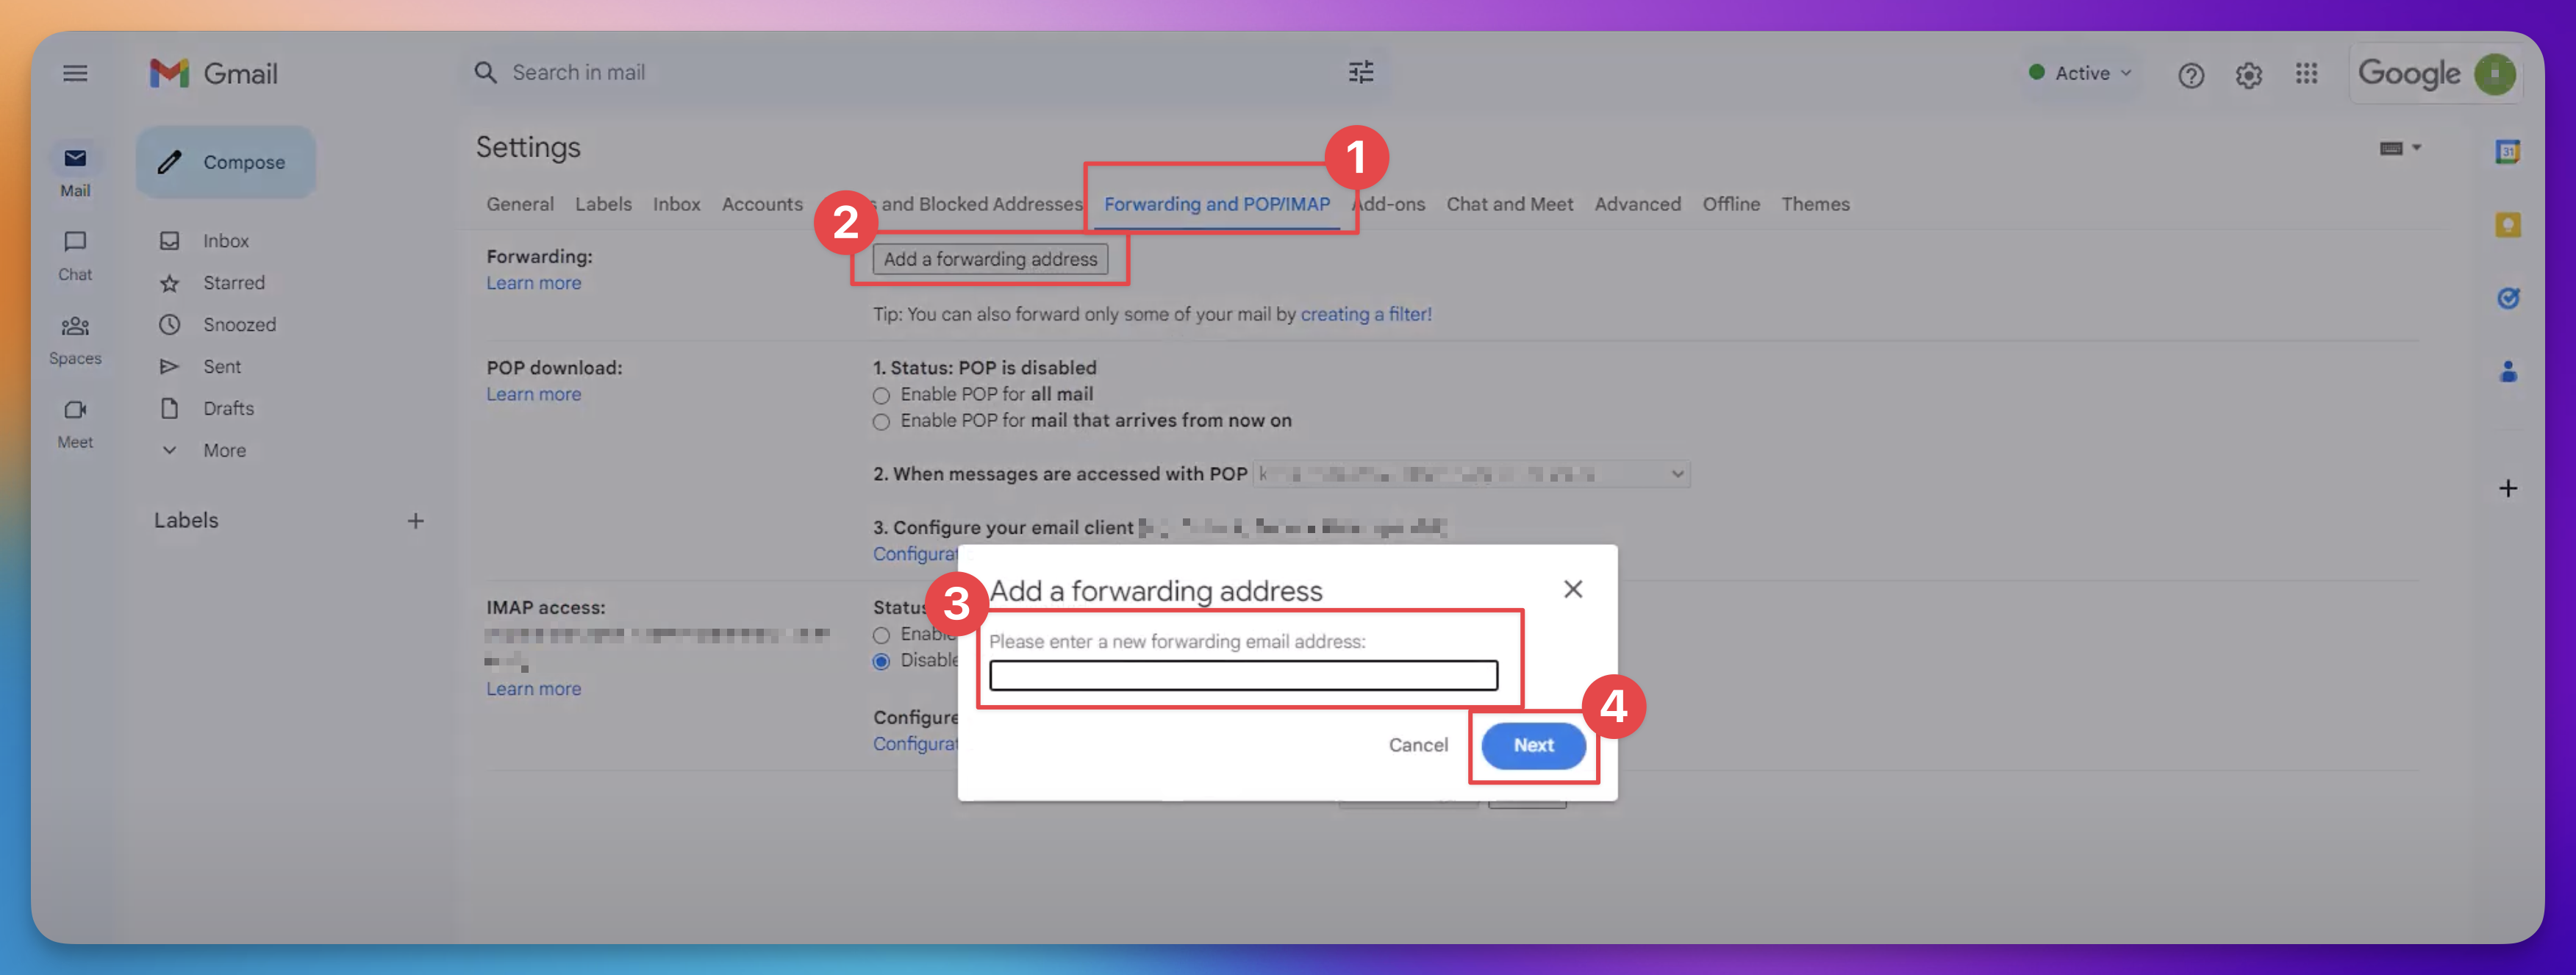
Go to 'Forwarding and POP/IMAP' tab.
Click 'Add a forwarding address', input the forwarding email, and confirm.
A verification email will be sent to the forwarding email. Open it and click the verification link.
Back in 'Forwarding and POP/IMAP' settings, select 'Forward a copy of incoming mail to…' and decide handling of Gmail's copy.
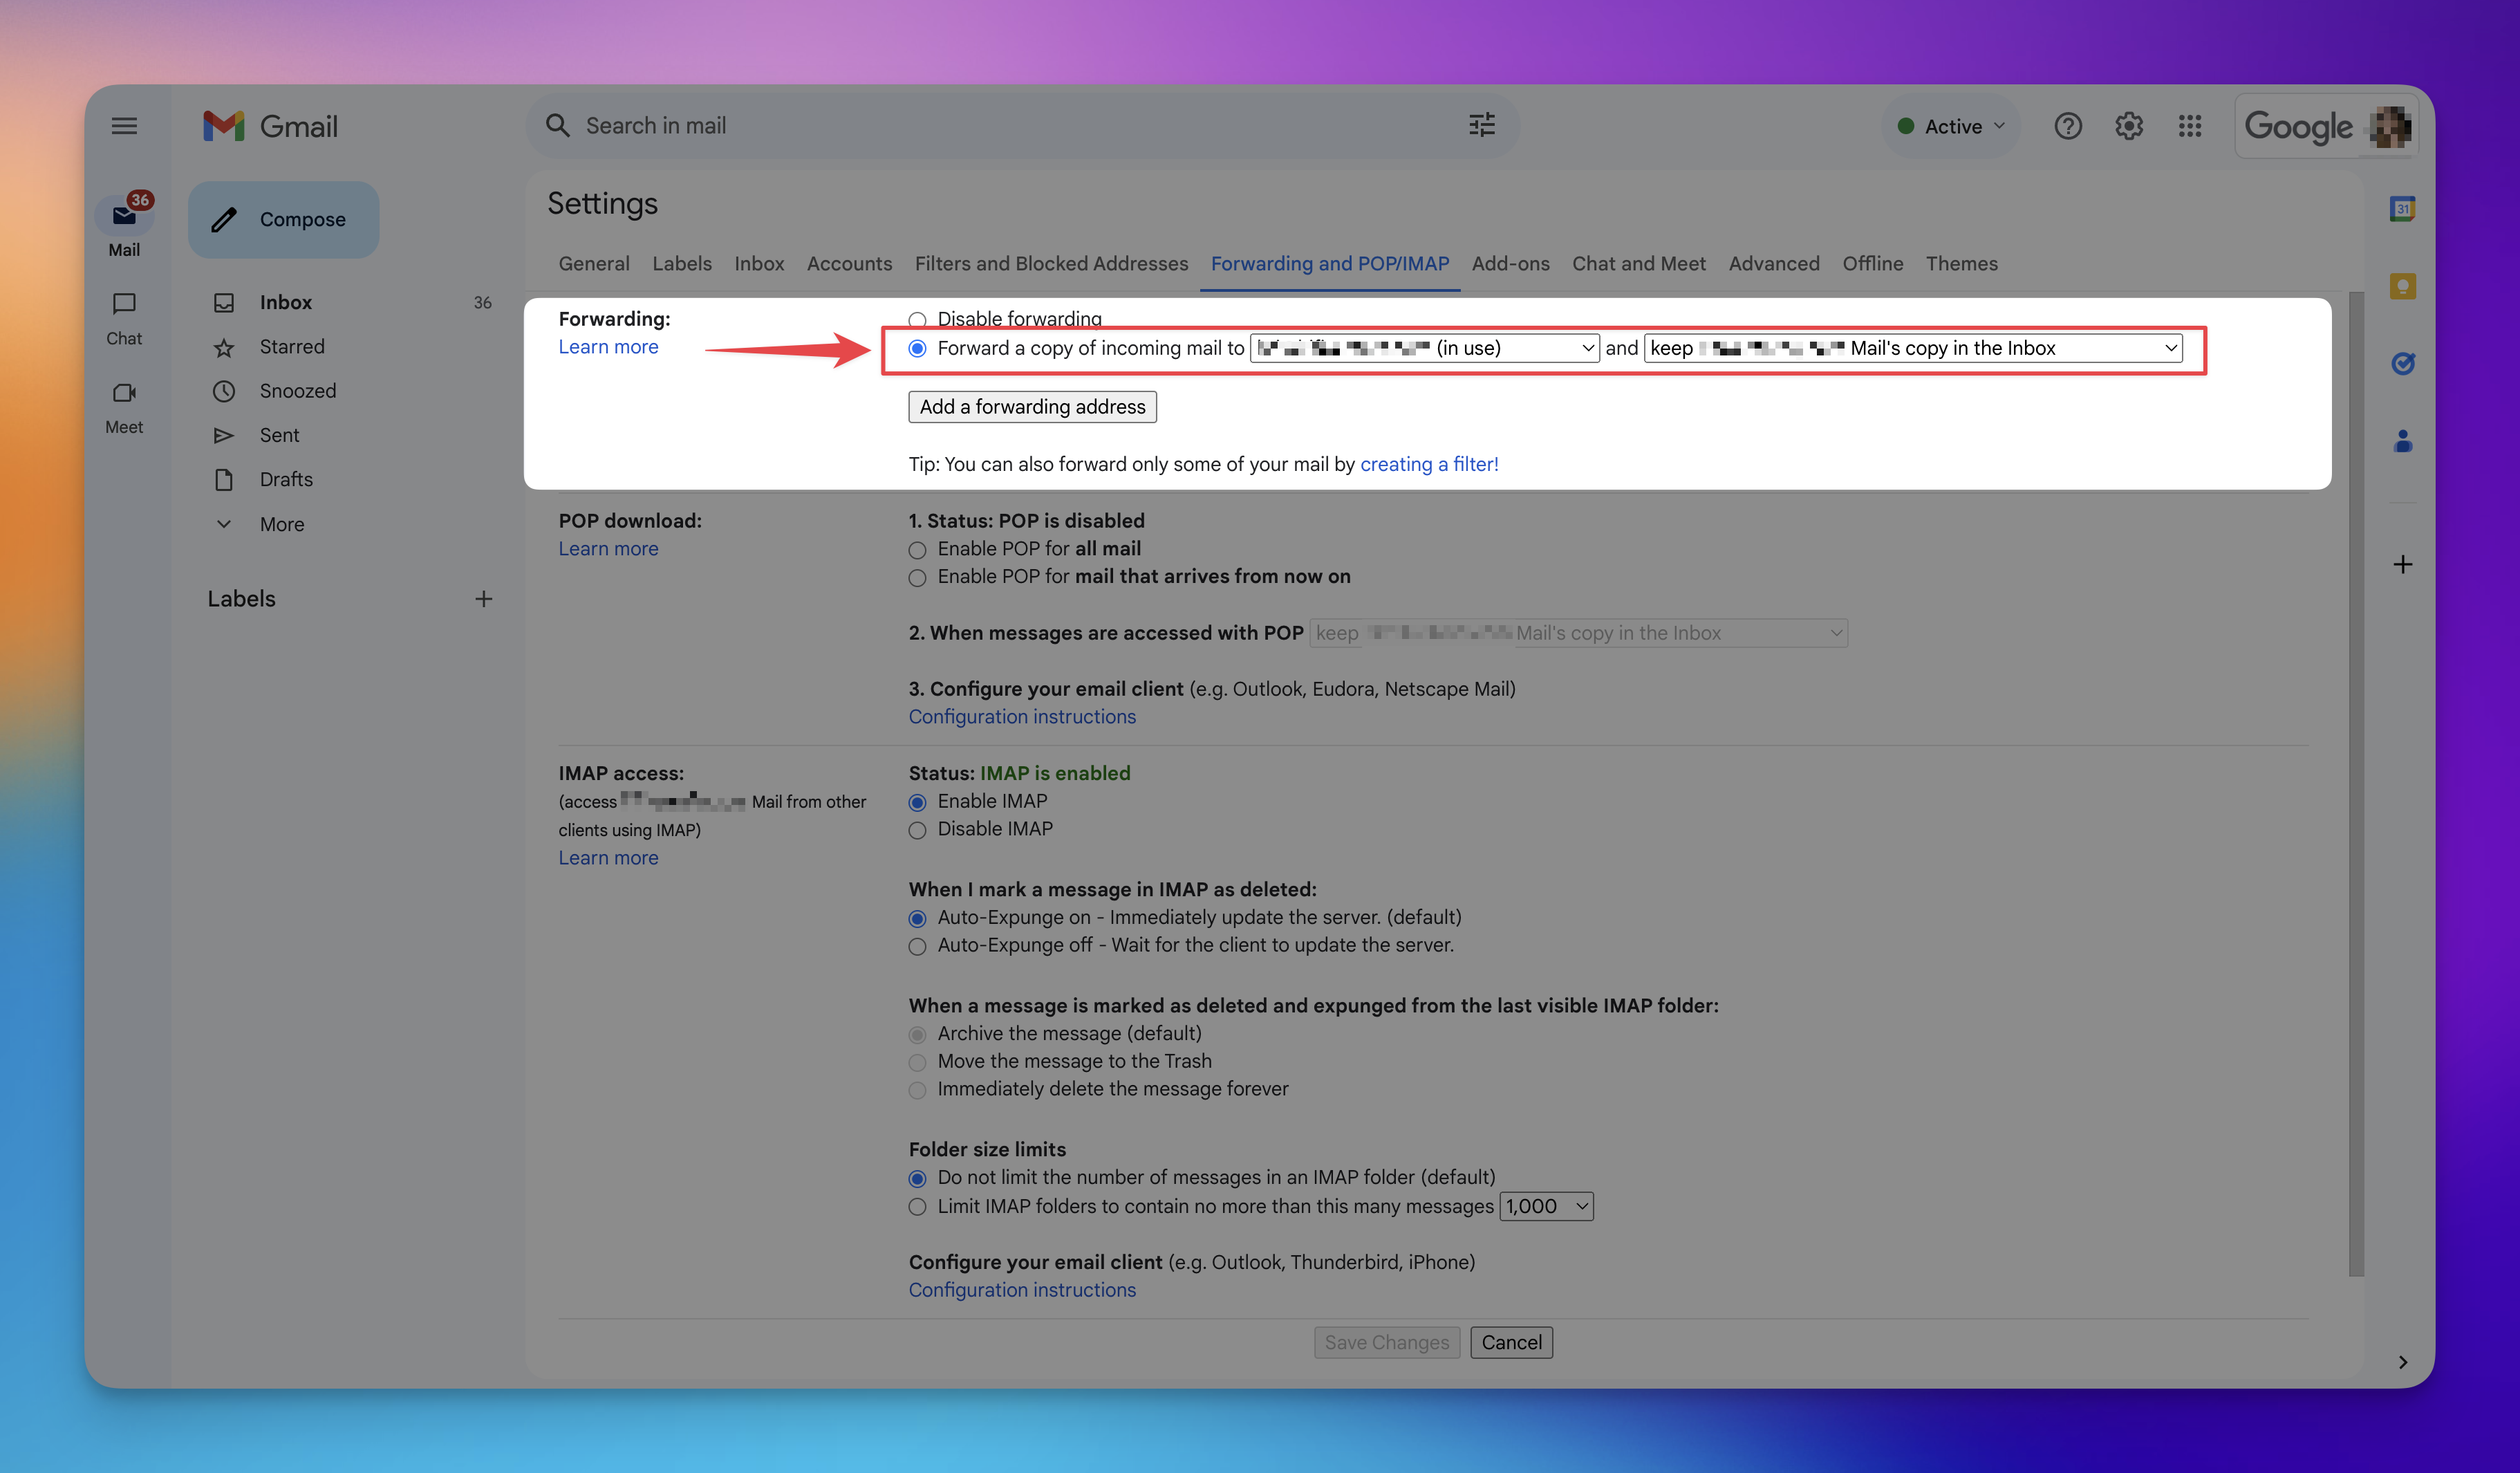
Click 'Save changes' and test by sending an email to the account.
Step 1: Add External Email Address
Open Gmail, click the 'Settings' (gear) icon, and select ‘See all settings’.
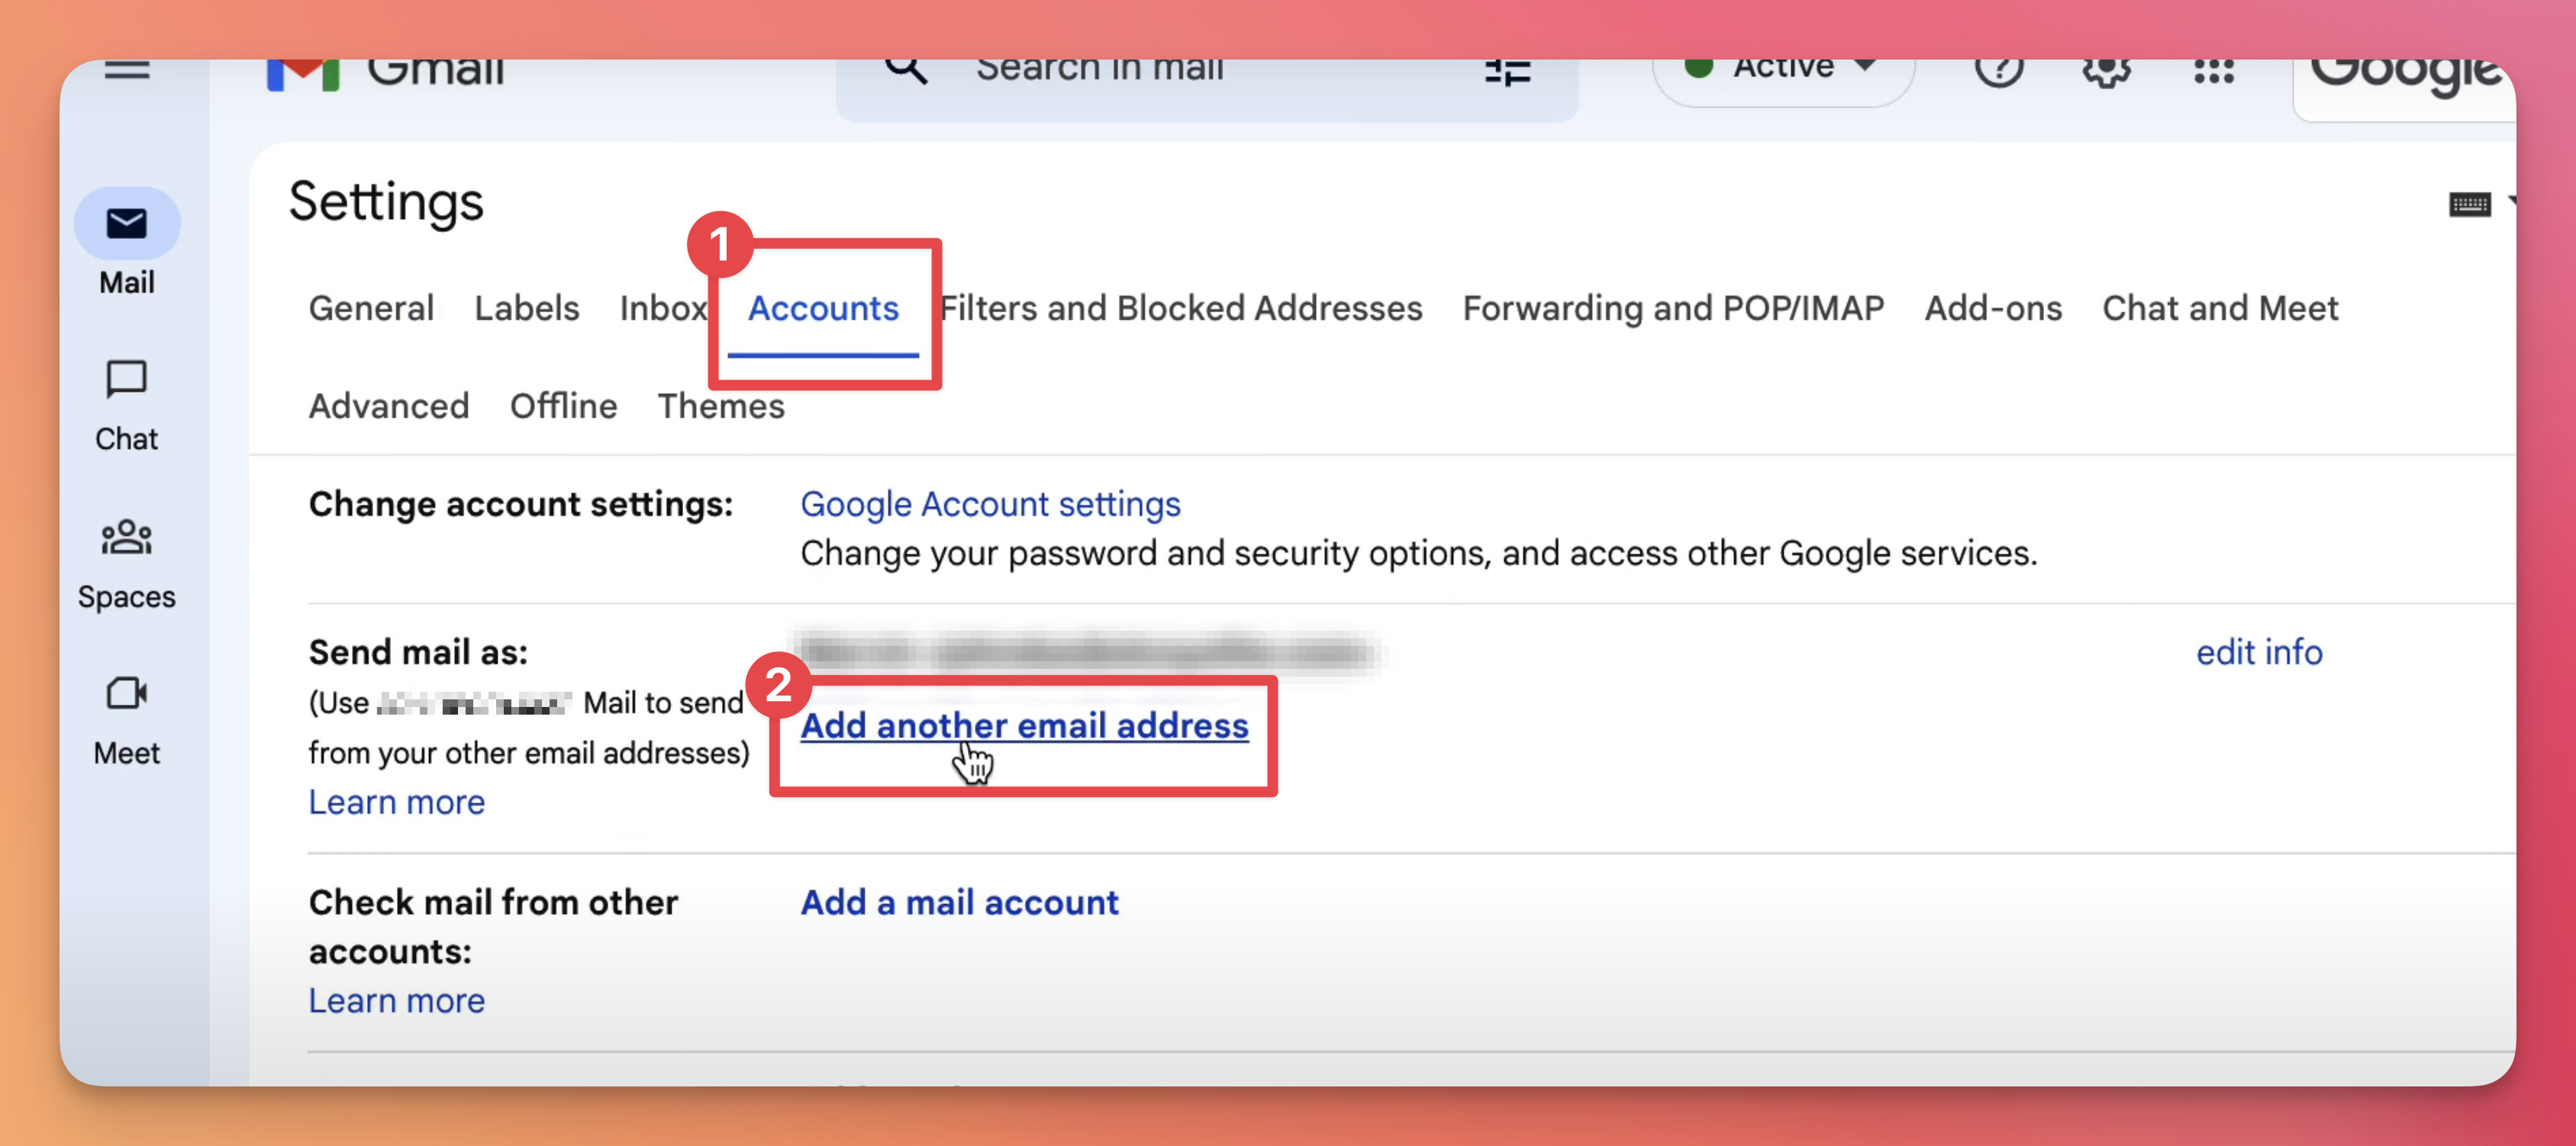
Go to the ‘Accounts' tab.
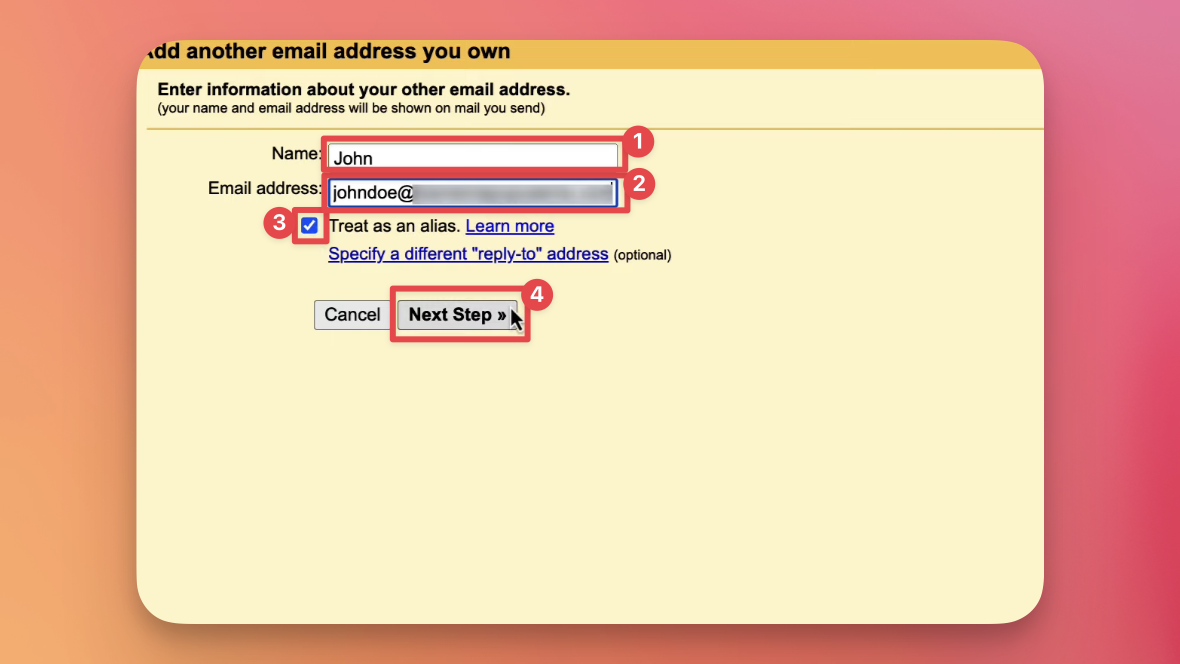
In ‘Send mail as’, click ‘Add another email address’.
Enter your name and the external email address. Check ‘Treat as an alias’.
Click ‘Next Step’.
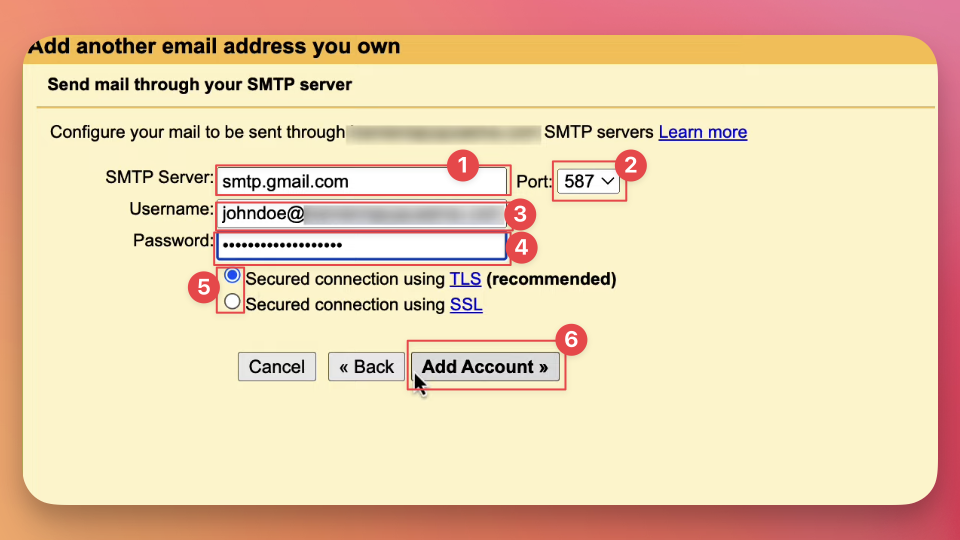
Step 2: Configure SMTP Settings
For ‘SMTP Server’, enter ‘smtp.gmail.com’.
Set ‘Port’ to ‘587’.
Choose ‘TLS’ for ‘Secure connection using’.
Enter your Gmail/Google Workspace email in ‘Username’.
Enter your Gmail/Google Workspace password or App Password.
Click ‘Add Account’.
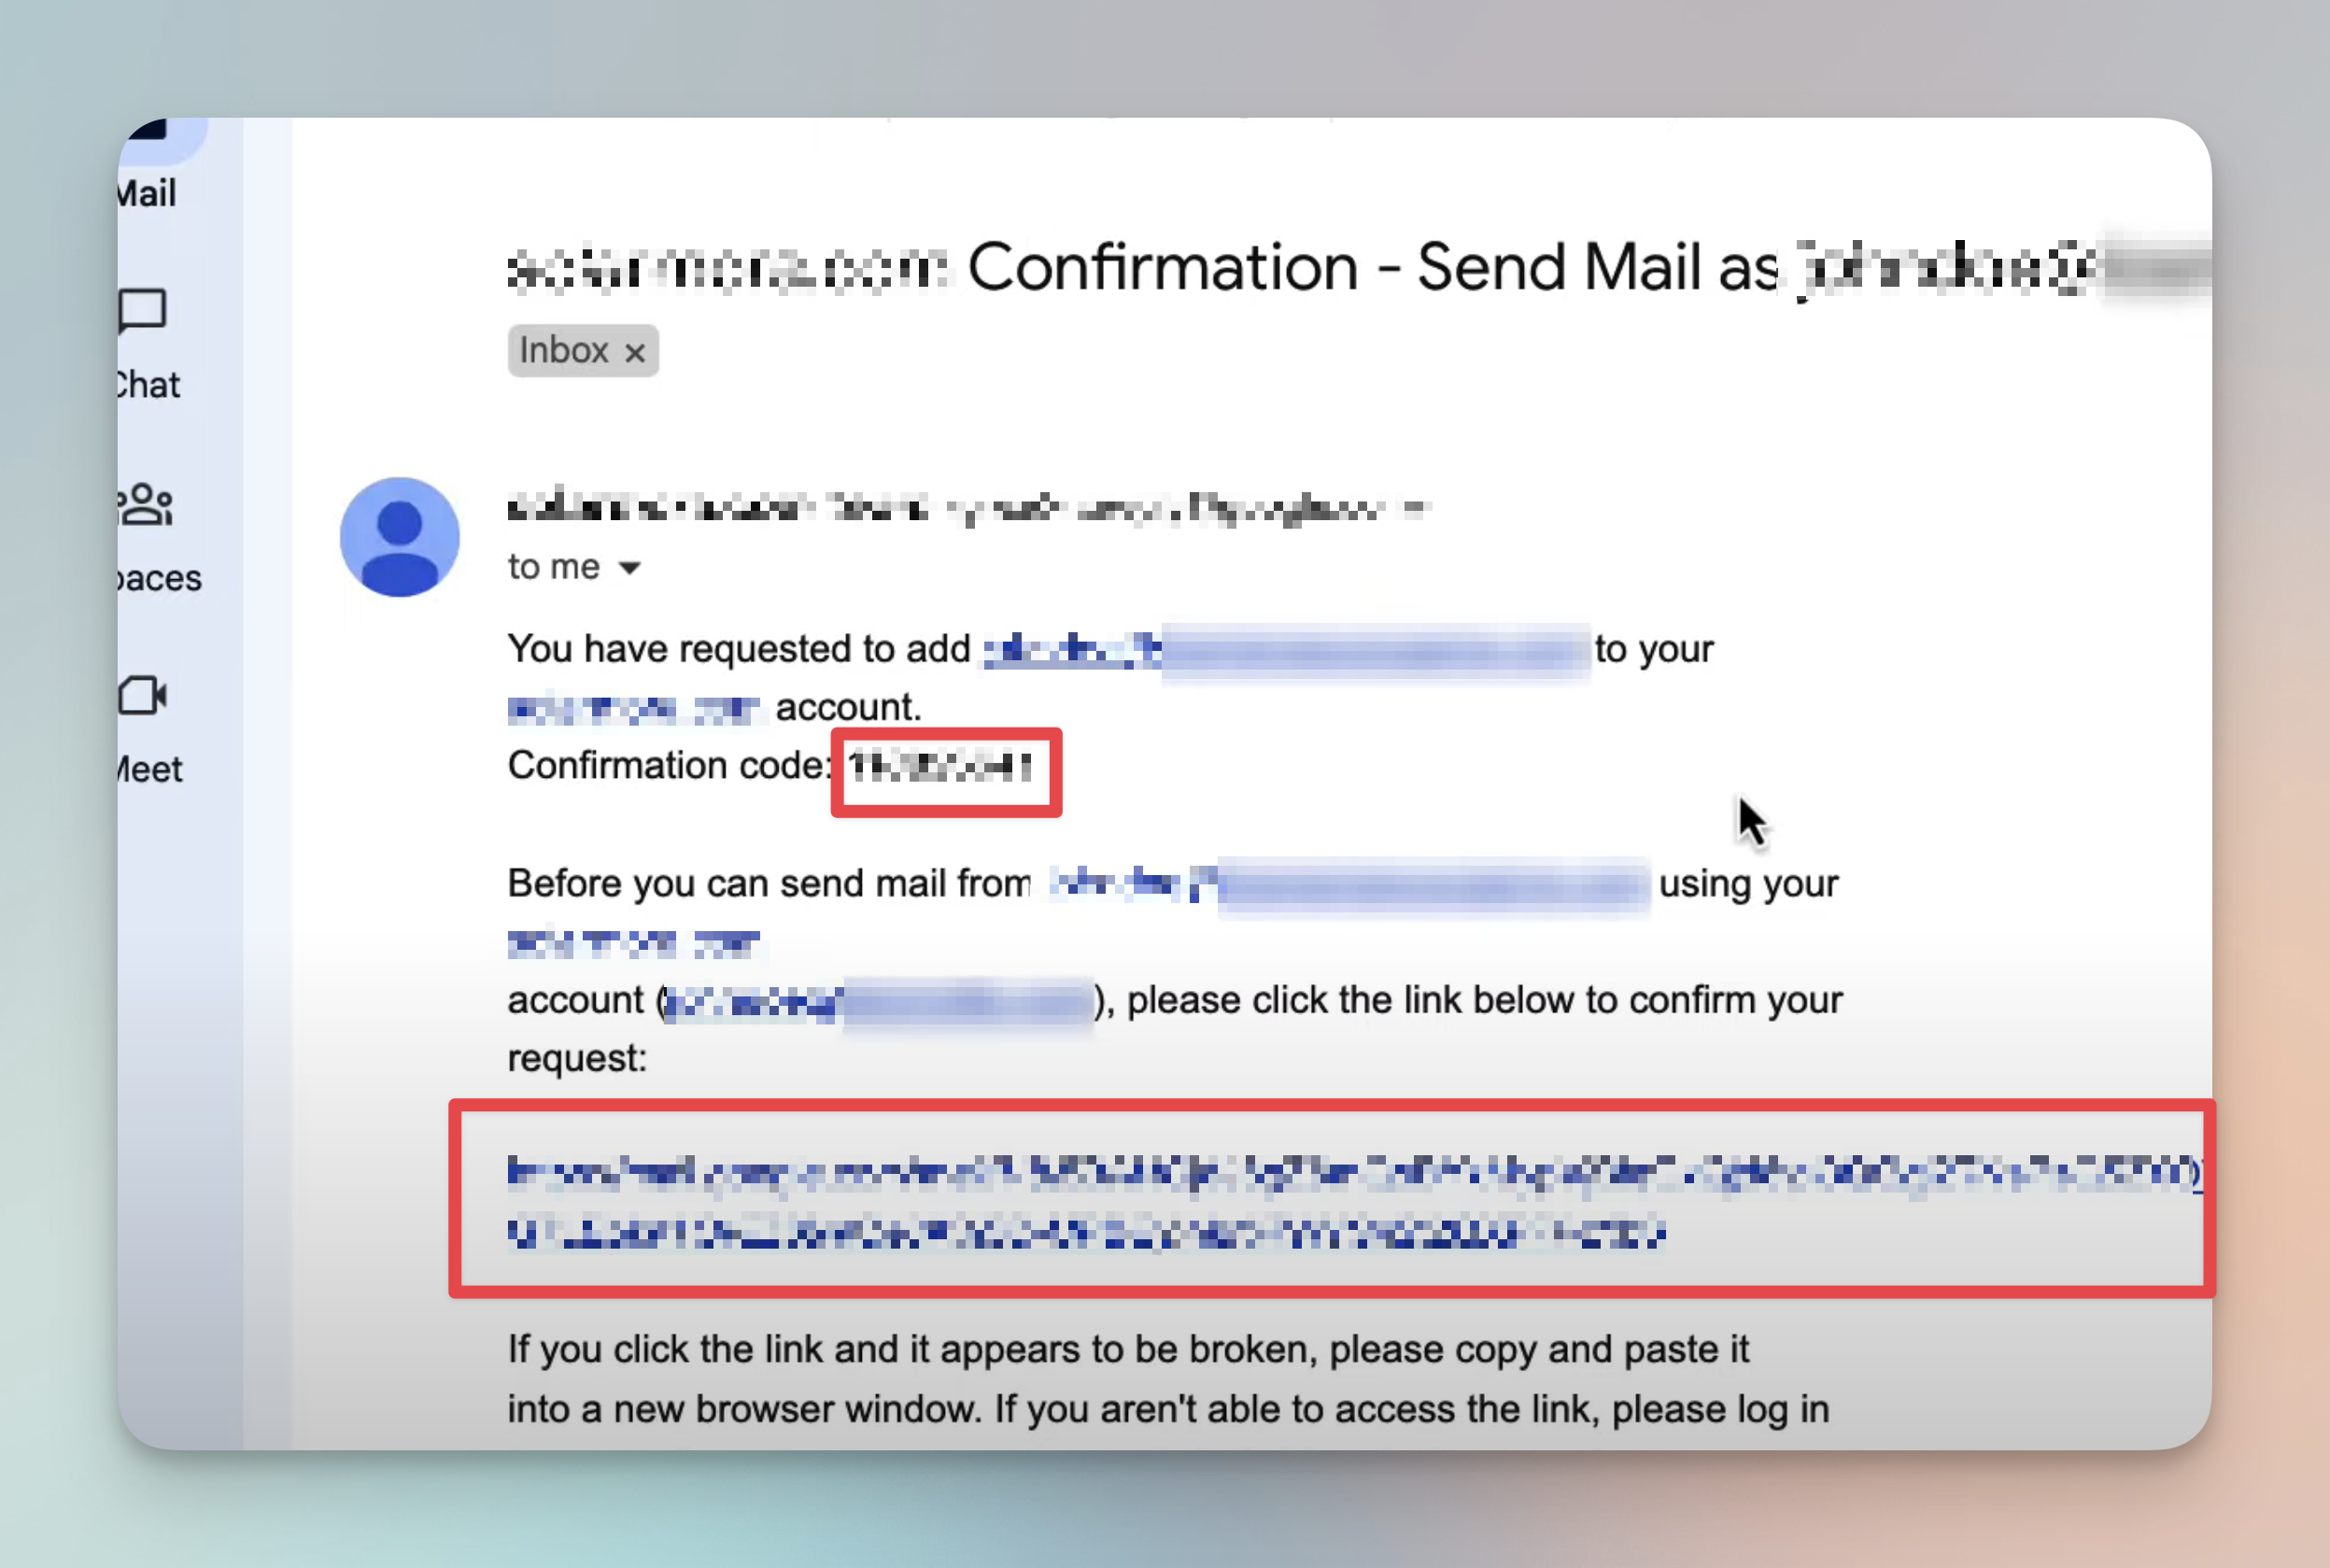
Step 3: Verify the Email Address
Log into your external email account.
Open the verification email from Gmail.
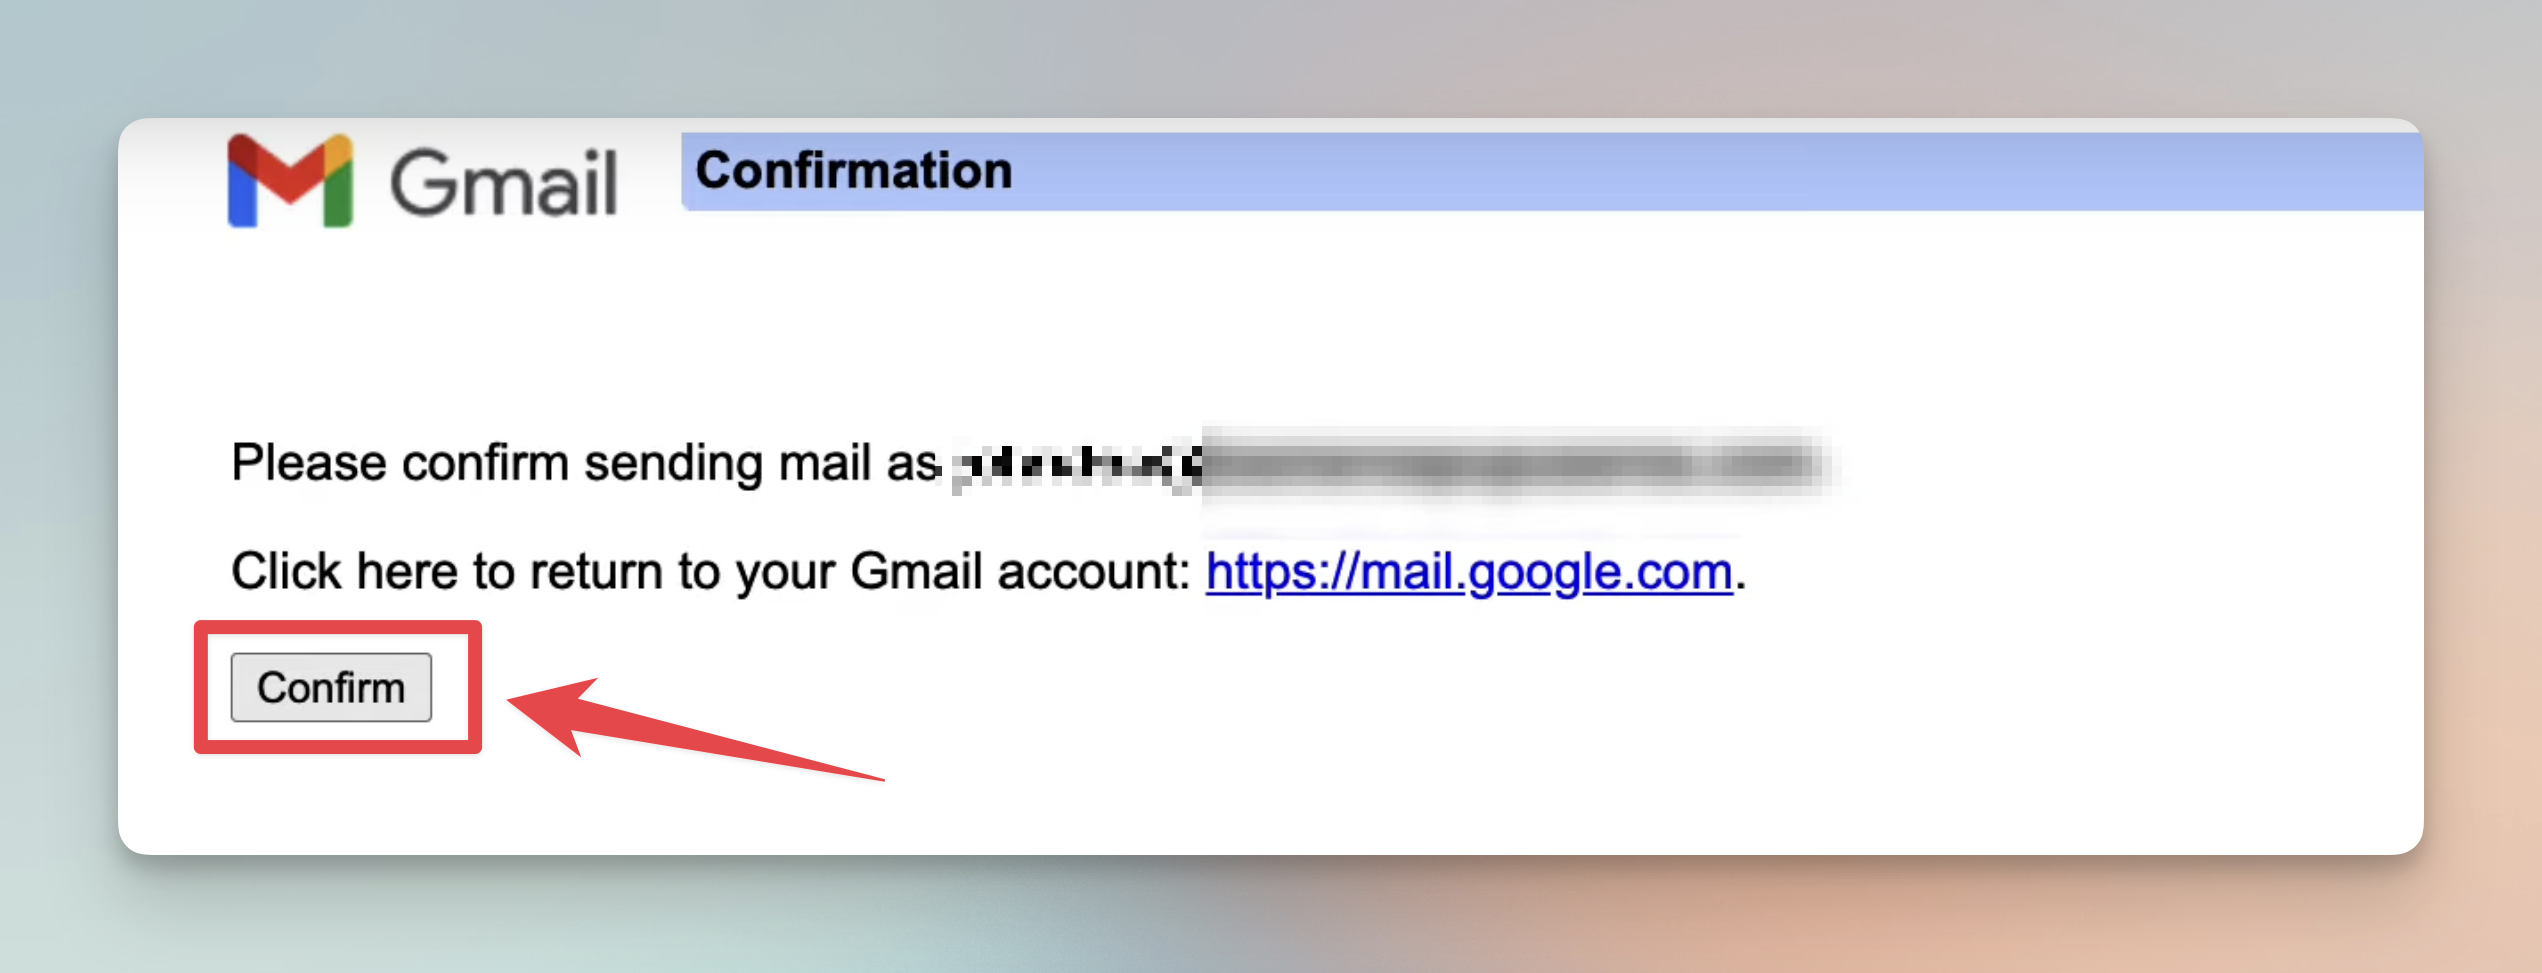
Click the link provided or enter the code in Gmail settings.
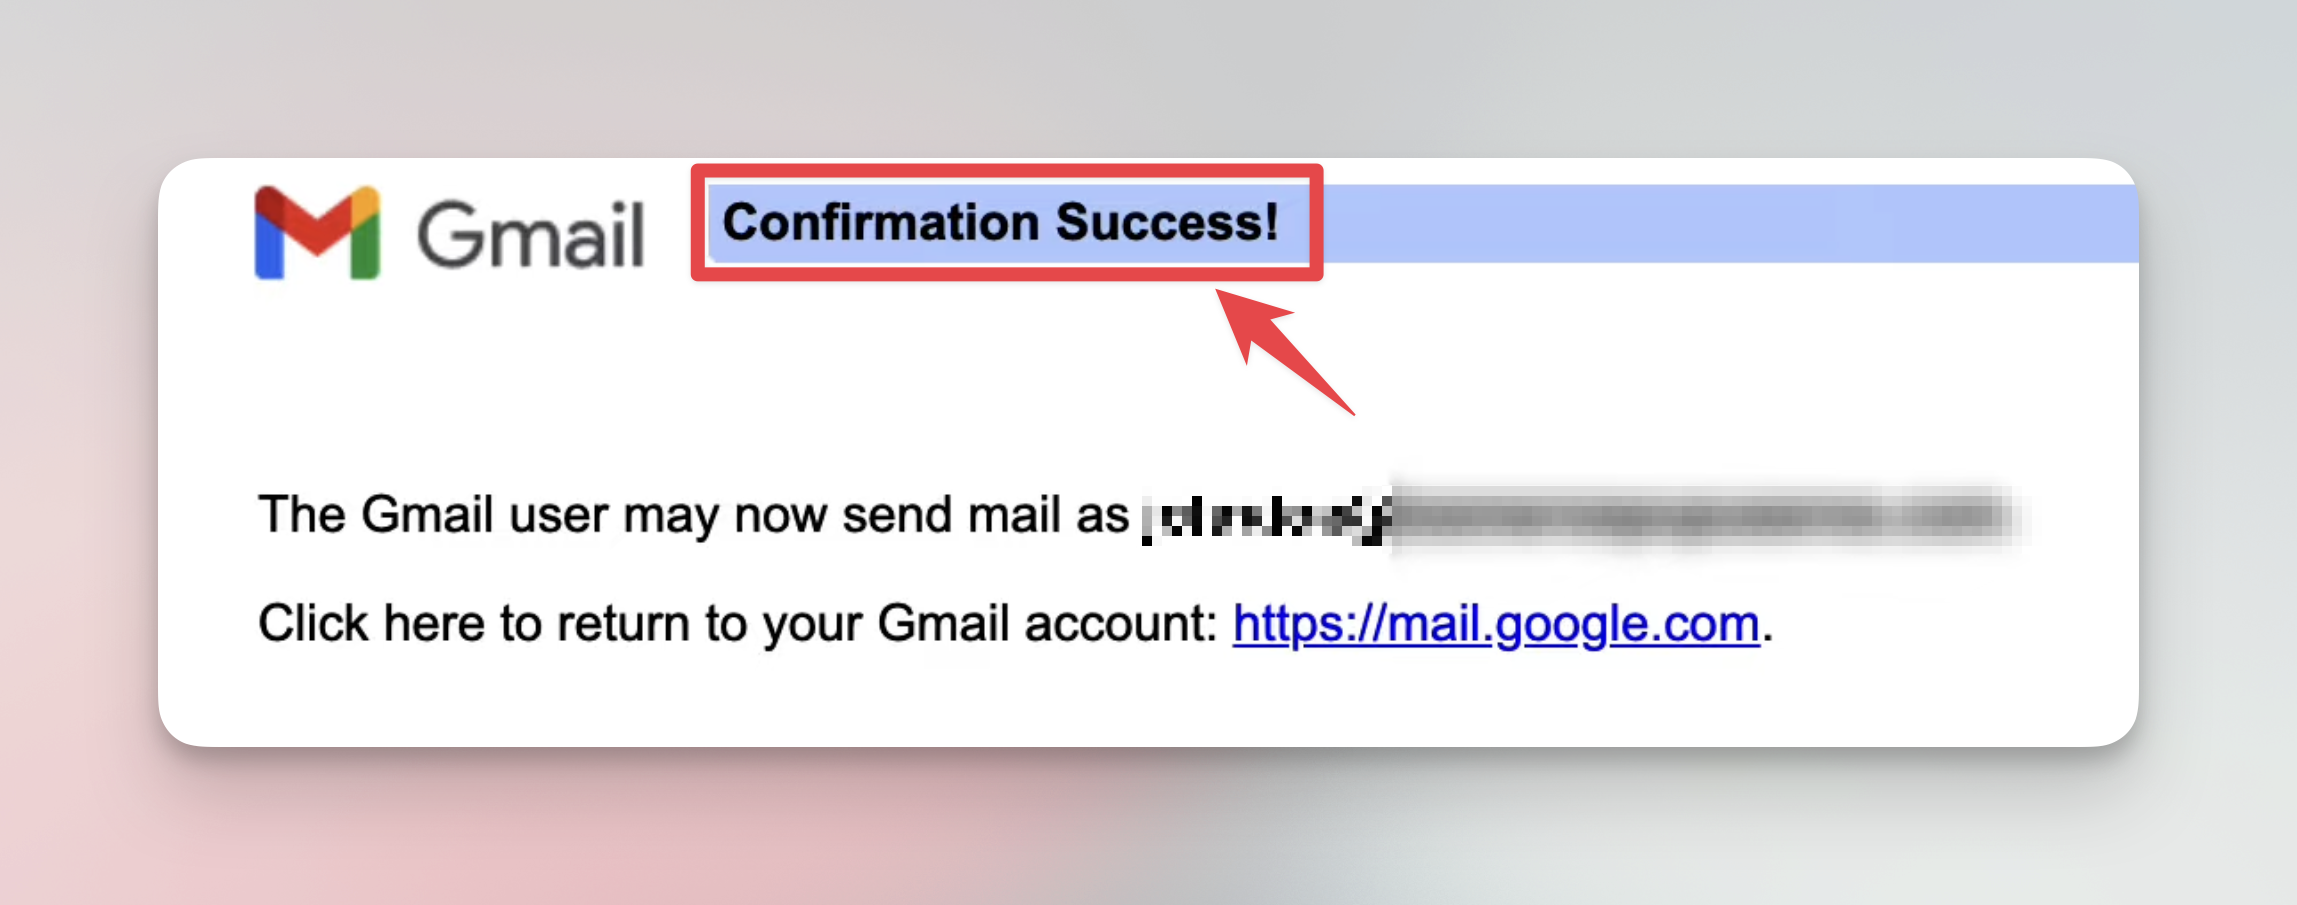
Click 'Confirm' or ‘Verify’ with the provided code.
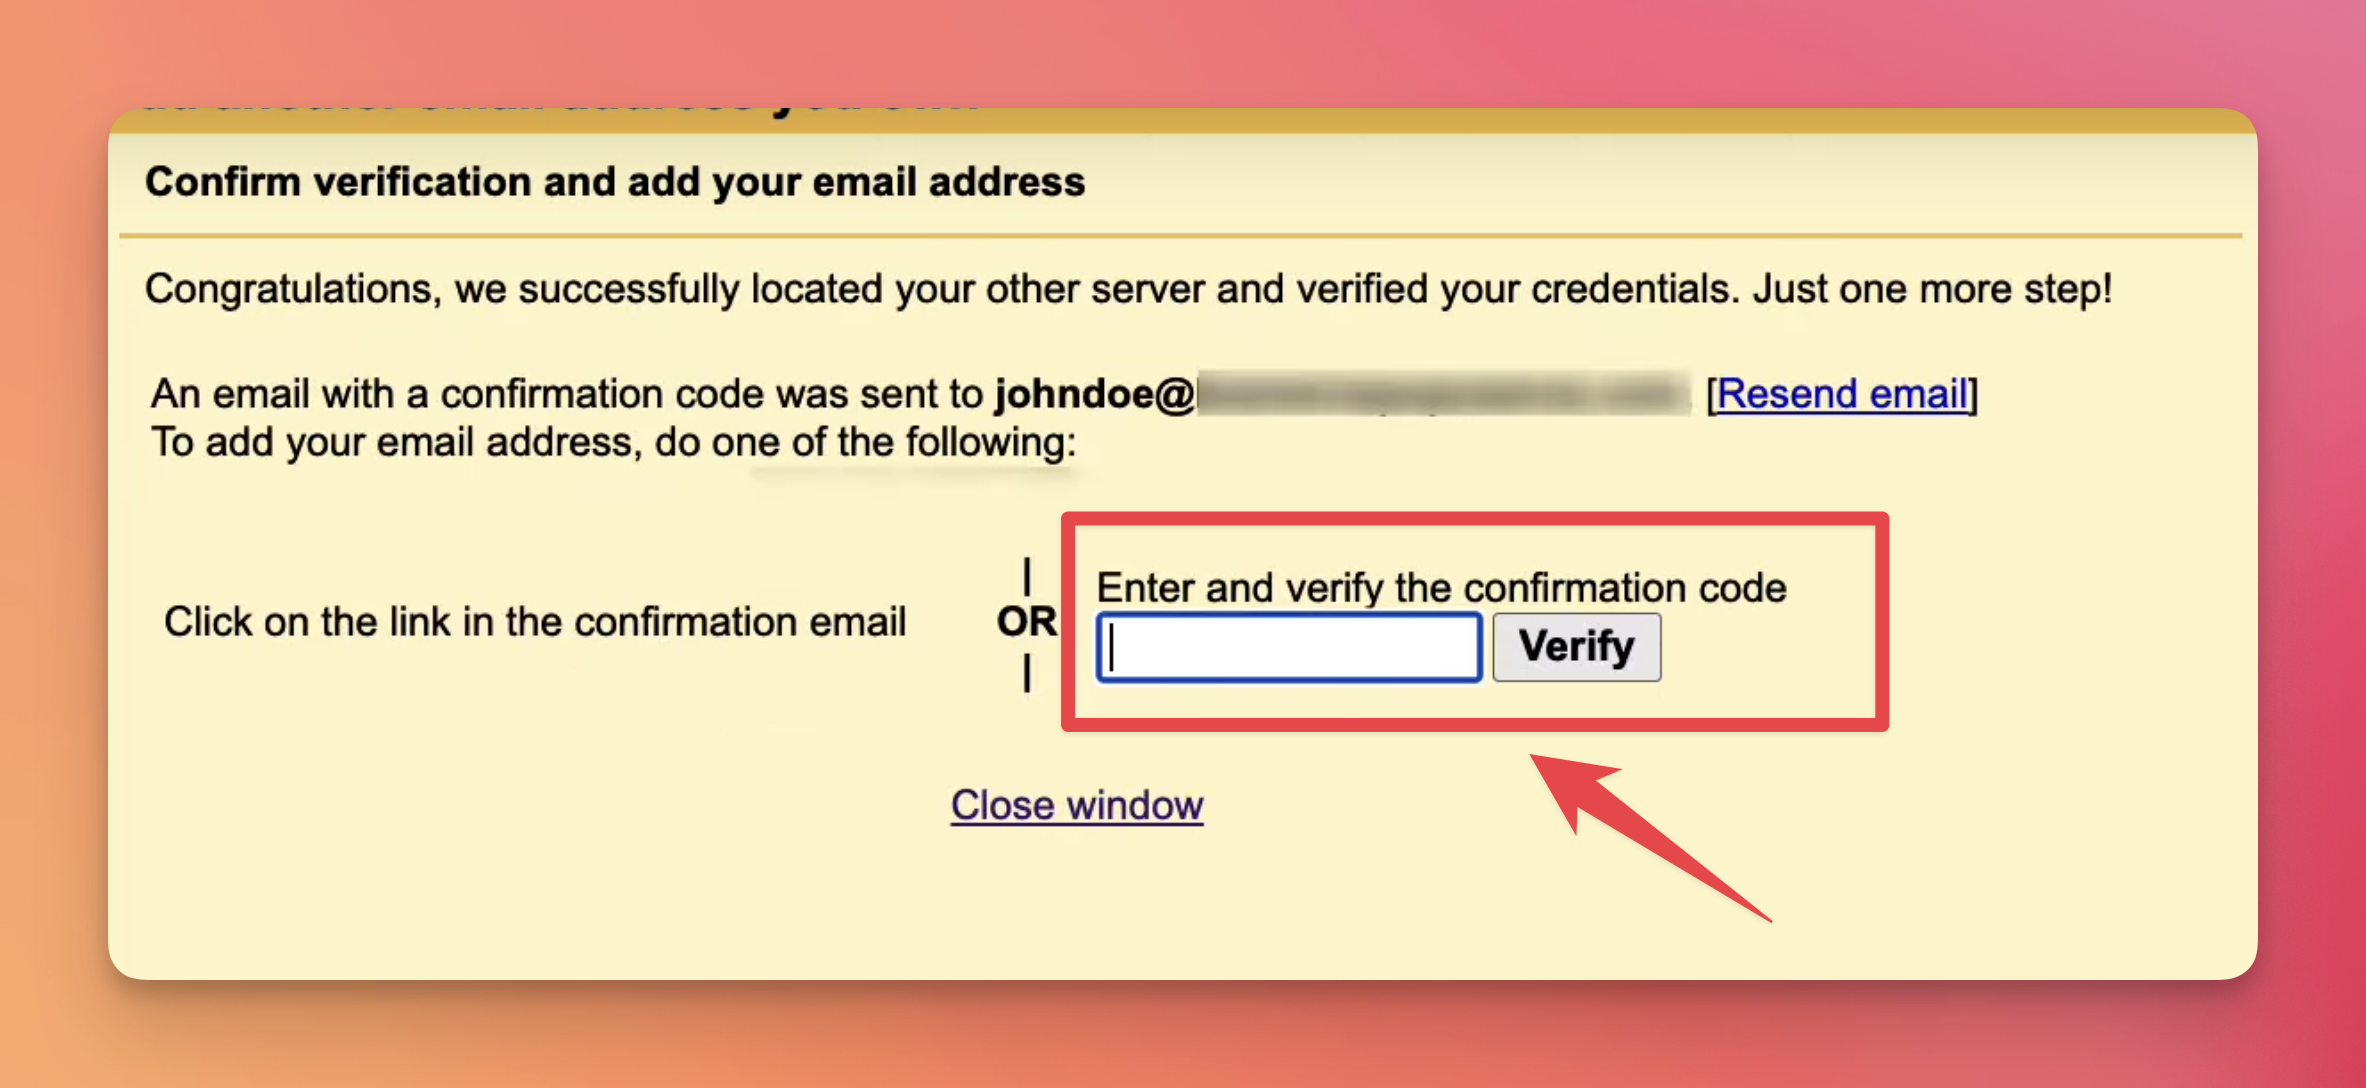
Done! 🎉🎉 You can now reply using the same sender email accounts.
Q: How do I choose a custom tracking domain if I have multiple domains?
A: You can choose any of your available domains as the custom tracking domain. You can always swap these whenever you want, giving you flexibility.
Q: For the "Send Mail As" feature in Google Workspace, should I select "reply from the same address the message was sent to" or "always reply from the default address"?
A: It is recommended to select "reply from the same address the message was sent to". This ensures that replies are sent from the same email address that received the original message, maintaining consistency.
Q: What should be my default email address when using the "Send Mail As" feature?
A: The default email address should be the one you want to use as your main inbox for cold emails. This helps ensure that your outgoing emails are sent from your preferred primary account.